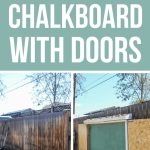
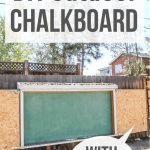
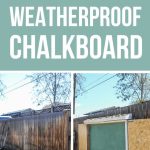
How to Make a Large Chalkboard For Backyard With Live Roof

Thank you to DAP for sponsoring this large chalkboard tutorial! All opinions are entirely my own. This post also contains affiliate links, but nothing that I wouldn’t recommend wholeheartedly. Read my full disclosure here.
Last summer our oldest kiddo discovered sidewalk chalk and fell in love. At 2 years old, he asked to go outside to play with the chalk just about every day.
Around the same time I kept seeing these amazing tutorials for how to make a large chalkboard for your backyard. Such a fun idea for the kiddos, right?
I loved this one from Love & Renovations with a bright yellow frame. This outdoor chalkboard is also great from DIY Network mounted directly to the fence with mounted hanging baskets as well.
Do you want to see more of our big backyard makeover??
- Family Friendly Backyard Plan: Our Next Big Project (BEFORE Pictures)
- Large Chalkboard For Backyard With Live Roof
- Easy Garden Tool Storage In Backyard Shed
- DIY Build for Outdoor Vertical Garden Pots (With Free Plans)
- Mulch for Playground: Why We Chose Rubber Play Bark
- How to Plant Grass Seed
- How To Create A Cozy Patio
- How To Build A Paver Patio with Fire Pit
- How To Build A Fire Pit With Pavers
- Our Backyard Makeover Before and After Pictures
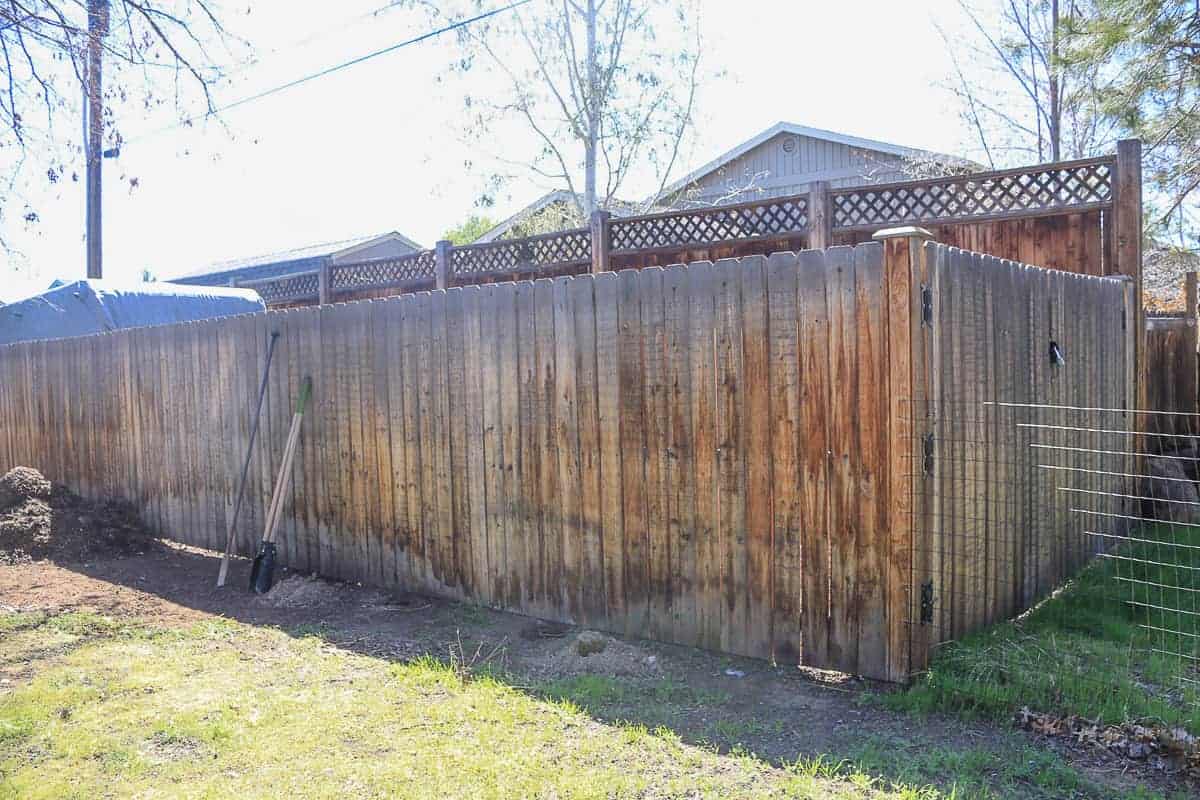
- How to Build a Wood Fence In Your Backyard
- How To Make a Wooden Gate for Your Fence
- How To Lay Deck Boards (and hide the screws!)
How does weather affect a backyard outdoor chalkboard?
But here’s the deal, we live in a region with some pretty harsh weather. I’m talking MONTHS of snow during the winter.
I even came across this awesome tutorial for an outdoor chalkboard made from Hardie backer (instead of plywood). That would be better….but I still don’t think it would last very long if it was sitting in the snow.
As soon as I mentioned something to Logan about wanting an outdoor chalkboard, we started dreaming about how this could work.
And the truth is that what we came up with is something that we hadn’t ever seen. So there were no tutorials to read. No plans to review. No inspiration pictures. Just some hardcore dreamin’ and thinkin’.
I referenced the locations where a lot of these other bloggers lived and their climates were pretty mild….Texas, North Carolina, California…etc. A large chalkboard outside just straight up wasn’t going to work for us unless we got creative.
We agreed that we needed to essentially build something to house the chalkboard to keep it out of the harsh weather. The closest thing we could find that would be equivalent to it would be an outdoor TV cover, like this.
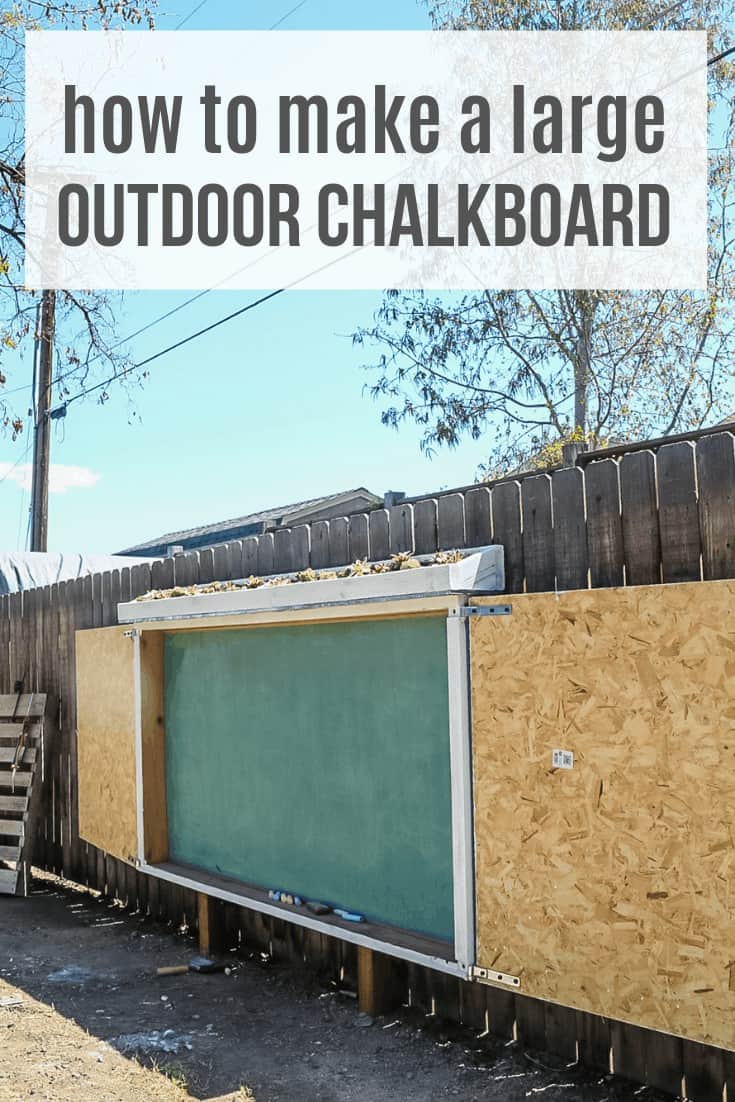
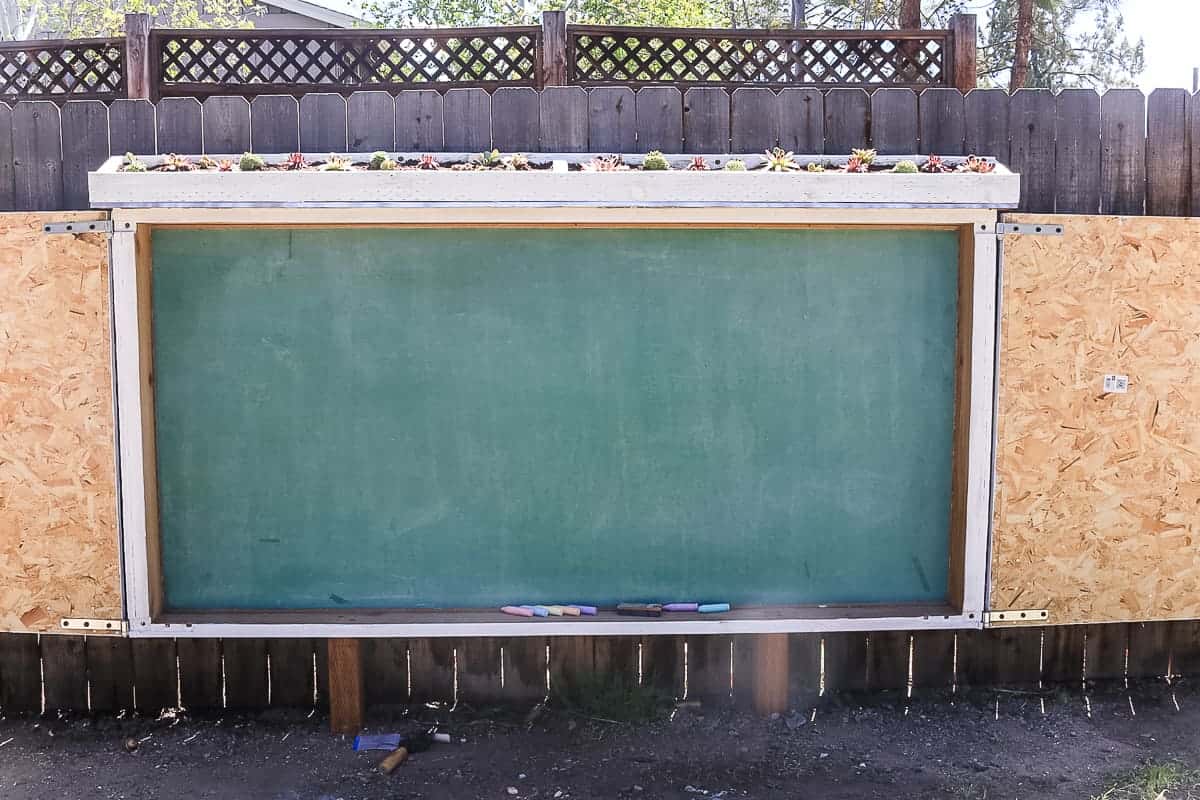
It was pretty ironic when Logan randomly came across this large chalkboard at our local ReStore for $20….and when I saw a large chalkboard, I mean MASSIVE chalkboard. Its classroom size – 4 feet by 8 feet.
Of course, one of the most important aspects of this large chalkboard project is making it waterproof, so we’re using our favorite exterior sealant – DAP’s Dynaflex Ultra Exterior Sealant.
All of the joints on the box around the outdoor chalkboard to sealed with Dynaflex so it will stand up to time for sure.
Well, enough ramblin’ from me now…
Are you ready to see how to make this large chalkboard?
If you love DIY videos, be sure to subscribe to my YouTube channel.
Supplies for outdoor chalkboard:
- DAP Dynaflex Ultra Exterior Sealant – Buy it here
- DAP Dynagrip Heavy Duty Max Construction Adhesive – Buy it here
- 4′ x 8′ chalkboard – We found one at our local ReStore for $20. You could also make one your own, here’s a good tutorial using plywood & chalkboard paint
- Sheet siding (we used 2)
- 2″ x 6″ x 12′ cedar wood (for frame of box – we used 2)
- 2″ x 6″ x 10′ pressure treated lumber (for live roof – we used 2)
- 1/2 inch plywood (for base of live roof)
- 2″ x 4″ x 8′ pressure treated cedar wood (for supports on the fence – we used 1)
- 4″ x 4″ pressure treated post
- Cedar fence pickets (for trim)
- 1 inch galvanized brad nails
- 2.5 inch construction screws
- 2 3/8 inch galvanized framing nails
- 4 inch screws (for posts)
- Strap hinges & pins
- Handle & latch
- Eye hook & latch (to secure doors to fence when opened)
- Primer
- Exterior paint
- Aluminum flashing
- Plastic sheething, 3.5mil
- Roofing nails
- Drain gravel
- Cactus potting soil
- Succulents
Tools needed to make an outdoor chalkboard:
- Table saw
- Miter saw
- Framing nailer
- Brad nailer
- Air compressor – we have this combo kit
- Impact driver
- Drill
- Level
- Speed square
- Post hole digger
- Rubber mallet
- Scissors
- Stapler
- Paint brush
- Chisels
How to Make a Backyard Outdoor Chalkboard (Step By Step!)
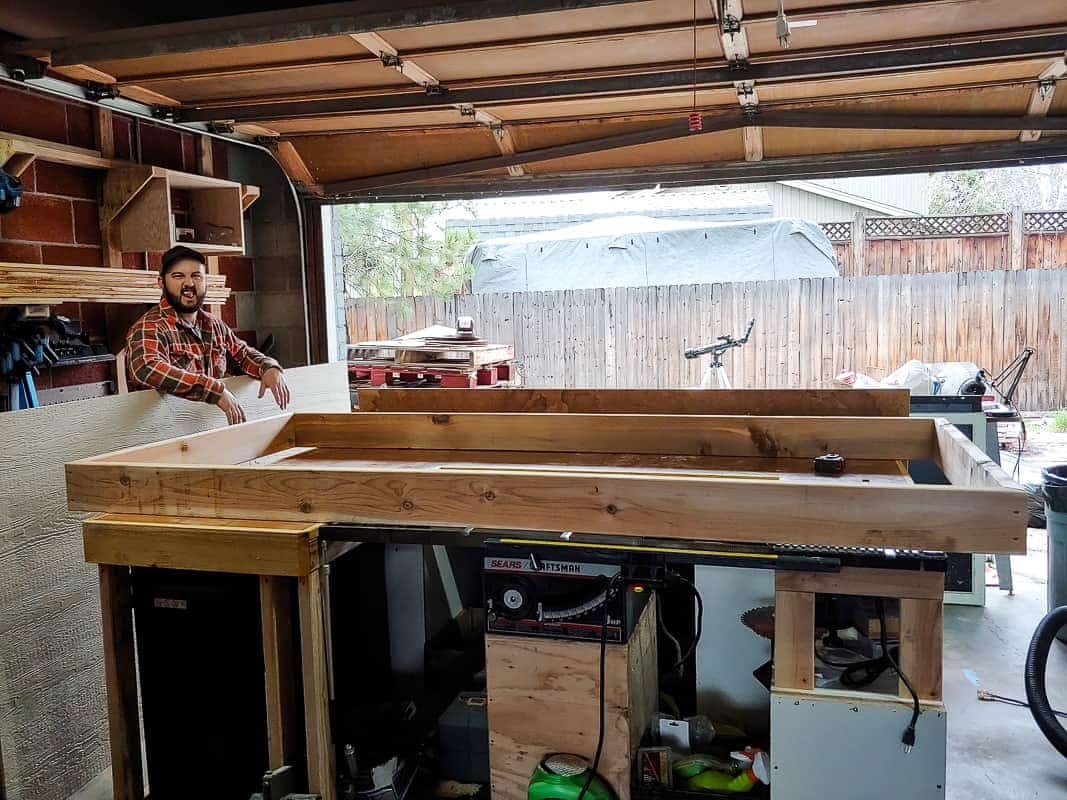
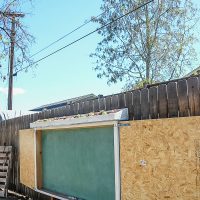
Build frame for box around chalkboard.
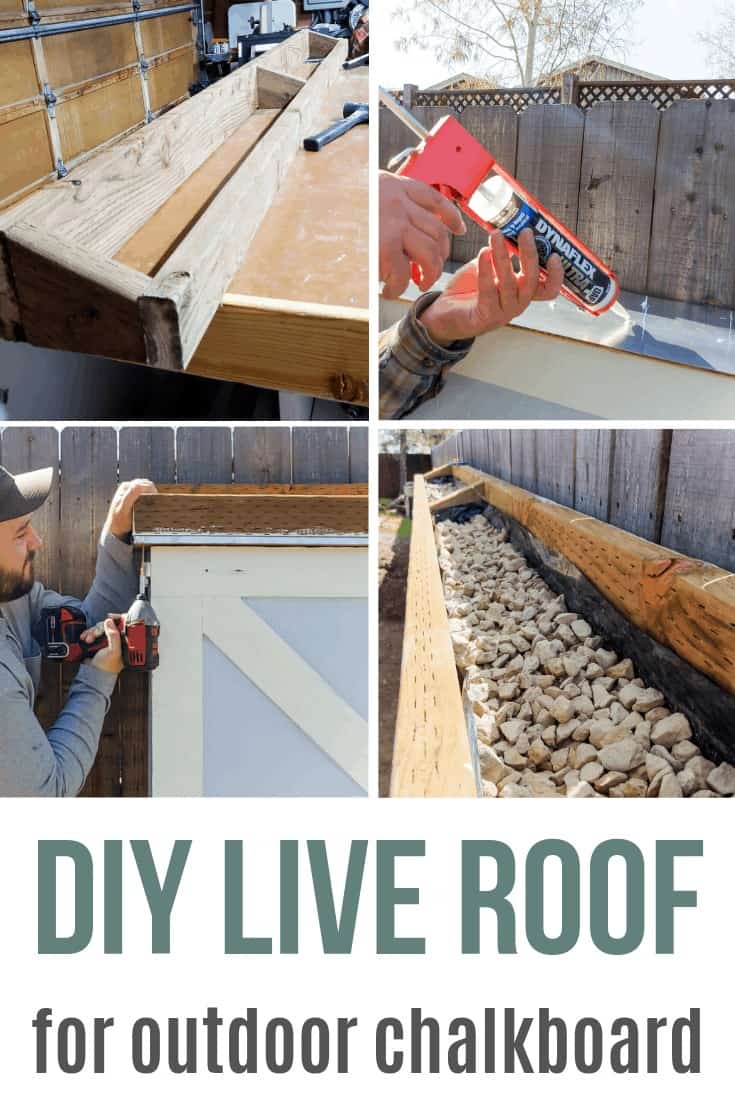
Using 2″ x 6″ cedar wood, build a frame that is a little bigger than your chalkboard. Join the corners of the frame by cutting 45-degree miter cuts and screw them together with 2.5″ construction screws.
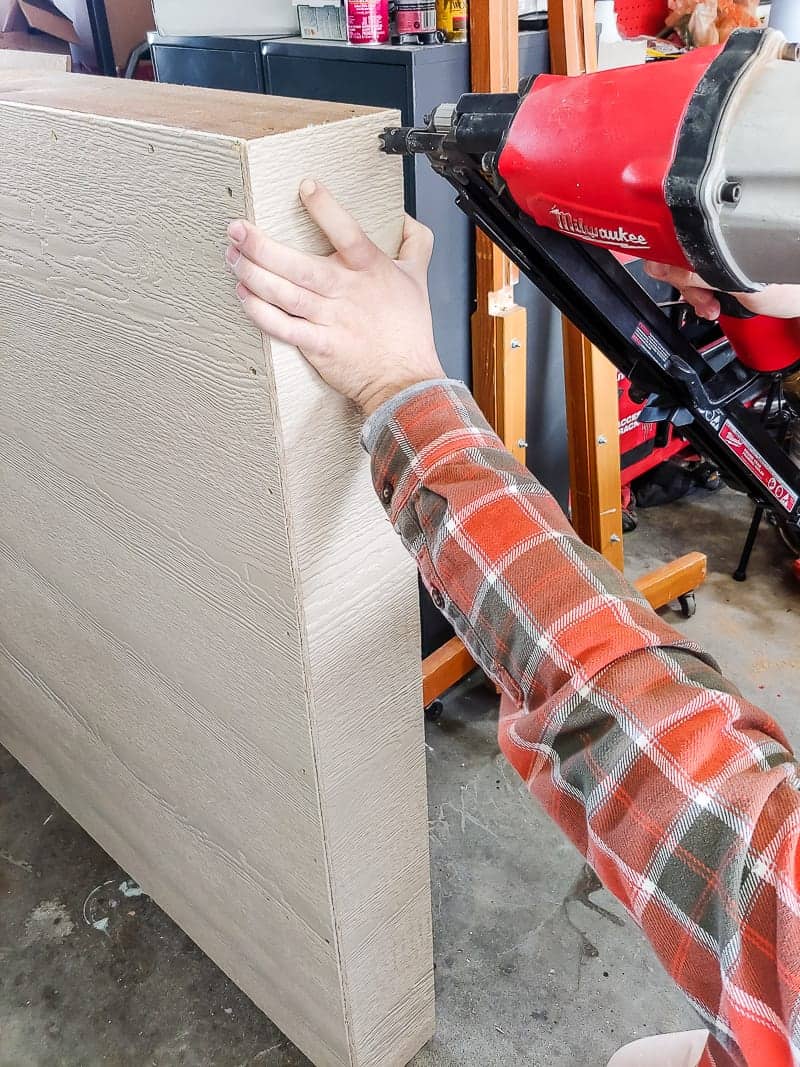
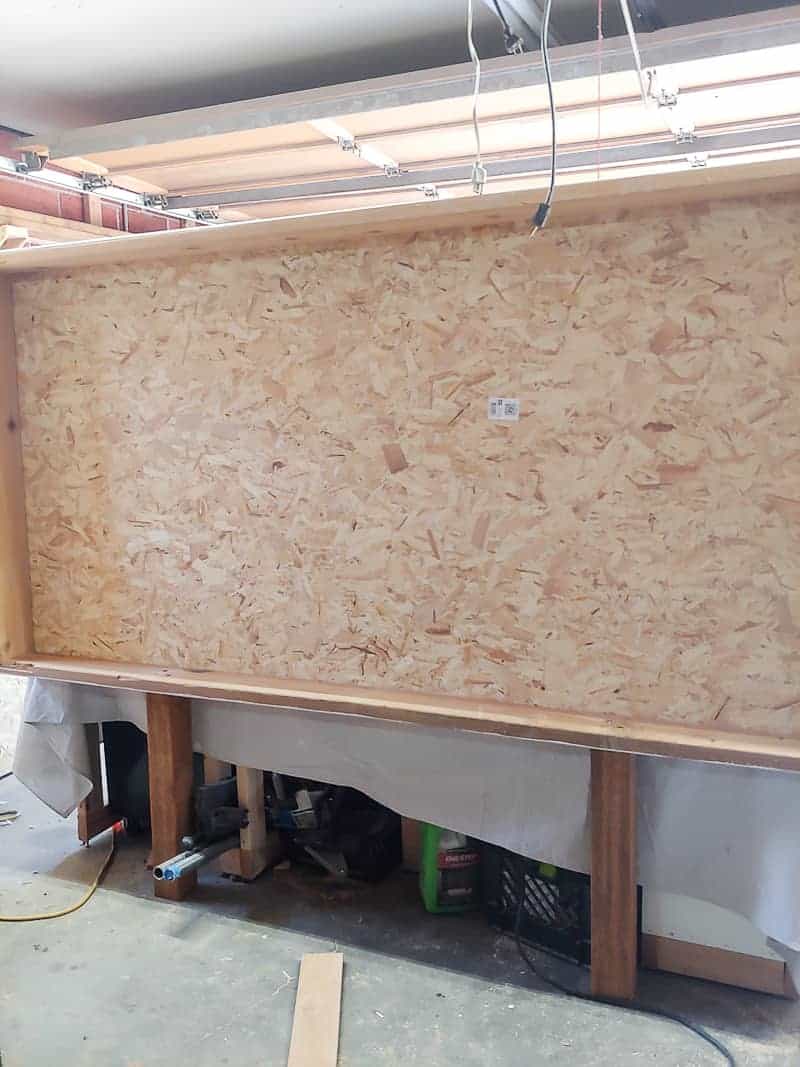
Add sheet of siding to the back & sides of frame.
On a level surface, lay the frame down flat. Next, lay the sheet of siding on top and attach using your framing nailer & 2 3/8 inch galvanized framing nails.
Also cut down and attach siding to the sides of the frame (the short sides of the rectangle). No need to worry about covering the top or bottom of the frame with siding.
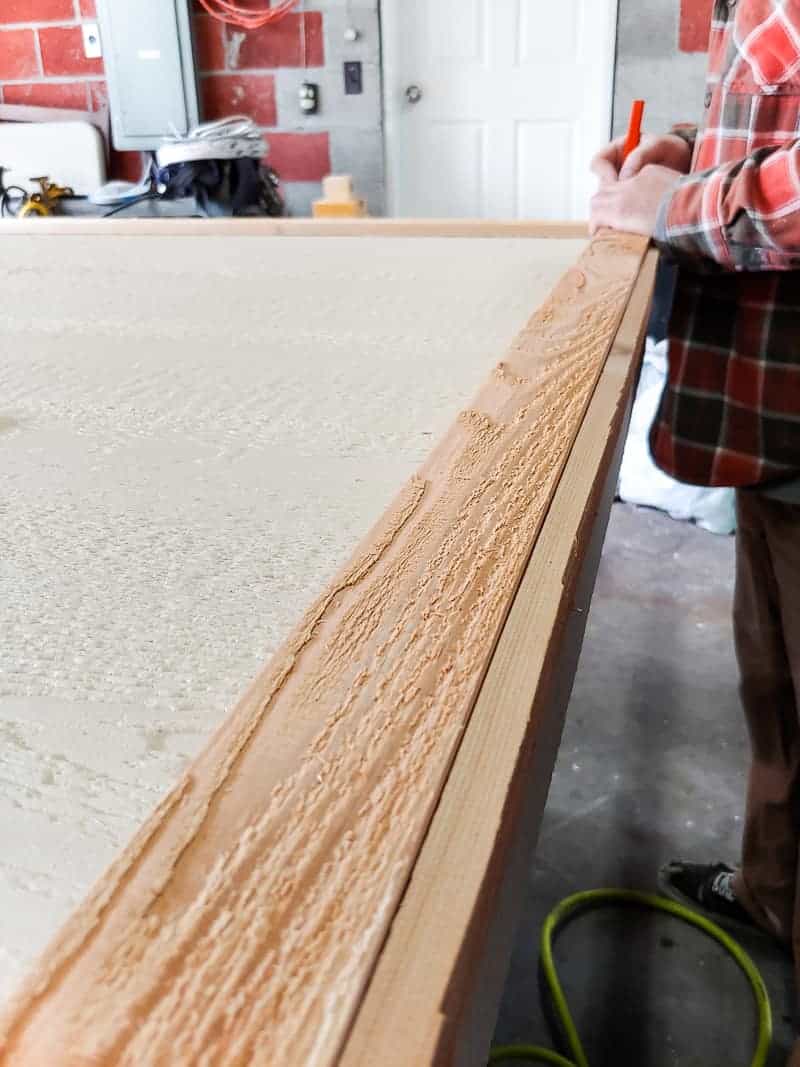
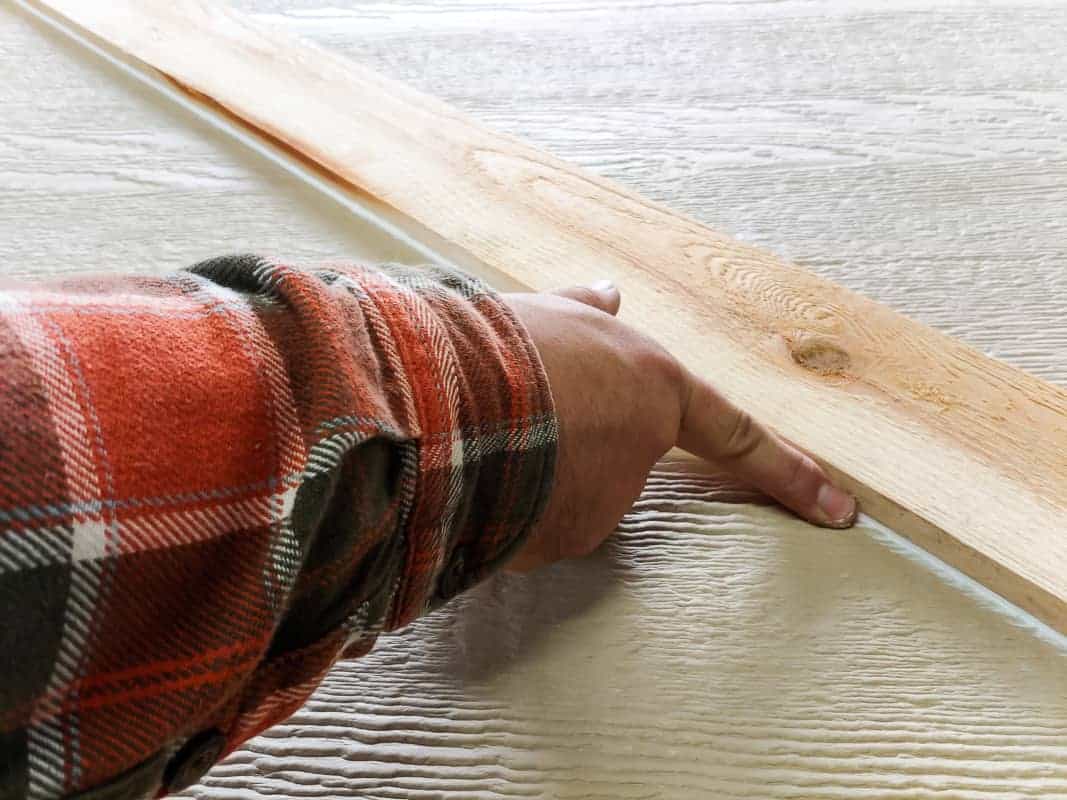
Rip cedar down for trim & attach to box.
For a budget-friendly option to trim everything out, we ripped down cedar fence pickets. On the box portion, they are 1 inch wide and on the doors, they are 3 inches wide.
We used a brad nailer & galvanized brad nails to attach the trim to the edges of the box.
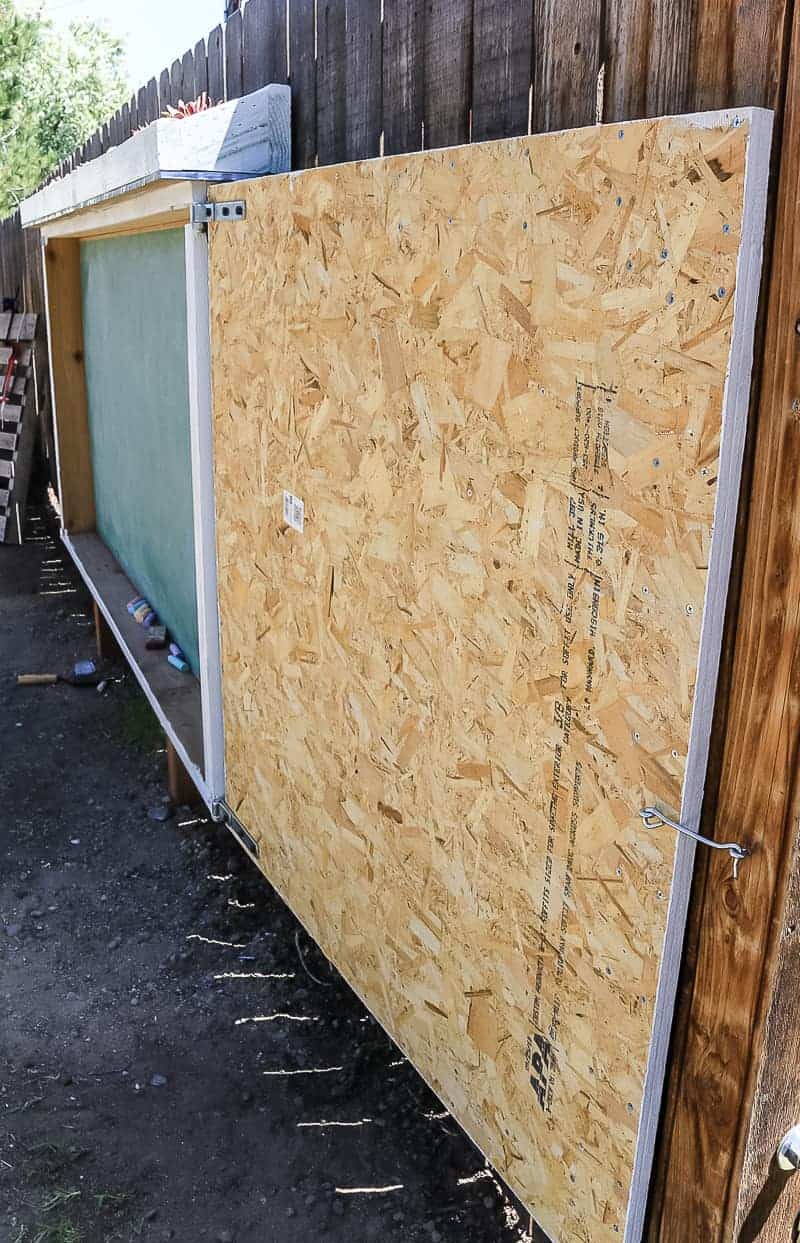
Build chalkboard box doors.
The doors were pretty easy to make.
- Take the total surface area of the front side of your box and divide it by two to determine the size of your doors.
- Cut sheet siding down to size with table saw.
- Attach the 3 inch trim to the front of the door with screws coming in from the back side of the door. Our trim goes around each side of the door and then one diagonal piece across the door for added support and to add a little bit of character.
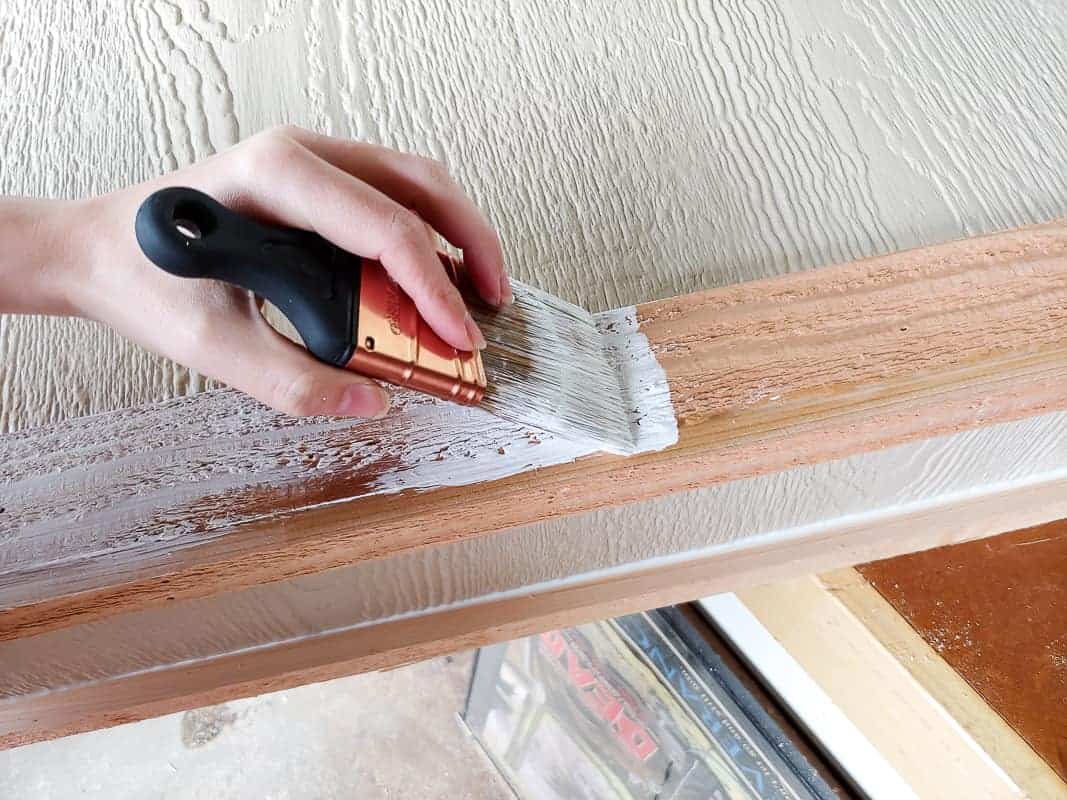
Caulk all joints, seams and exposed nail holes.
To make sure the box that houses the chalkboard is waterproofed, it’s very important to use a high-quality exterior sealant, like DAP’s Dynaflex Ultra.
We caulked every joint, seam, and all exposed nail holes on the box. Be sure to wait the right amount of time per caulk’s instructions before moving on to painting.
If you’re confused about what type of caulk to use and how to apply it – check out our full article of caulking tips and tricks!
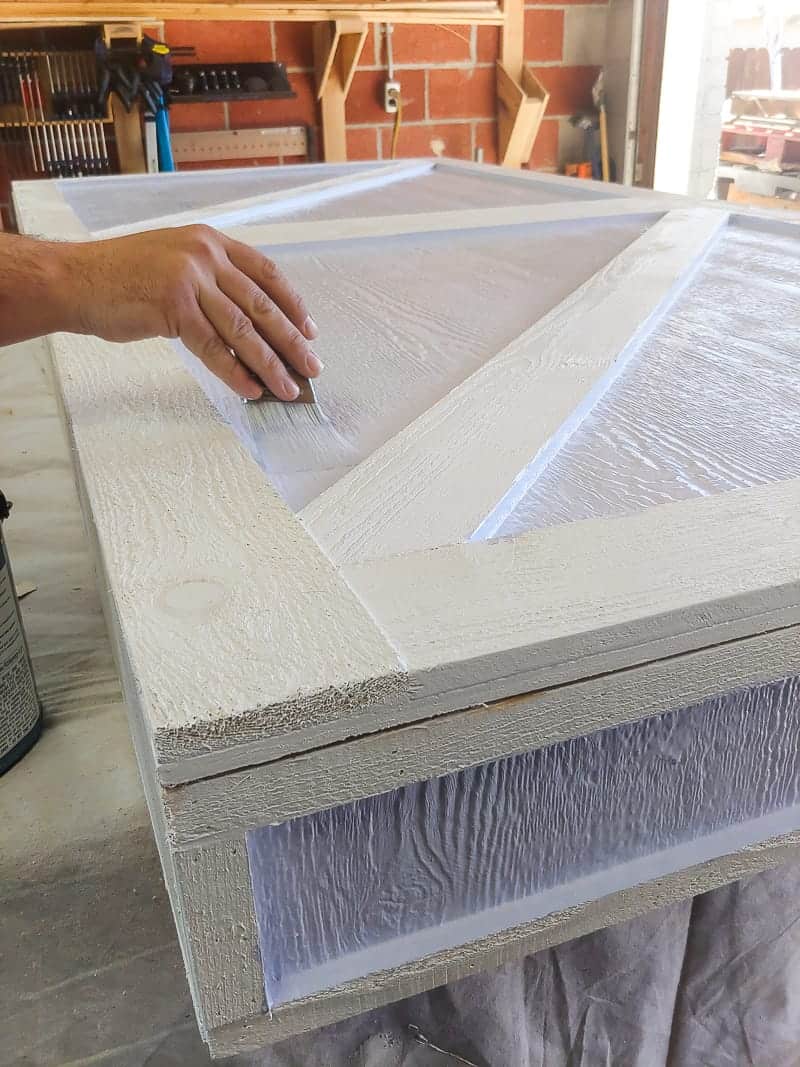
Prime & paint the outdoor chalkboard box.
On the cedar trim pieces, start by painting with primer and then move on to exterior paint. We did 2 coats of paint on everything included.
No need to worry about priming the siding pieces, they are already pre-primed.
Attach posts to bottom of box.
Once the paint is dry, cut your 4×4 posts and attach them to the bottom of the box with four 4-inch screws on each post.
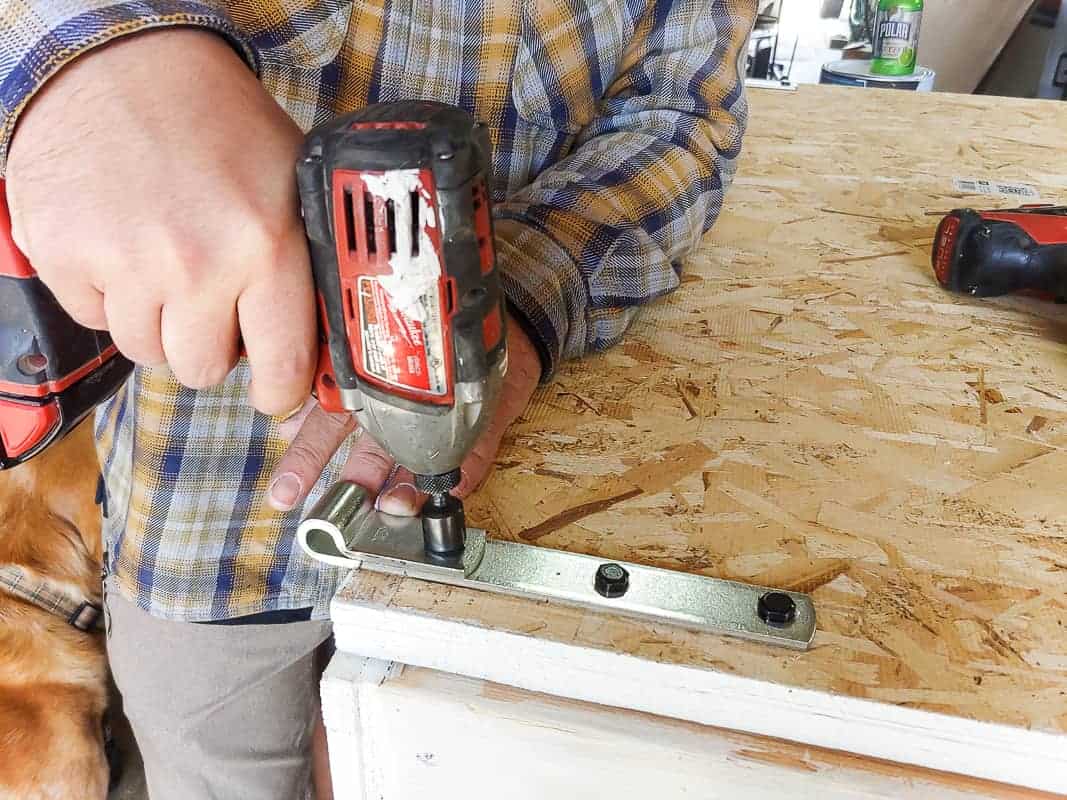
Attach hinge straps & lag bolts for doors.
We originally purchased some decorative gate hinges that would have been installed on the outside corner, but they definitely weren’t going to work because they didn’t fit right.
We ended up getting hinge straps & pins that were installed on the inside of the door. The new hinges required us to chisel out part of the frame to allow the door to sit flush.
Then the hinge straps get attached to the backside of the doors.
Lastly, the large lag bolts with the pins that the hinge sits on get installed into the frame at a diagonal.
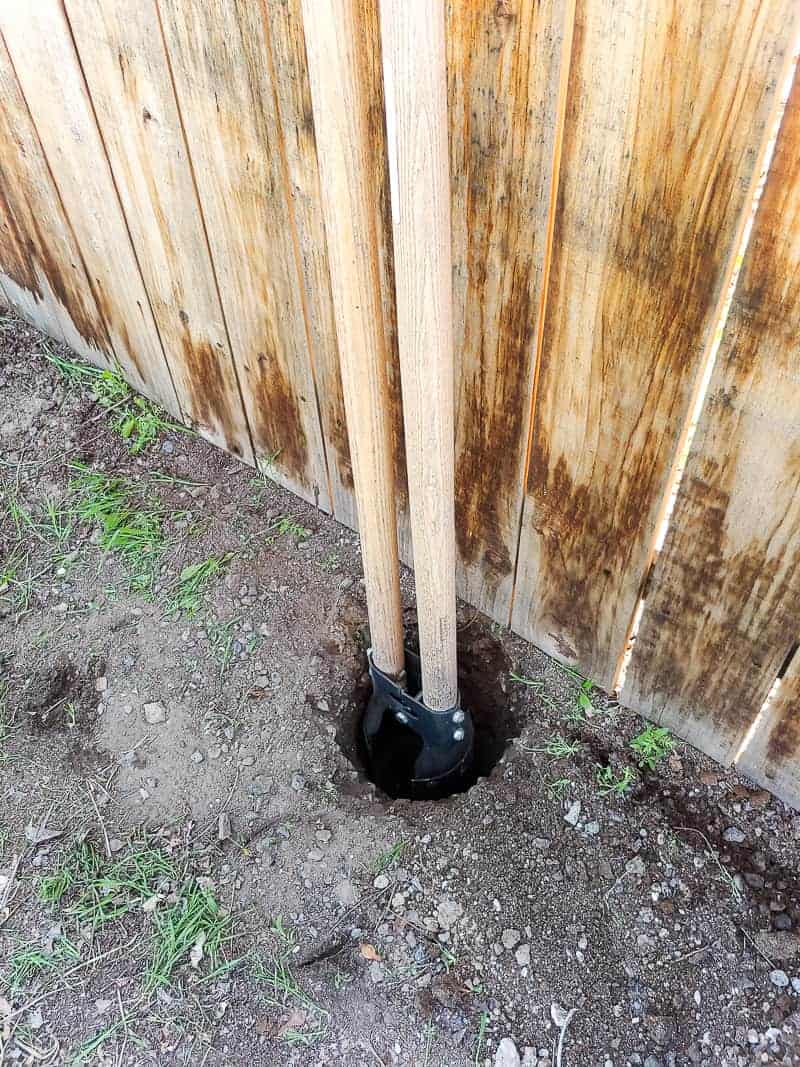
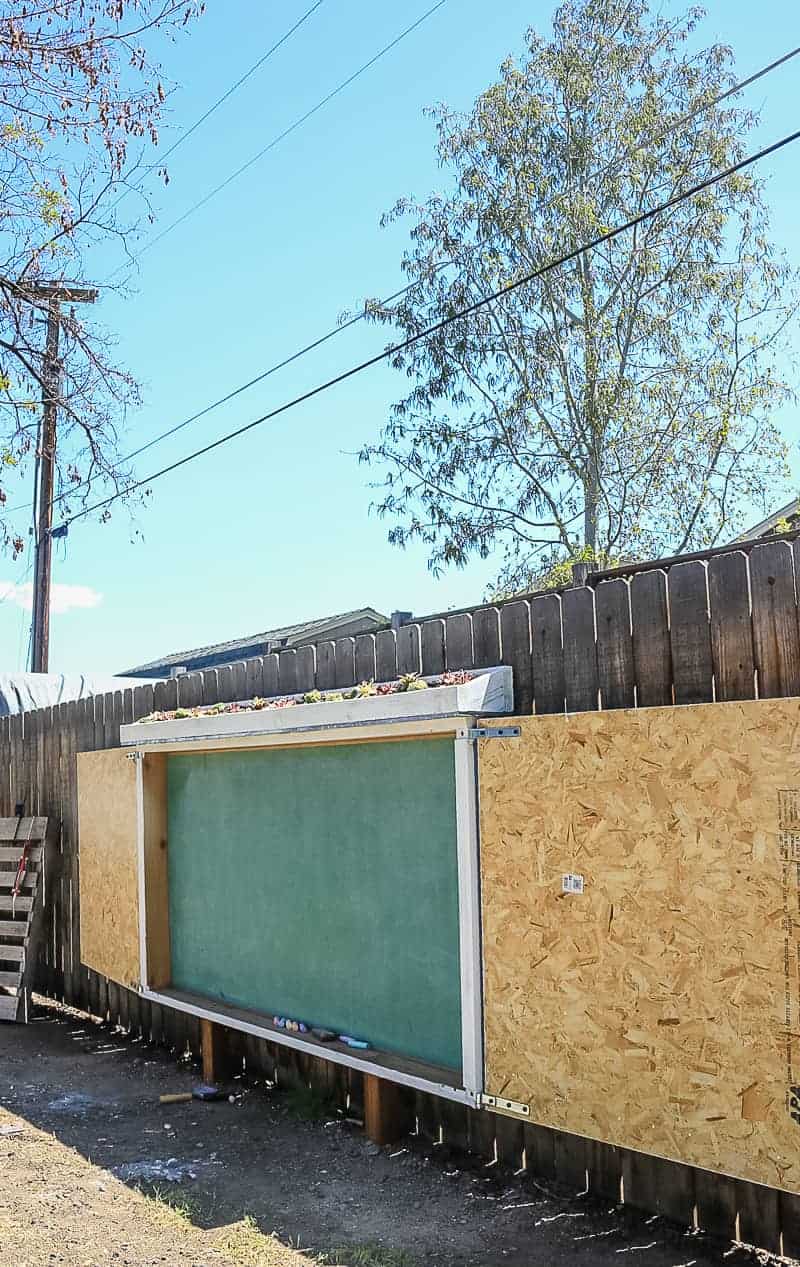
Dig post holes in front of fence.
Using a post hole digger, dig 2 holes about 12 inches down about 6 inches away from the fence for the posts to sit in.

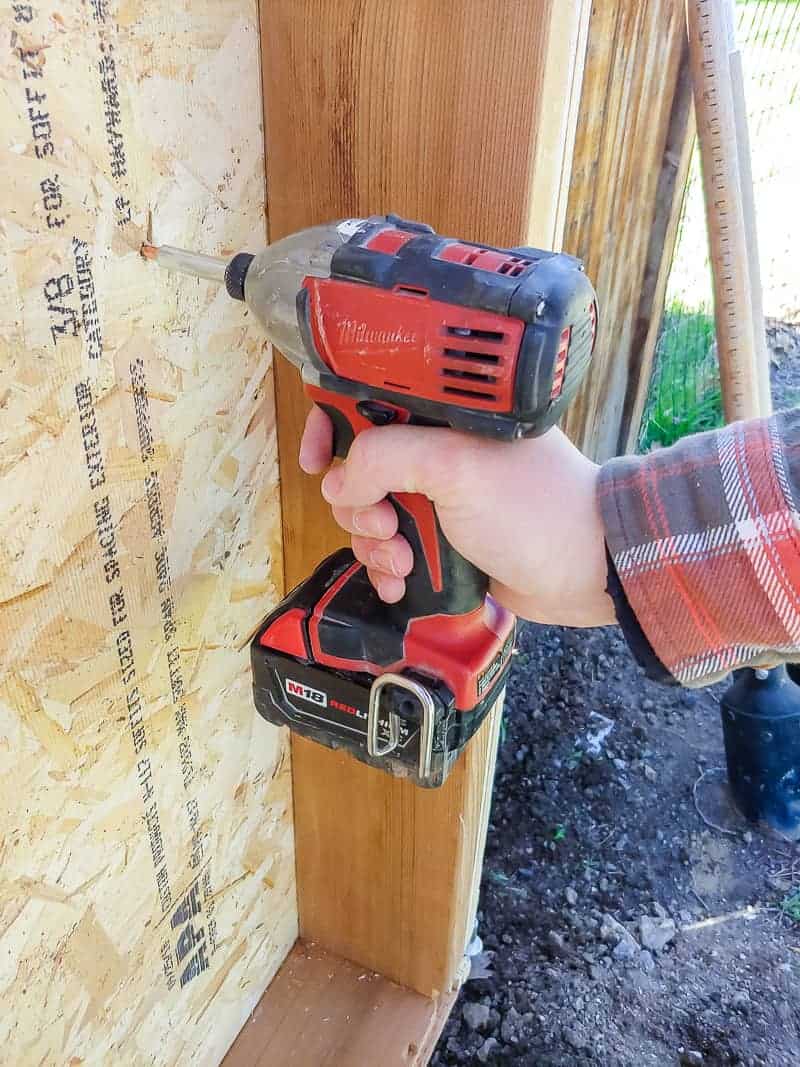
Attach supports on fence.
Next, attach pressure-treated 2×4s directly to the fence where the fence rails are located (so you have something to screw into besides just a fence picket).
These will be supports to hold some of the weight of the chalkboard box and give you something to screw into when attaching. We added 6 support pieces total in two rows.
Set in box & level.
Now you can set the box in the holes and get everything leveled out. You may need to add or remove some more dirt from one of the holes to level it. Be sure to level both vertically and horizontally.
Screw box onto supports on fence.
Using construction screws, attach the box to the support anchors that you added to the fence.
Adding the Live Roof Planter to the Top of the Outdoor Chalkboard
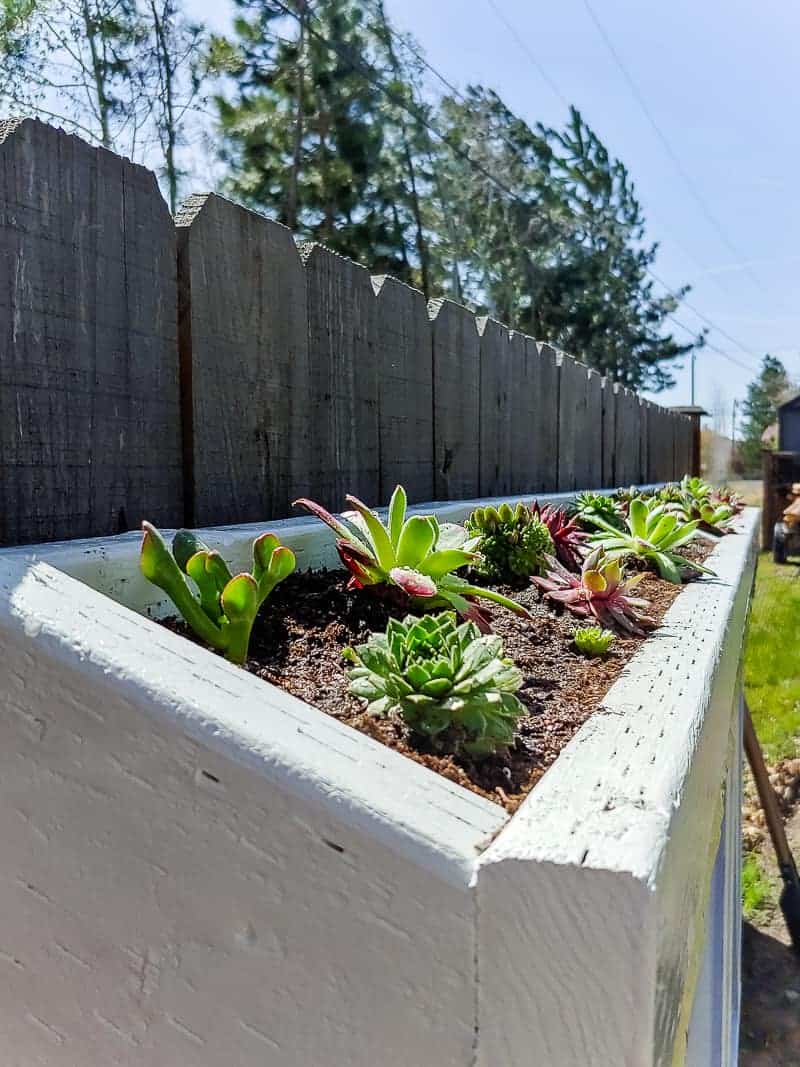
Build the live roof.
Now we totally decided to add in the live roof at the last minute. We were toying around with a few different ideas of how to finish the roof off and Logan came up with the brilliant idea of adding a live roof.
After doing some research on the supply cost, he figured out that it was only to cost about $30 extra. How could I say no to that, right?!
Here’s how we make the live roof on our large chalkboard:
- The base of the roof is made with 1/2 inch plywood that we had laying around the garage. It was cut to have about 1.5″ overhang on all sides.
- Nail in the plywood to the top of the box with galvanized nails.
- Next attach aluminum flashing over the top of the plywood with nails. Be sure the flashing runs all the way over edge of the plywood. Use a rubber mallet to beat it downward so it sort of wraps around the edge of the plywood.
- Cover the nail holes with Dynaflex Ultra to seal them up.
- The main structure of the live roof was made with pressure treated lumber painted white (learn more outdoor wood painting tips here). We designed it so the front piece of the roof was much smaller than the back so you can really see the succulents growing on the live roof. There is one support piece in the middle as well to break it up into two sides.
- The main structure needs to be painted with exterior paint (including back and bottom) to seal it.
- Set the structure of the roof on top of the flashing and screw in place.
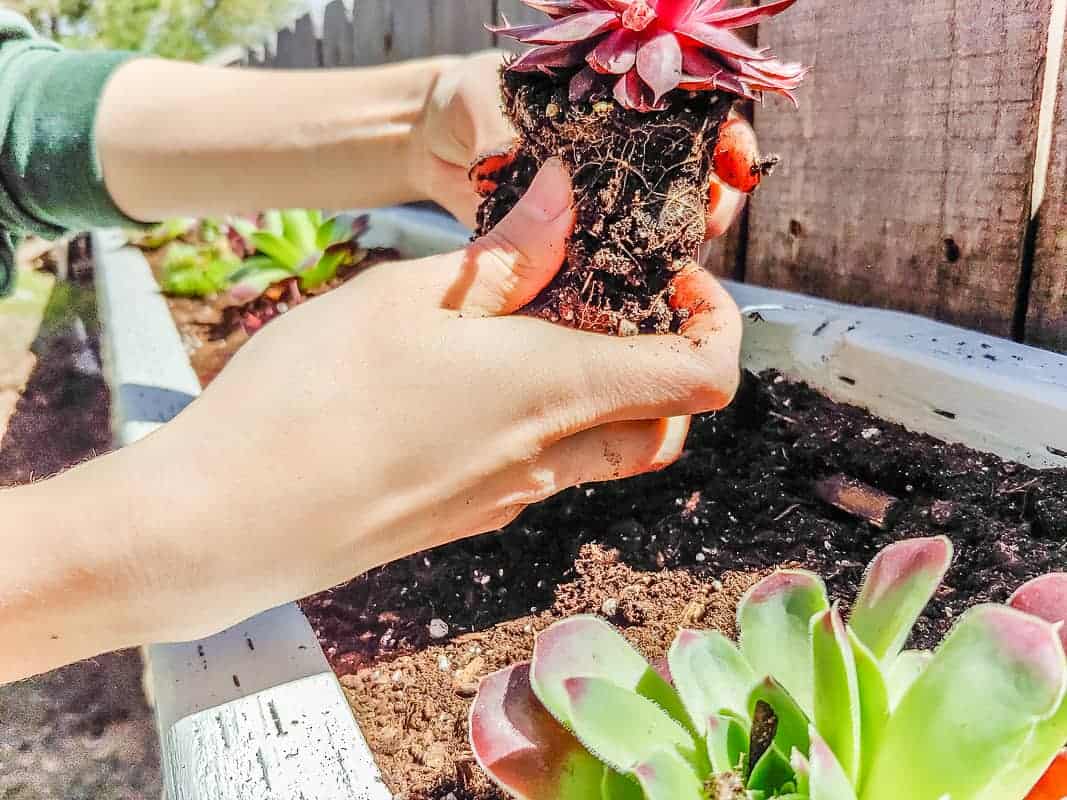
- Next cut enough plastic sheething to cover the base of the roof to create your planter and staple in place.
- For drainage, we cut a very small hole in the plastic sheething in the lowest part of each planter bed and put a little dap of Dynaflex Ultra to keep it secure. Those holes are positioned in the back corners so the water will essentially go behind the chalkboard and drop to the ground. Remember the chalkboard box is about 2 inches off of the fence so there’s plenty of room back there. And everything is sealed on the backside and we used pressure treated lumber for the support pieces in the back, so no probably if some water splashes on them.
- We filled each planter bed will drainage rock and cactus soil and then planted pretty succulents. Keep in mind that when planting succulents, you need be sure to create a good drainage base and use cactus soil rather than regular potting soil (which will hold moisture in).
Attach chalkboard.
Use a whole tube of DAP Dynagrip Heavy Duty Max to the back of the chalkboard and simply press into the box. I love that the Dynagrip has an instant grab, so it makes it easy!
Hang doors.
Doors simply slide onto the pins with the hinge straps…again pretty easy, but takes two people to hold the door and line up the hinge.
Attach handle.
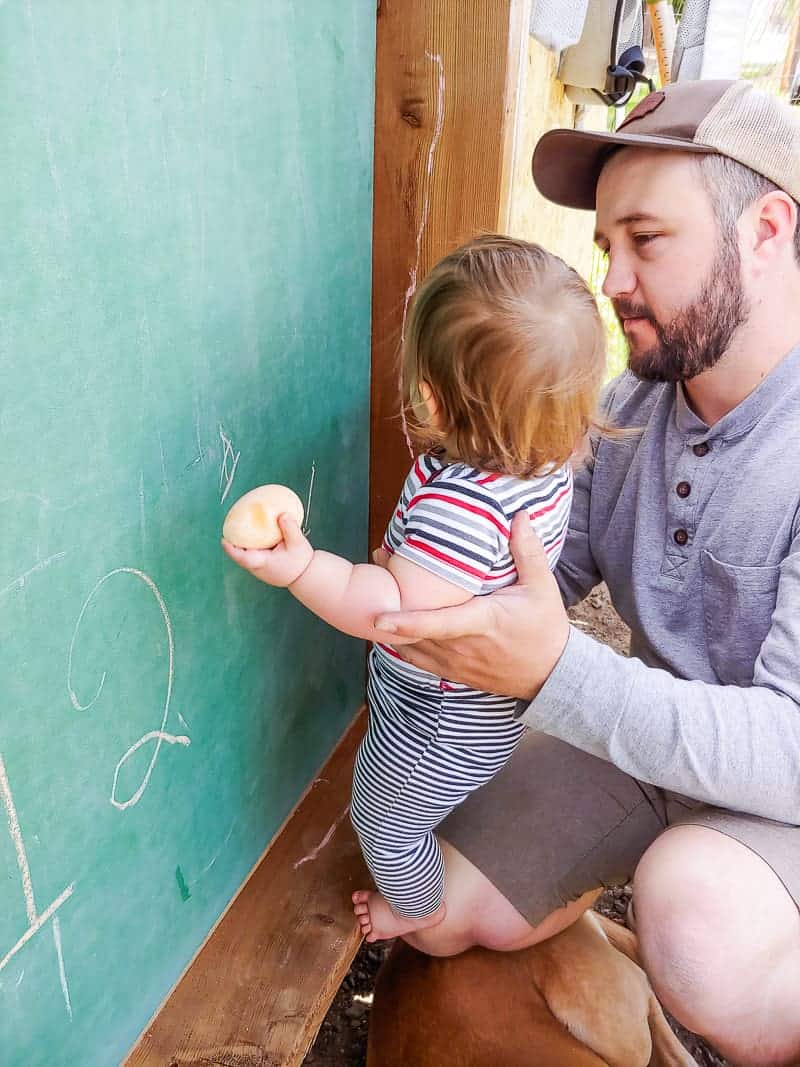
We opted for a latch and pin for a handle. We simply just screwed it to the front at a level where our little guy could open it himself.
Attach eye hooks.
After using the chalkboard for about a day, we realized that we definitely need to add some sort of way to secure the doors when open so they stay open.
There were a few times when a gust of wind would pass through and slam the door shut. Thank God we never had a little one standing there when it happened, but we quickly realized that we needed a solution.
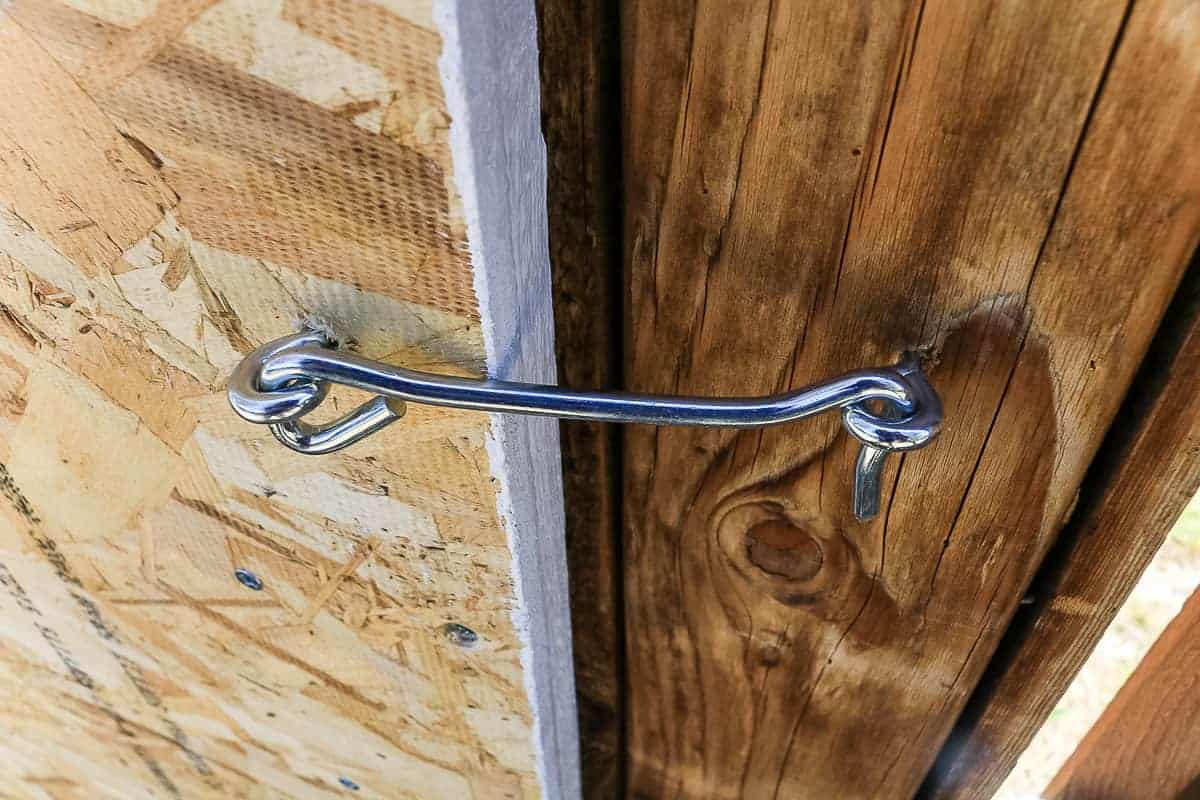
We added these eye hooks to the fences on both sides to hook the doors onto to keep them open. Again, we secured these down low so that Cal can do this himself. And we taught him how they work…we’re all about independence over here.

Now do you wanna build a large chalkboard for your backyard too?
Let us know in the comments below!
How To Make A Large Chalkboard for Backyard
If your kids love playing with chalk, this large outdoor chalkboard might be the perfect addition to your backyard! Follow along on how to make this outdoor chalkboard and a "live roof" succulent planted.
Materials
- DAP Dynaflex Ultra Exterior Sealant
- DAP Dynagrip Heavy Duty Max Construction Adhesive
- 4' x 8' chalkboard
- Sheet siding
- 2" x 6" x 12' cedar wood (qty 2)
- 2" x 6" x 10' pressure treated lumber (qty 2)
- 1/2 plywood
- 2" x 4" x 8' pressure treated cedar wood (qty 1)
- 4" x 4" pressure treated post (qty 1)
- Cedar fence pickets
- 1 inch galvanized brad nails
- 2.5 inch construction screws
- 2 3/8 inch galvanized framing nails
- 4 inch screws (for posts)
- Strap hinges & pins
- Handle & latch
- Eye hook & latch
- Primer
- Exterior paint
- Aluminium flashing
- Plastic sheething, 3.5 mil
- Roofing nails
- Drain gravel
- Cactus potting soil
- Succulents
Tools
- Table saw
- Miter saw
- Framing nailer
- Brad nailer
- Air compressor
- Impact driver
- Drill
- Level
- Speed square
- Post hole digger
- Rubber mallet
- Scissors
- Stapler
- Paint brush
- Chisels
Instructions
- Build frame for box around chalkboard.
- Add sheet of siding to the back and sides of frame.
- Rip cedar down for trim and attach to box.
- Build doors.
- Caulk all joints, seams, and exposed nail holes.
- Prime and paint.
- Attach posts to bottom of box.
- Attach hinge straps & lag bolts for doors.
- Dig post holes in front of fence.
- Attach supports on fence.
- Set box in holes in ground and level.
- Screw box onto supports on fence.
- Build live roof.
- Attach chalkboard.
- Hang doors.
- Attach handle.
- Attach eye hooks.


Why in the world make it so tall for a 2 year old??? Great idea, however.
Hi there, not sure if it looks tall in the photos, but it’s not at all. It’s the perfect height for our little ones. We couldn’t put it much closer to the ground or it would be sitting in snow half the year 🙂