Thank you to Arrow Fastener for sponsoring this DIY paper bag snowflake tutorial! All opinions are entirely my own. This post also contains affiliate links, but nothing that I wouldn’t recommend wholeheartedly. Read my full disclosure here.
This year I’m focused on bringing you some super inexpensive Christmas decor ideas that you can make on a budget.
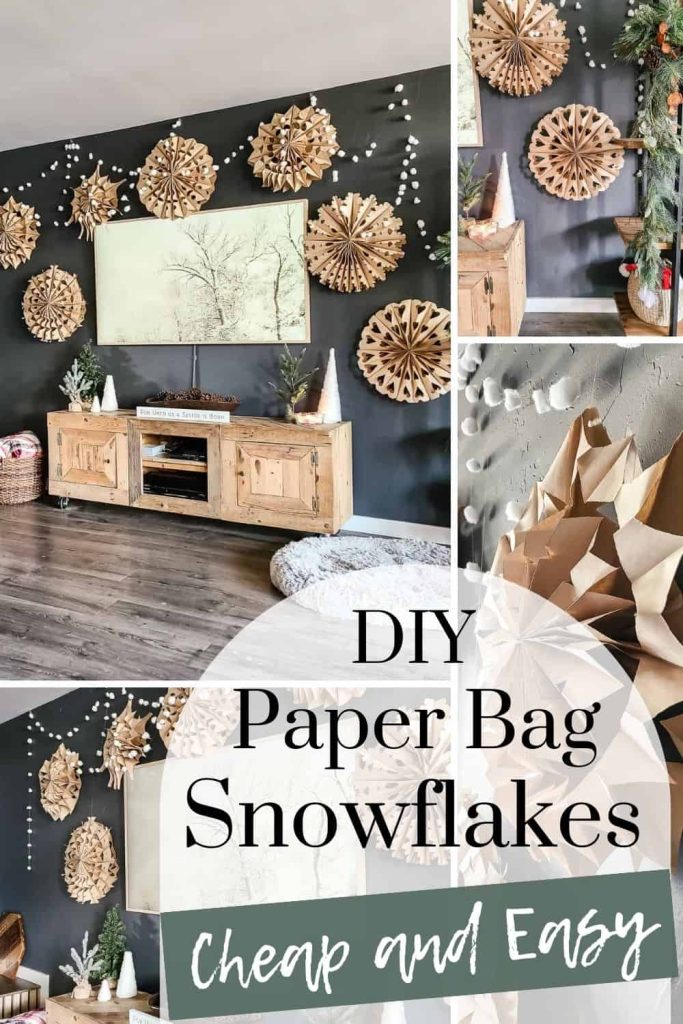
All you need for this adorable and fun craft idea is a stack of brown paper bags and your handy hot glue gun!
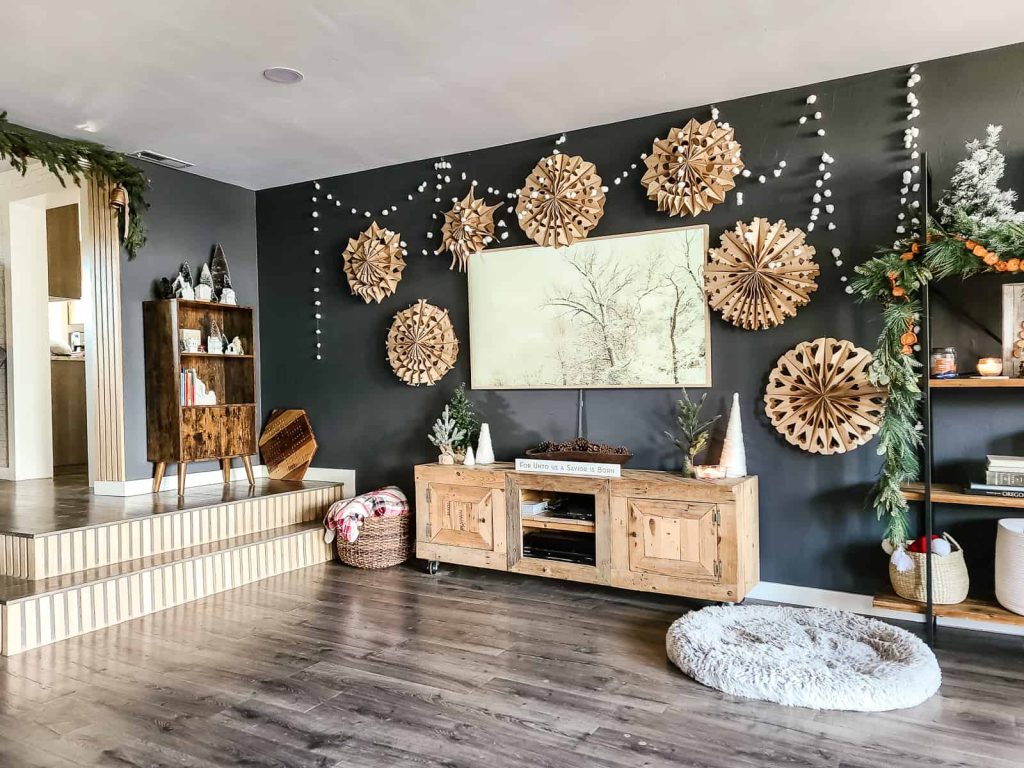
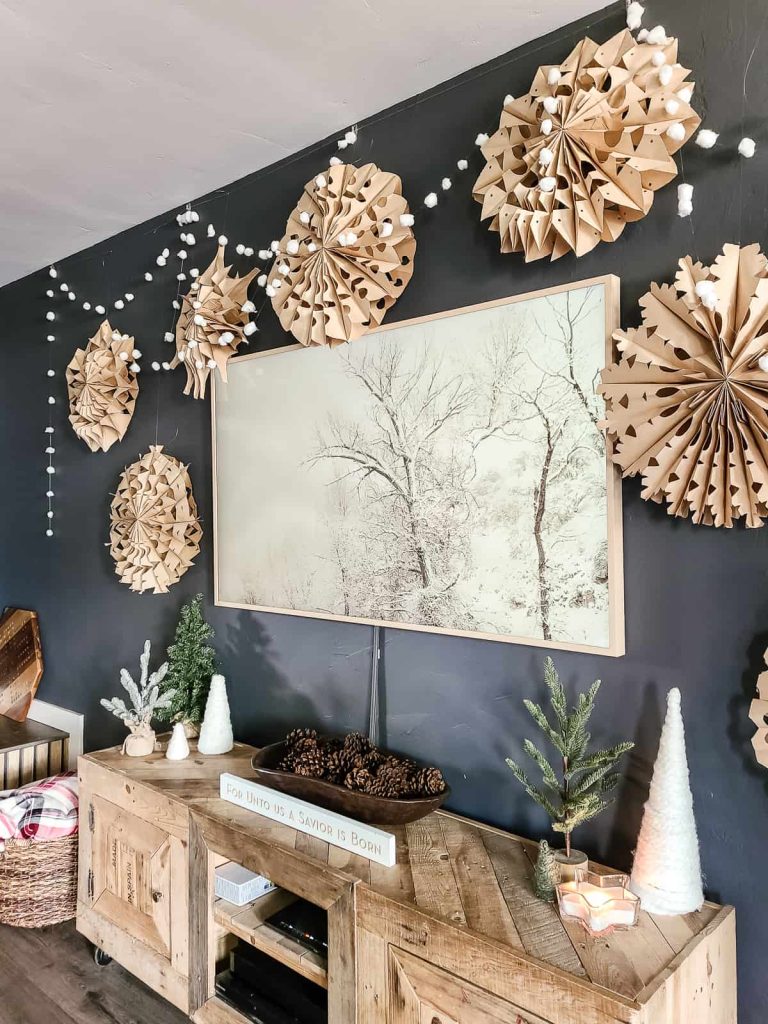
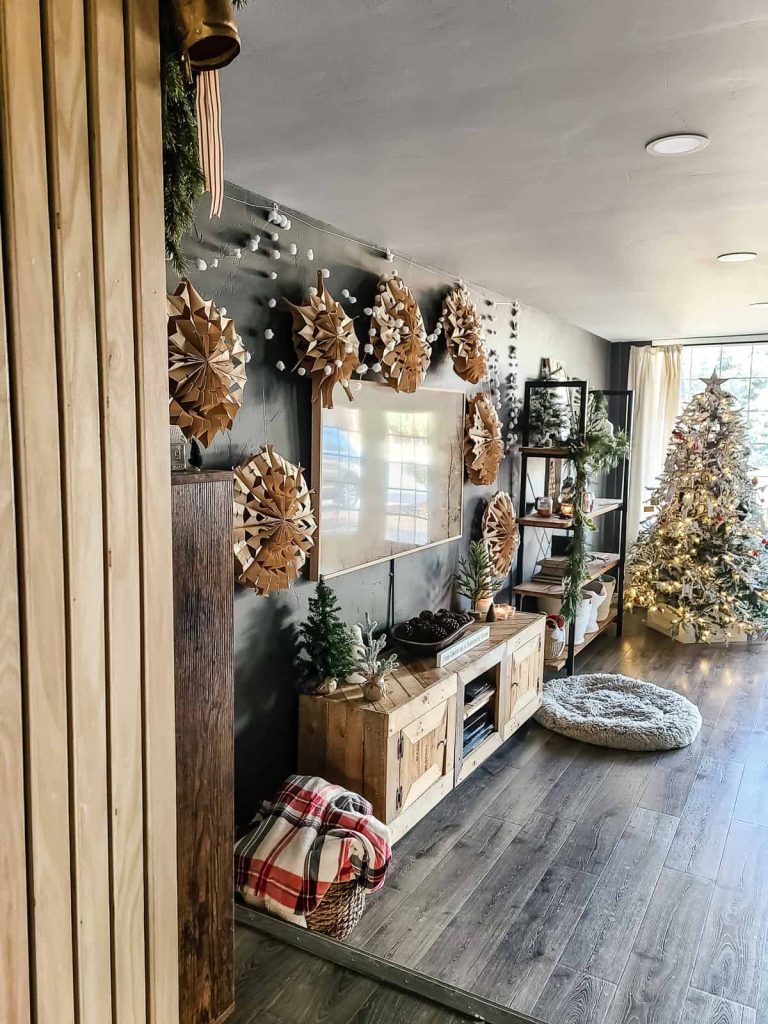
These brown paper bag snow flakes decorated my entire wall around our TV and go so well with these yarn Christmas trees we made last year, which I have styled on the entertainment center under the TV.
Paper Bag Snowflakes – Video Tutorial
If you love DIY videos, be sure to subscribe to our YouTube channel!
Cordless hot glue gun from Arrow Fastener
Having a cordless hot glue gun for this craft project was a game-changer! No need to mess with the cord, which means you can craft anywhere!
The Arrow GT30LI glue gun has a charging base with a retractable drip pad. All you do is plug in the base and get the glue gun charged. Once the light is green, you push a button on the glue gun to heat it up to the operating temperature of 170 degrees.
The cordless glue gun heats up in less than 1 minute and will turn green when it is ready to go!
It will last for up to 30 minutes on one charge! Amazing, right?
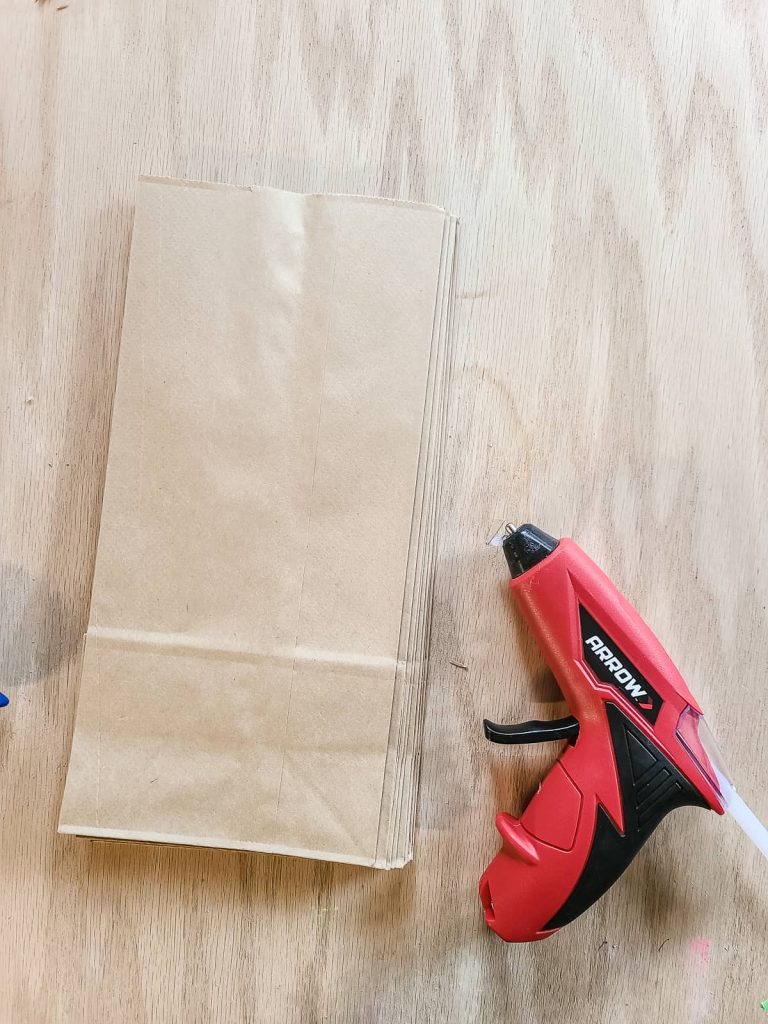
Supplies needed for paper snowflakes:
- Hot glue gun, I love using the Arrow GT30LI cordless glue gun
- Glue sticks for hot glue gun
- Brown paper lunch bags (or you could also use white paper bags)… For the amount of bags, you’ll need 9 per snowflake.
- Fishing line
- Strong scissors
- Hole punch
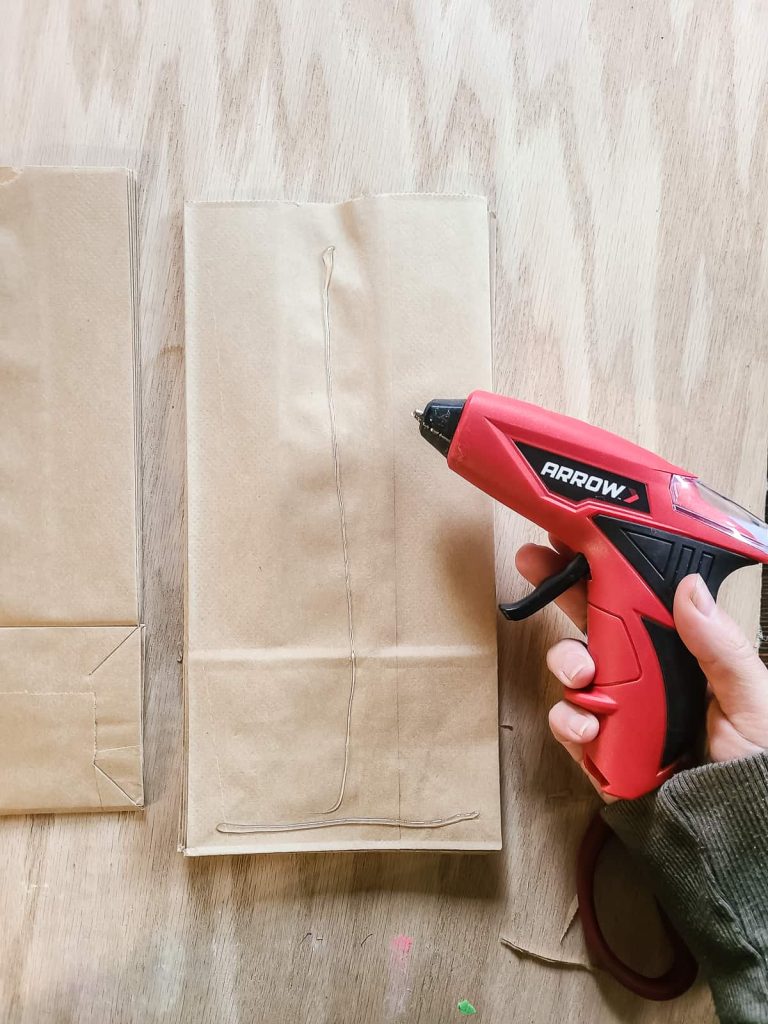
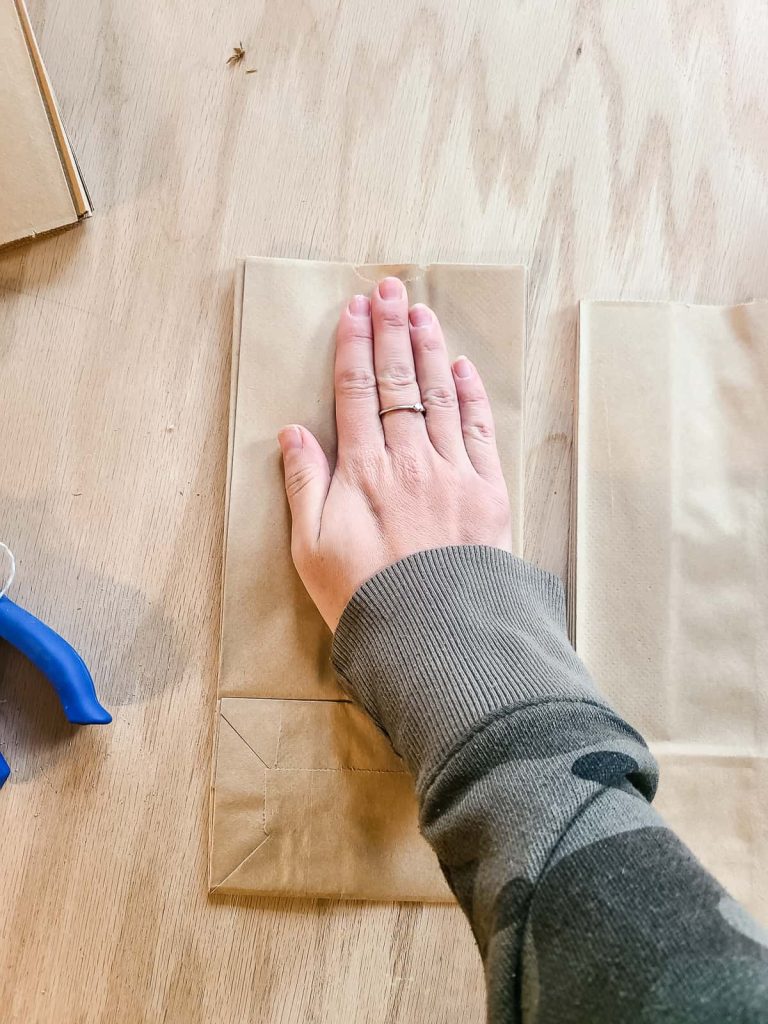
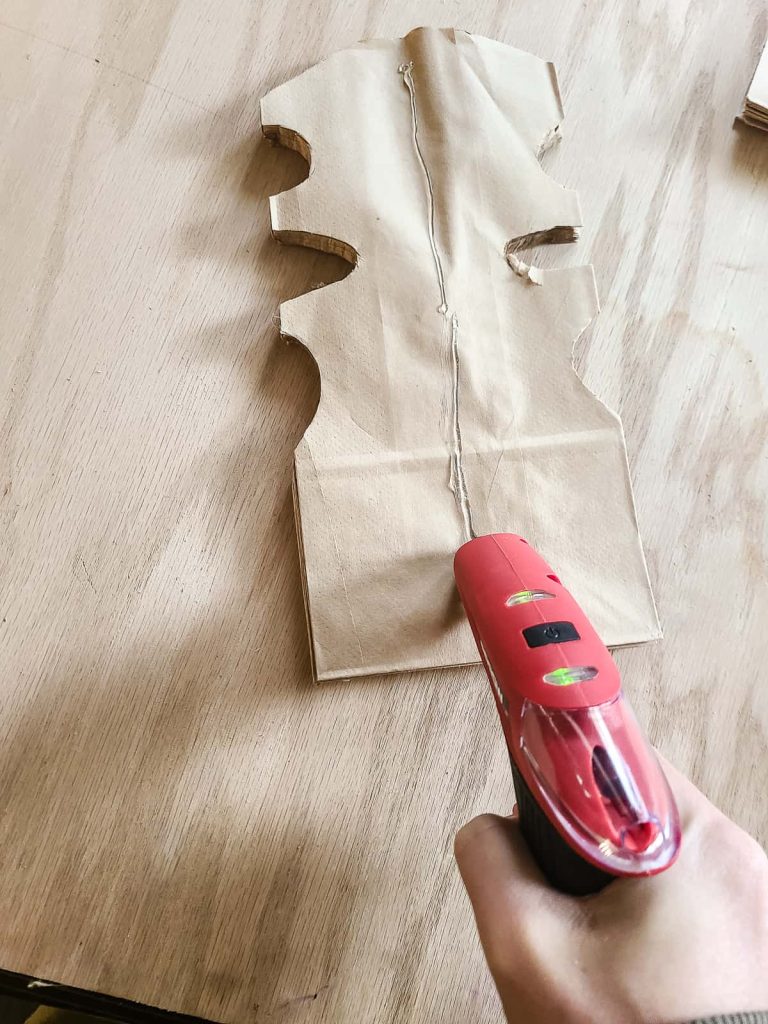
Step 1. Glue together 9 paper bags.
Once your hot glue gun is ready, apply a small glue line across the bottom of the bag (not the open end of the bag, but the bottom fold edge of the bag) and the middle of the bag in the shape of an upside-down T.
Press another bag into place over the glue.
Continue this process with the next bag until you have an entire stack of 9 bags.
Make sure you don’t bring the line of glue too close to the top edges of the bags. You don’t want the glue squeezing out the top and sticking to the other bags.
I didn’t experiment much here and this was my first time making these, but you may be able to get away with a smaller number of bags here. The giant paper bag snowflakes would just look a little flatter and the designs would be more stretched out if you used fewer bags.
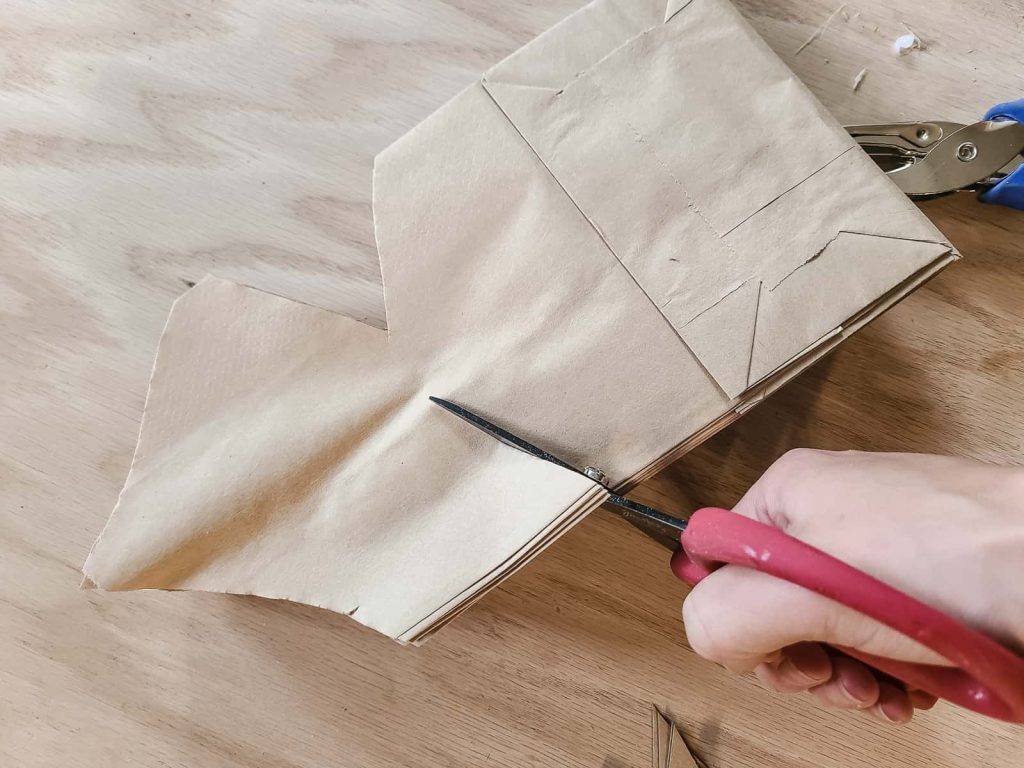
Step 2. Cut shapes out of the sides of the paper bags.
The next step is to cut out small shapes from the edges of the bags. Be sure you have good scissors here because there are a lot of layers to cut through.
Keep the snowflake pattern symmetrical on both sides of the bags so you can see all the way through your giant snowflake once you are done.
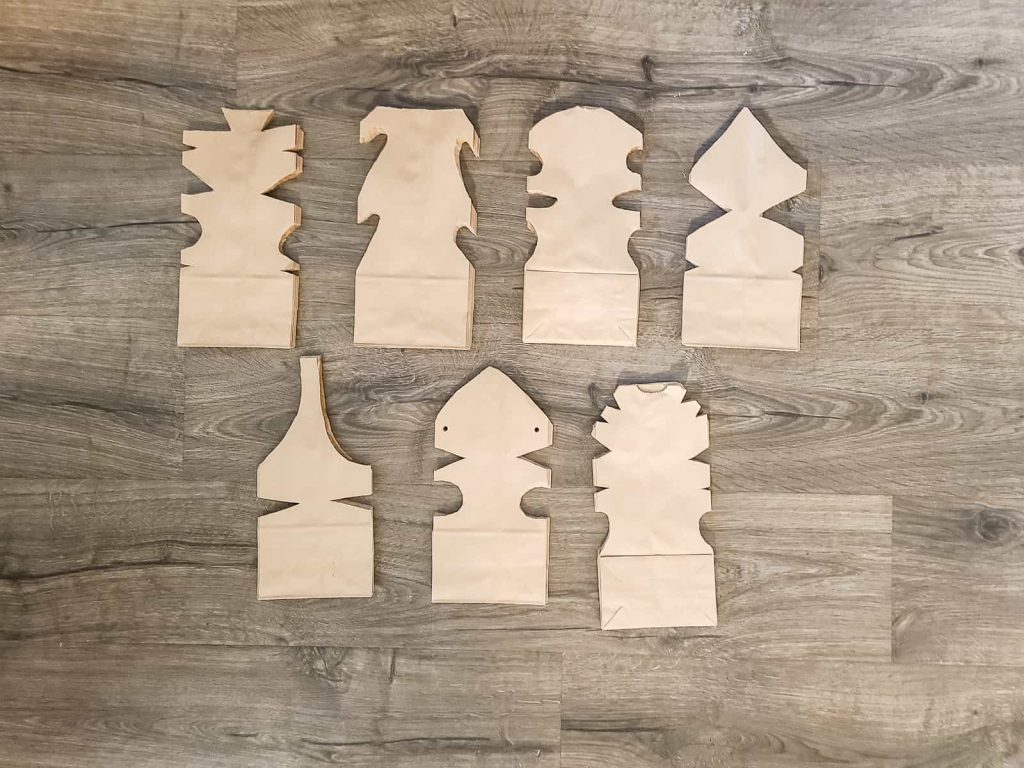
Here are some examples of how the cut lines that we used to create our snowflake shapes.
Get creative here with different shapes and different patterns! It’s just like making those folded paper snowflakes when you were a kid. There are so many different ways to make these DIY paper bag snowflakes and they will all look fun and unique.

Keep in mind that this process is pretty messy! You’ll probably end up with a big pile of paper bag scraps like this.
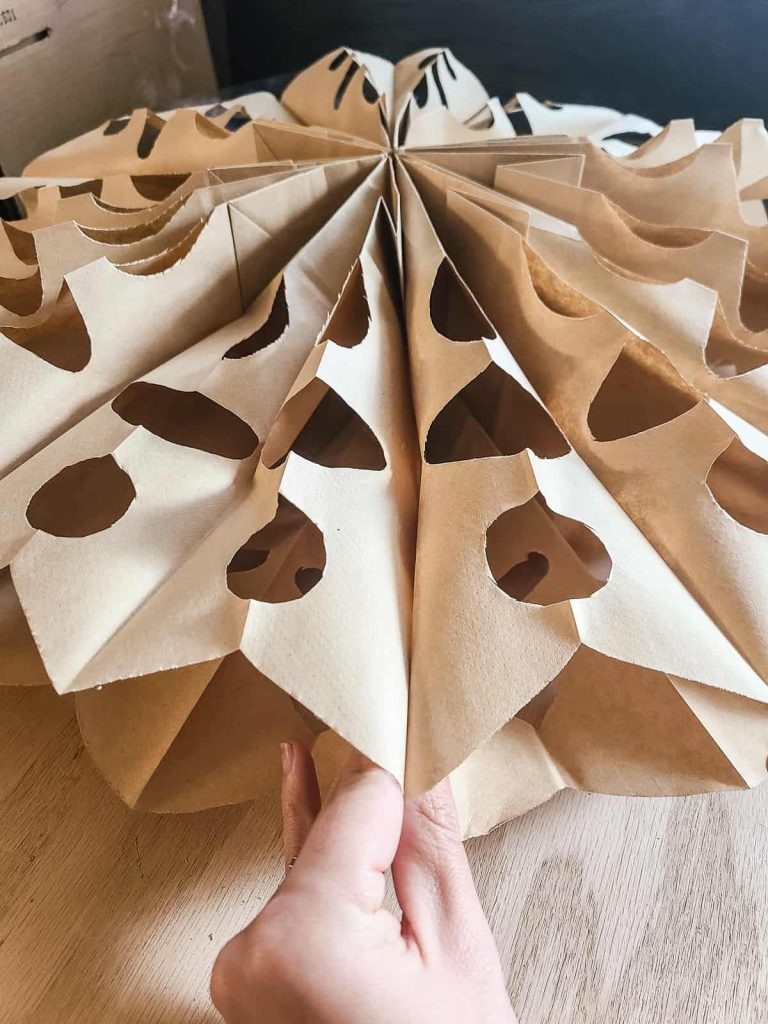
Step 3. Open up paper bag snowflake.
Open your paper bag snowflake by grabbing the top of the bag and pulling them together in a circle shape. Check out your design and make sure you’re happy with it before moving on.
Next, apply more hot glue to the paper bag in the same upside-down T shape along the bottom fold and up through the middle of the bag. Join the 2 ends together and hold them in place in the center of the bag for about 30 seconds while the hot glue sets.
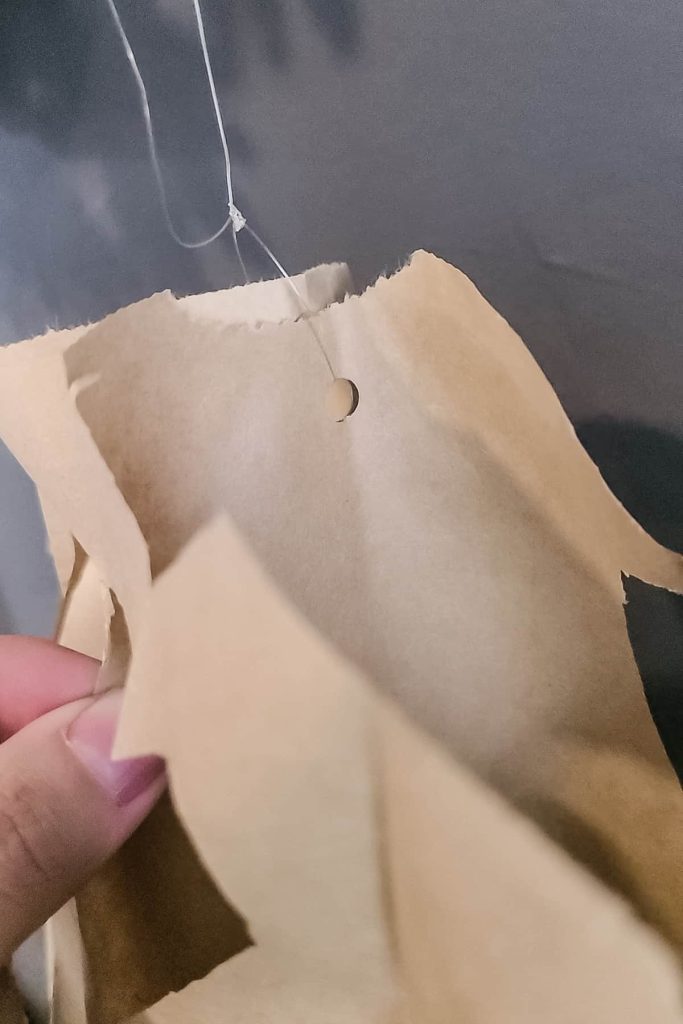
Step 4. Hang the giant snowflakes.
Hanging the paper bag snowflakes is easy! All you do is punch a hole in the top of the paper bag where you want it to hang and tie some fishing line on.
You can hang them from a Command hook, a nail on the wall or anything else that you can tie to.
To hang a bunch all over the wall, as we did around our TV, we added about 5 clear mini Command hooks to the very top of the wall up by the ceiling.
Then, we strung several layers of fishing lines and tied them to the outside hooks. Then we had a string line at the top of the wall so we could add the large paper bag snowflakes anywhere we wanted on the wall.
If you don’t have a fishing line, you could also use a piece of twine or yarn.
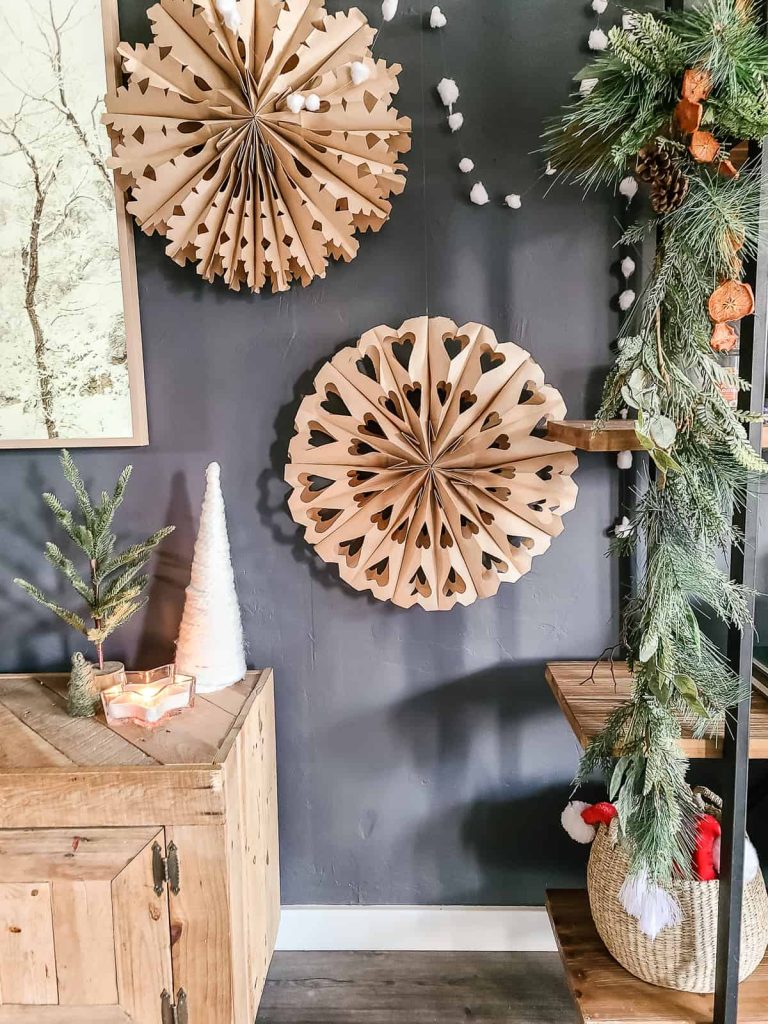
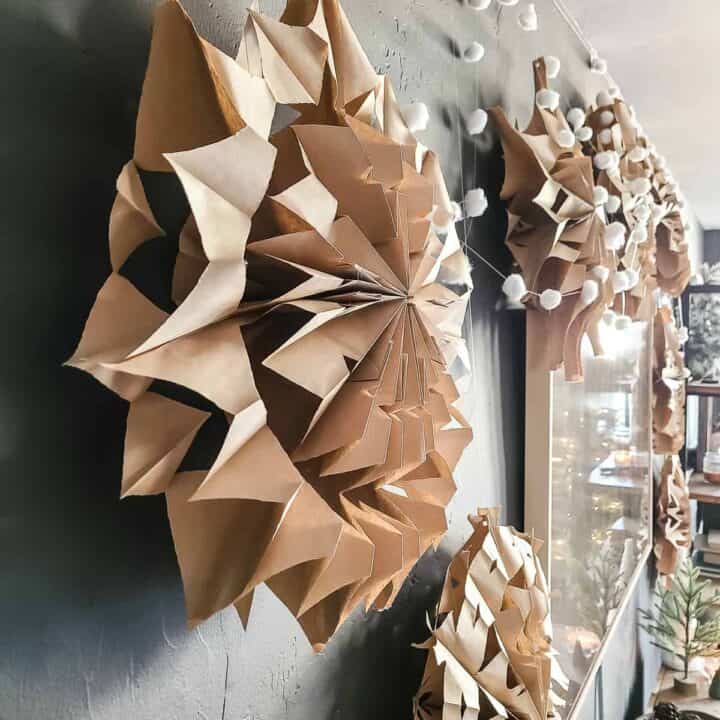
Giant 3D Paper Bag Snowflakes: Reveal
These giant snowflakes would also look so fun added around your Christmas tree or hanging in your windows for winter decor. This great craft is so easy to make, even the kids can do them. It’s a great way (and definitely an inexpensive way) to get the little ones involved in decorating.
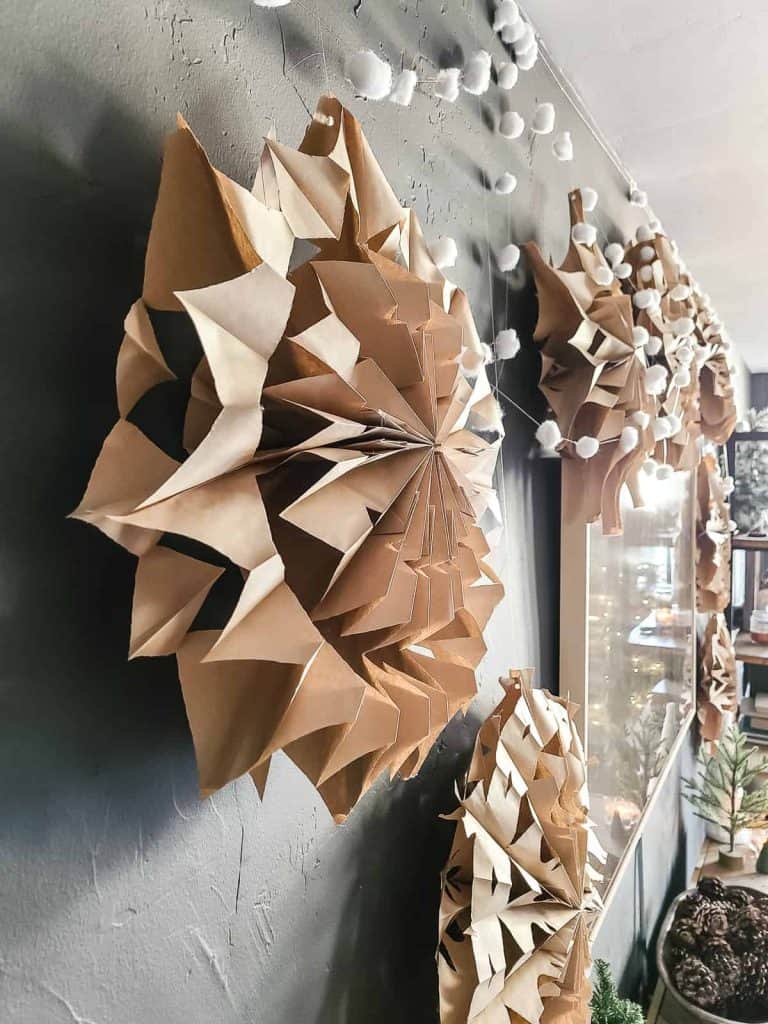
If you want to jazz them up a bit, add in some fairy lights, popsicle stick snowflakes, or make your own cotton ball snowball garland as I did. It was so easy to make with cotton balls, fishing line, and the same cordless hot glue gun.
If you want to make smaller snowflakes, you could try to make them with different sizes of bags. I’m thinking you could find smaller bags or gift bags that could work well, as long as they weren’t too thick. I didn’t think of this until after I was already done! Maybe I’ll try a smaller version next year.
If you wanted to make even larger snowflakes, you could use these giant lunch bags instead. How fun would that be?
If you’d rather have white paper bag snowflakes, just use white lunch bags instead! But I love the neutral look of the brown paper bags. They fit right in with our boho Christmas decor.
Where would you hang giant paper bag snowflakes in your house?
Let us know in the comments below.
Want to see more Christmas craft projects? Check out these posts!
- Fake Gingerbread House with Dollar Tree Dollhouse
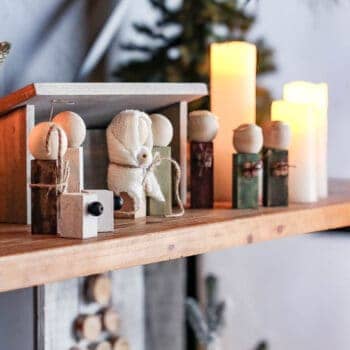
- DIY Wood Nativity Scene
- How To Make A Christmas Tree Star with Yarn and Cardboard
- Wood Bead Ornaments: 3 Easy Tutorials
- Macrame Christmas Ornaments: 3 Easy Versions
- How To Make Easy Faux DIY Mercury Glass Christmas Ornaments
- DIY Matte Textured Ornaments with Dollar Tree Ornaments
- Homemade Mulling Spices for Christmas Gifts with Free Printable Tag
- Easy DIY Stovetop Potpourri Gift Idea with Free Printable Tags
- How To Make Cheap and Easy Paper Bag Snowflakes with Lunch Bags
- How To Make Cotton Ball Garland for Less Than $5
- DIY Stocking Tags | Cheap & Easy Idea Anyone Can Do
- Easy DIY Gnome for Christmas Decor Using Dollar Store Materials
- Easy Boho DIY Yarn Christmas Trees
- DIY Christmas Village Makeover For Less Than $10
- Handmade Christmas Ornament with Farmhouse Style
- DIY Wrapping Paper For Christmas Gift Wrap
- How To Make Christmas Gift Tags With The Silhouette Mint
- DIY Dreamcatcher Ornament for Boho Christmas Tree
- Easy Leather Christmas Ornaments – Circles with Wood Beads
- DIY Leather Ornaments – Mini Christmas Tree with Wood Beads
- How To Make A Fabric Christmas Tree
- Rustic Christmas Advent Calendar
- Fabric Christmas Ornaments Made With Homespun Fabric – 4 Different Tutorials
- Cozy Sweater Covered Vases
How To Make Paper Bag Snowflakes
These giant snowflakes would look so fun added around your Christmas tree or hanging in your windows for winter decor. This great craft is so easy to make, even the kids can do them.
Materials
Instructions
- Glue together 9 paper bags. Once your hot glue gun is ready, apply a small glue line across the bottom of the bag (not the open end of the bag, but the bottom fold edge of the bag) and the middle of the bag in the shape of an upside-down T.
- Cut out shapes from the sides of the paper bags. Keep the snowflake pattern symmetrical on both sides of the bags so you can see all the way through your giant snowflake once you are done. Get creative here with different shapes and different patterns!
- Open up the paper bag snowflake and apply more hot glue in the same "T" shape. Join together to make a full circle.
- Hang the snowflakes up. To hang a bunch all over the wall, as we did around our TV, we added about 5 clear mini Command hooks to the very top of the wall up by the ceiling.