DIY Leather Ornaments – Mini Christmas Tree with Wood Beads

This leather ornaments tutorial contains affiliate links, but nothing that I wouldn’t wholeheartedly recommend anyway! Read my full disclosure here.
If you’ve been following for a while, you know that I’ve got a whole boat load of leather that I got for FREE sitting in my garage (yes, that’s right. I said free. Find out how in this post).
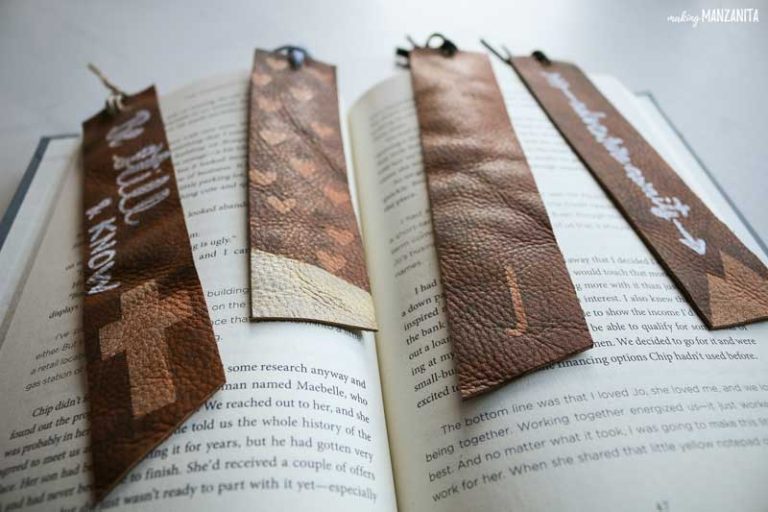
I’ve been busy coming up with ways to use leather like these leather keychains and leather bookmarks, which I made as DIY Christmas gifts this year.
Just when I thought I was done with the leather this season, it dawned on me….as I was making tons of my homespun fabric Christmas ornaments for my Etsy shop…I could DIY leather ornaments!!! Genius, right?
Table of Contents
After doing some research, I found a lot of really cute leather ornaments for sale and realized that I could totally make those myself. I do that all the time, you too?
I guess that’s just the DIYer in my blood. I’m always seeing things in stores that I know I could make at home (and have a ton of fun doing it…).
One of the perks of being Making Manzanita readers is that I always show you how to make it as well. Teaching you how to DIY is my favorite thing in the world, so thanks for joining in the fun and making it possible for me to create with you.
Want to see more Christmas craft projects? Check out these posts!
- Fake Gingerbread House with Dollar Tree Dollhouse
- DIY Wood Nativity Scene
- How To Make A Christmas Tree Star with Yarn and Cardboard
- Wood Bead Ornaments: 3 Easy Tutorials
- Macrame Christmas Ornaments: 3 Easy Versions
- How To Make Easy Faux DIY Mercury Glass Christmas Ornaments
- DIY Matte Textured Ornaments with Dollar Tree Ornaments
- Homemade Mulling Spices for Christmas Gifts with Free Printable Tag
- Easy DIY Stovetop Potpourri Gift Idea with Free Printable Tags
- How To Make Cheap and Easy Paper Bag Snowflakes with Lunch Bags
- How To Make Cotton Ball Garland for Less Than $5
- DIY Stocking Tags | Cheap & Easy Idea Anyone Can Do
- Easy DIY Gnome for Christmas Decor Using Dollar Store Materials
- Easy Boho DIY Yarn Christmas Trees
- DIY Christmas Village Makeover For Less Than $10
- Handmade Christmas Ornament with Farmhouse Style
- DIY Wrapping Paper For Christmas Gift Wrap
- How To Make Christmas Gift Tags With The Silhouette Mint
- DIY Dreamcatcher Ornament for Boho Christmas Tree
- Easy Leather Christmas Ornaments – Circles with Wood Beads
- DIY Leather Ornaments – Mini Christmas Tree with Wood Beads
- How To Make A Fabric Christmas Tree
- Rustic Christmas Advent Calendar
- Fabric Christmas Ornaments Made With Homespun Fabric – 4 Different Tutorials
- Cozy Sweater Covered Vases
UPDATE: See below for a replay of my live video tutorial for this project!
How To Make Leather Ornaments: Step-by-Step
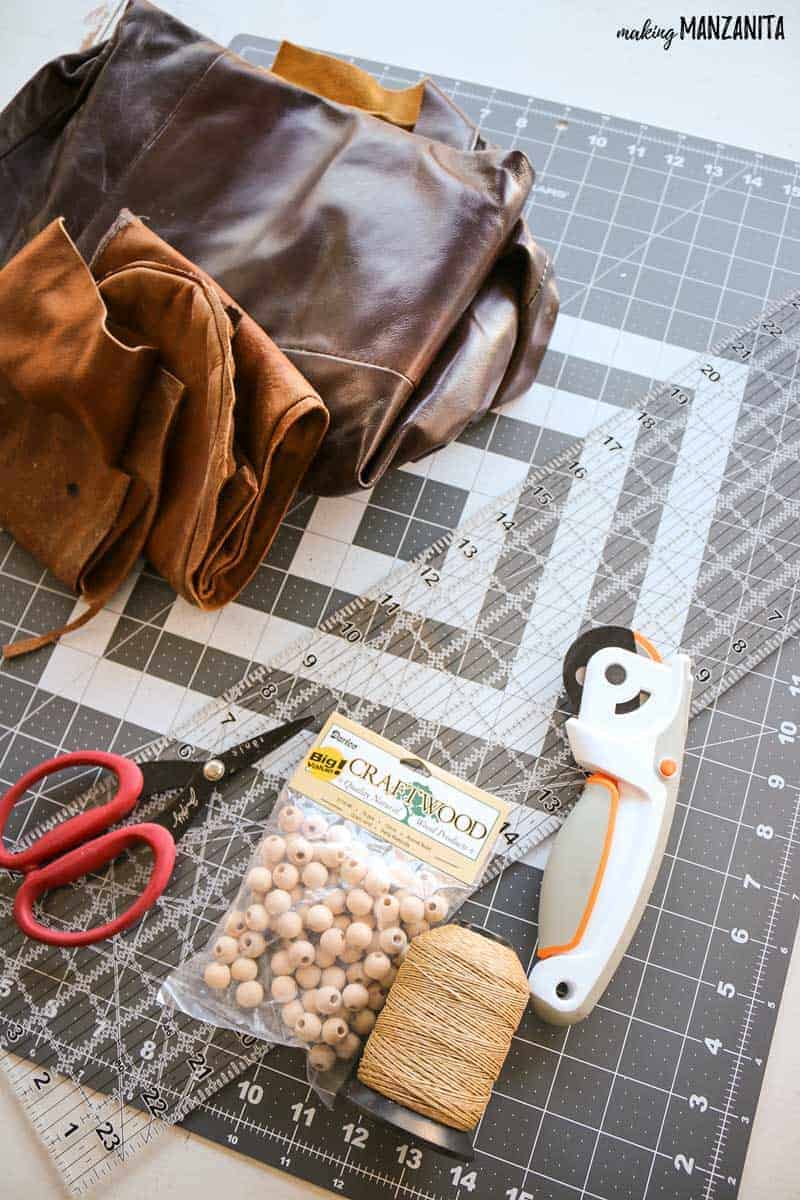
Supplies needed
- Leather (will need 1 piece 1/2” x 18” for one ornament)
- 10 wood beads
- Waxed twine
- Rotary cutter
- Cutting mat
- Clear acrylic ruler
- Scissors
- Small hole punch (not shown in above photo)
Step 1: Cut strip of leather.
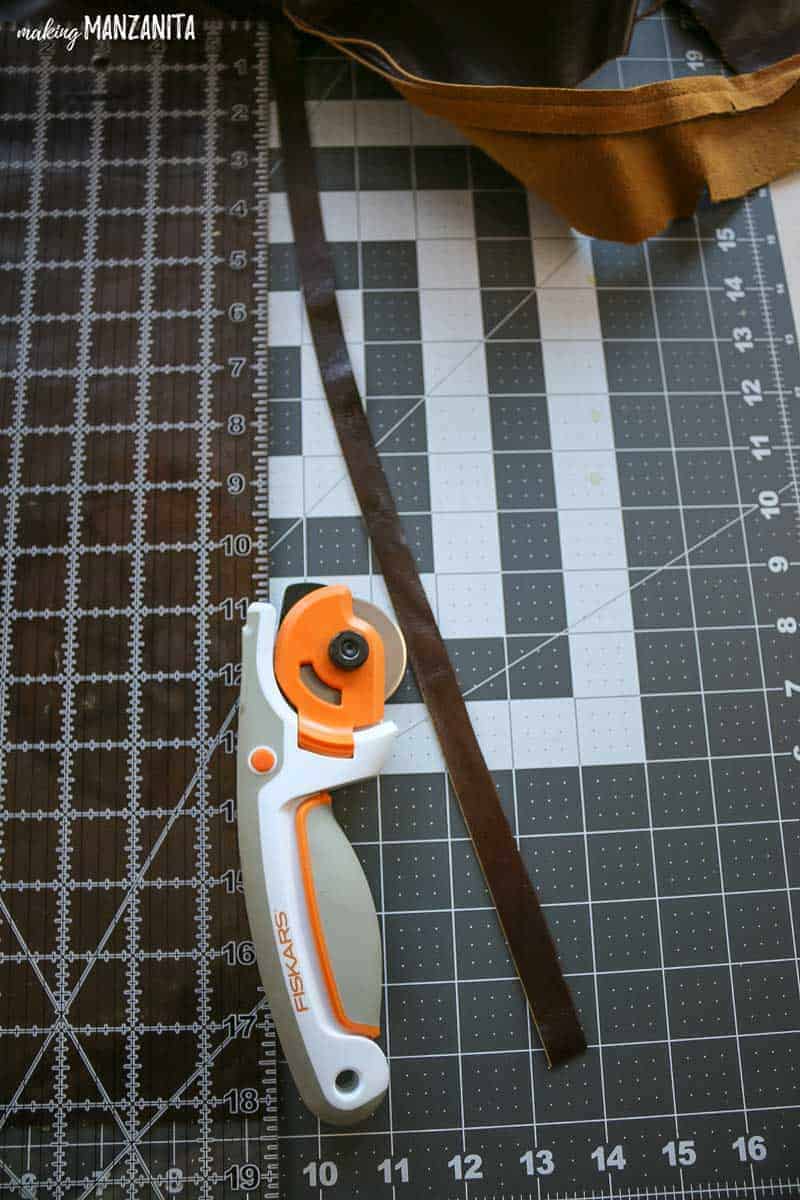
You will need one piece of leather about 1/2” wide and 18” long. To get nice straight cuts, I like using my rotary cutter for this.
Step 2. Fold up leather.
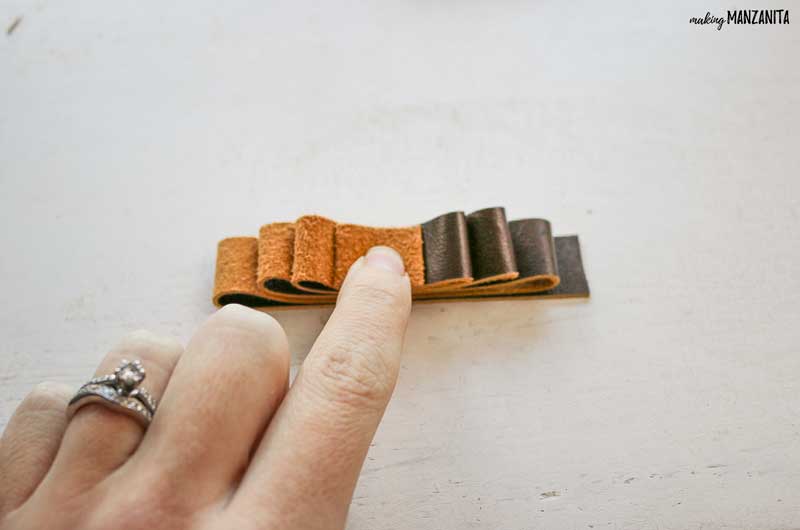
Next, fold up your leather in the general shape of the tree (getting smaller as you fold up). The base of my tree is about 3 inches wide and the top was about 1/2 inch wide.
Step 3. Punch holes in leather.
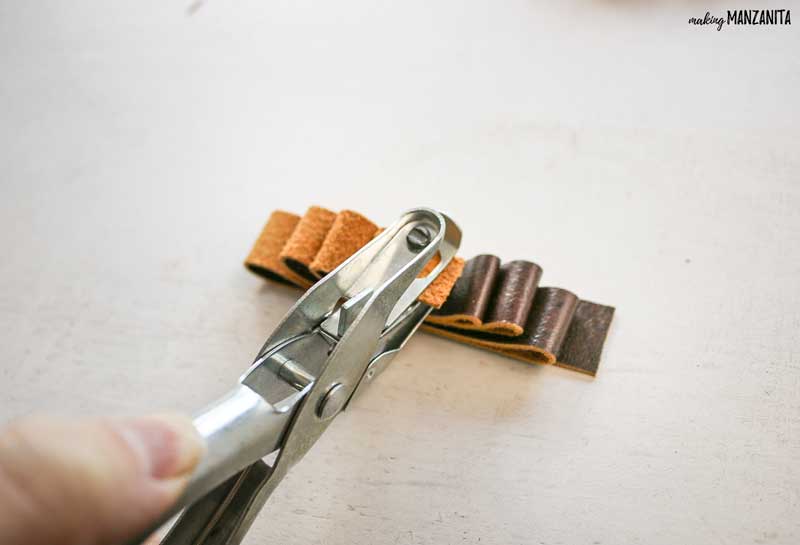
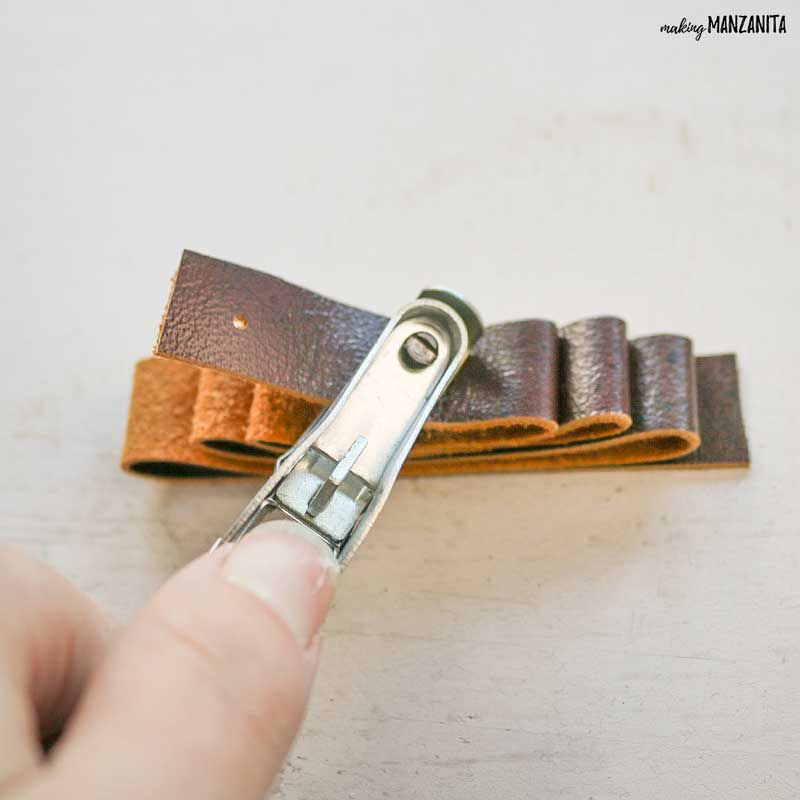
If you’re using the same measurements as me (1/2” x 18”), then this part will be easy for you because I write down the measurements at which you should punch your holes (see below bullet points), but if your ornament is going to be smaller or larger than me, this is how I did it.
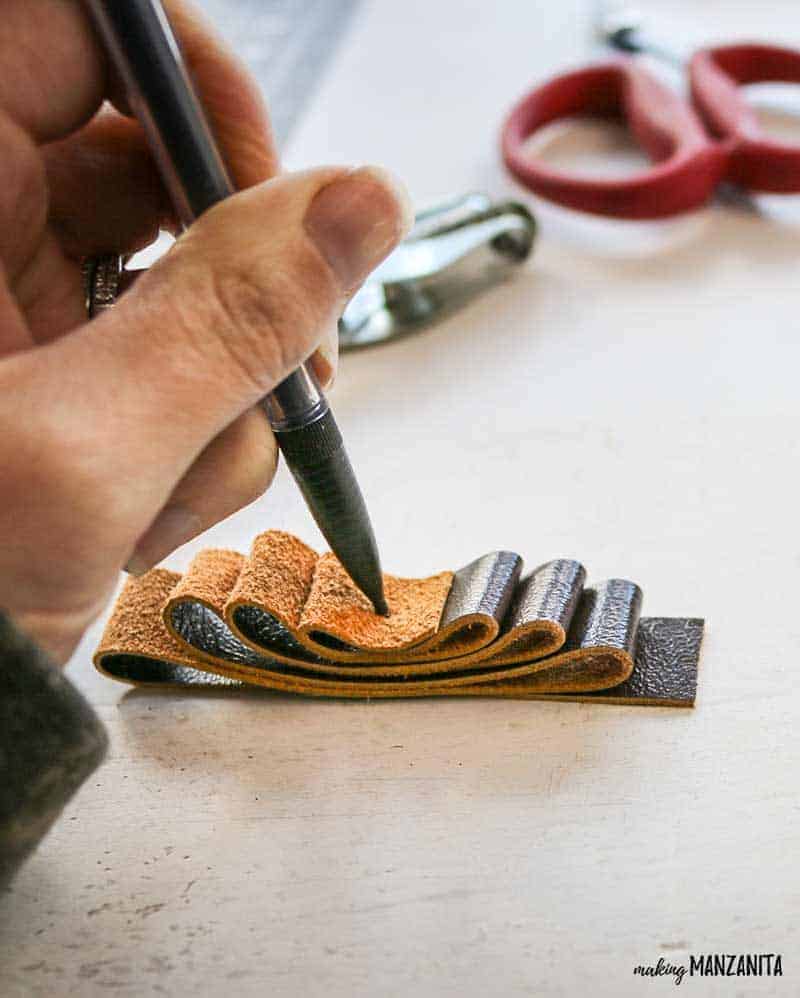
Punch a hole in the middle of the top piece on your folded up tree. Then, using a mechanical pencil (or pen), make a mark through hole on the to next layer of leather underneath.
If you are having a hard time seeing the pencil on the dark leather like I did, if you push hard enough, there will be a little indent so you know where to punch the hole.
Then, peel back the layer with the hole and punch a hole where you marked with the pencil.
Continue this steps until you’ve made it all the way down to the bottom of the tree with your holes punched.
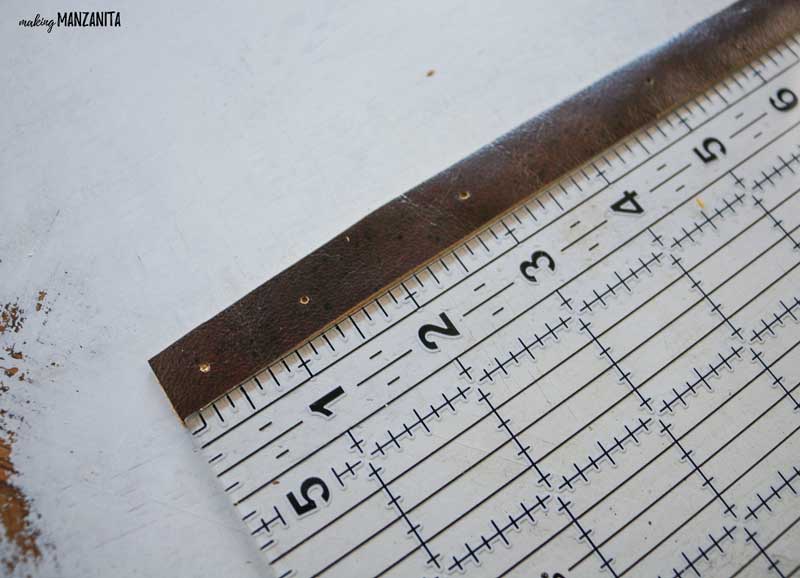
If you are making yours 1/2” x 18”, you can just punch your holes on these measurements on the strip of leather. This will make it easier for you!
- 3/8” is where your first hole should be punched
- 1 1/4” is where your 2nd hold should be punched
- 2 7/8”
- 5”
- 7 1/8”
- 9 7/8”
- 12 7/8”
- 16 3/8”
Step 4. Thread twine through beads and leather.
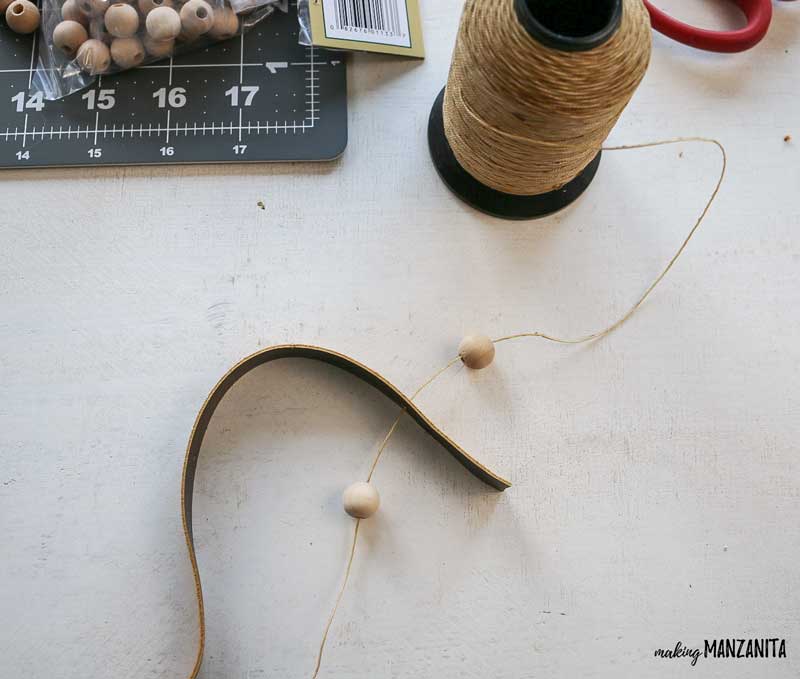

Starting at the bottom of the tree, add a wood bead to your twine and then push the waxed twine through the first hole in the leather. Next, add another wood bead, fold the leather over and push through the next hole in the leather.
Continue this process until you’re at the very top of the tree. Add more bead on top of the last piece of leather.
If you’re buying wood beads, you’ll probably buy a large package – so check out these wood bead crafts for some ideas on what to do with all the leftovers!
Step 5. Secure beads and twine on the bottom.

Next, cut off the twine so you have about 8 inches to spare at the bottom. Add more more bead to the twine and then loop the twine around the bottom bead and up through the top bead (coming from the bottom) as shown in the photos above.
Pull the twine to tighten and secure with a knot. Cut off extra twine.
Step 6. Secure top bead.


Cut off the twine so you have about 10 inches to spare at the top of the mini Christmas tree.
Take the end of the twine and loop it back through the wood bead coming from the bottom as shown in the photo above. Pull the twine to tighten.
Step 7. Knot the loop of twine.

Lastly, just put a knot in the loop of twine directly above the top bead. This will make a nice and simple hanger for your ornament.
I just love how this leather ornament turned out! I love the modern farmhouse look to the DIY leather ornaments. Fits right in on the backdrop of our new shiplap wall in the living room.
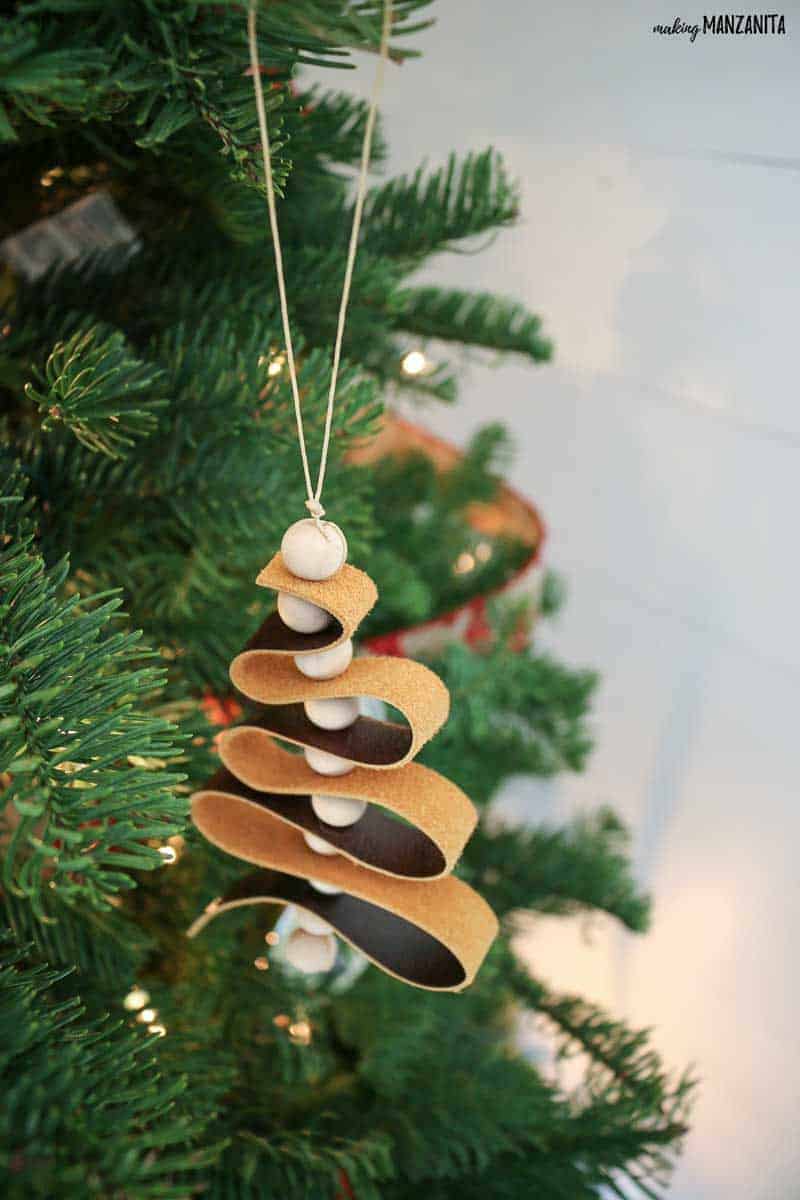
The other great part about this Christmas craft is how budget friendly these DIY leather ornaments are! The only thing that I had to go out and purchase were those wood beads and they were only a couple bucks!
Cheap and simple Christmas DIYs are the name of the game this time of year. I’m way too busy right now anything more complicated than this!


I’ve got one more fun DIY leather ornament tutorial up my sleeve that I can’t wait to show you tomorrow (UPDATE: see how the other leather ornament turned out!)

How To Make DIY Leather Ornaments
These DIY leather ornaments fit right in with the modern farmhouse home decor style and are such a great budget-friendly Christmas craft! This easy to follow tutorial will walk you through how to make this leather ornament that looks like a mini Christmas tree with wood beads.
Materials
- Leather (will need 1 piece 1/2” x 18” for one ornament)
- 10 wood beads
- Waxed twine
Tools
- Rotary cutter
- Cutting mat
- Clear acrylic ruler
- Scissors
- Small hole punch
Instructions
- Cut strip of leather approximately 1/2" wide and 18" long.
- Fold up leather in the shape of Christmas tree gradually getting smaller near the top.
- Punch holes in leather in the middle.
- Thread twine through beads and leather. Put one bead in between each piece of leather.
- Secure beads and twine on the bottom.
- Secure top bead.
- Knot the loop of twine.