Laying Large Format Tiles | Tile Entryway Reveal

Do you want to learn all about laying large format tiles? Follow along as we complete our tile entryway. We are sharing tons of beginner tips for large format tile installation.
As a part of our living room renovation, we needed to replace the tile entryway near our front door. The old builder-grade tiles were damaged and, to be honest, pretty boring.
There are several considerations that need to be paid close attention to when you’re laying large format tiles. We will start with a quick large format tile frequently asked questions and then jump into the large format tile installation with a video tutorial and step-by-step guide with pictures.
Table of Contents
This laying large format tiles tutorial contains affiliate links, but nothing that I wouldn’t recommend wholeheartedly. Read my full disclosure here.
Want to see more of our living room renovation?
- Modern Bohemian Living Room Mood Board & Layout (our next renovation!) – you are here!
- Removing Baseboards: Tips and Tricks
- How To Remove Carpet Tack Strips – 2 Easy Ways!
- How To Install Laminate Flooring on Concrete
- How To Fill Nail Holes in Wall
- How To Paint A Room For Beginners | Ultimate Guide
- Laying Large Format Tiles | Tile Entryway Reveal
- Easy DIY Tapestry Frame | 6 Simple Steps To Create Fabric Wall Art!
- DIY Slat Wall | Easy Modern Wood Accent Wall Idea
- Faux Concrete Wall Panels Behind Fireplace (No tools required!)
- Modern Boho Living Room Reveal
Large format tile FAQs
Before we jump into the tutorial for how to lay large format tiles, let’s start with some basic frequently asked questions!
What size tile is considered large format?
For a tile to be considered large format, at least one side of the tile must be more than 15″.
What size notched trowel should be used for large format tiles?
It is recommended to use a 1/2″ square notched trowel to get the proper setting for large format tile.
Are large tiles harder to install?
Laying large format tiles will go faster because you are covering more ground with each tile, however large format tiles are more likely to crack or have lippage (which is when the adjacent tiles aren’t even).
Large format tiles are also more likely to be warped or have doming during production.
The large format tile mortar that is required for this type of tile is a little thicker so it can be harder to trowel than more traditional mortars.
For these reasons, some consider large tiles harder to install than smaller tiles. But it’s not so hard that a beginner can’t tackle large format tiles. You just do your research first – start by reading this article with everything you need to know about large format tiles!
What type of tile is best for entryway?
There are so many different types of tile, it can be overwhelming when you’re trying to choose one! If you’re considering tile for your entryway, great choice!
Tile is a very durable material that is easy to clean. I would recommend a ceramic or porcelain tile for your entryway because they are popular, which means there are a lot of design options to choose from. They are also both affordable and easy to work with and install.
I would NOT recommend installing cement or natural stone tile in your entryway because they are susceptible to staining and need to be sealed and maintained. I don’t know about you but our entry sees a lot of dirt, mud, and stuff getting tracked in the house. I would hate to have to worry about ruining the tile in the entryway every time we walk in the door.
Pro tip – Be sure you are choosing a tile that is designed for floors! Floor tile is made thicker harder to withstand foot traffic, hold furniture, appliances, etcetera, and usually has some added texture to prevent slips and falls.
Before Pictures – Tile Entryway
There was nothing necessarily wrong with the flooring that was in our entryway, to begin with, besides the fact that it was a bit boring and basic. Clearly, the flippers we purchased this house from were just choosing builder-grade finishes.
Even though it looks like tile, these are actually peel-and-stick vinyl tiles that were grouted. We have the same tile floors in our guest bathroom that we ended up painting last year. Learn how to use Rust-Oleum floor tile paint here.
Once we got the old flooring removed, we were left with this subfloor as our starting point for the large format tile installation.
Laying Large Format Tiles – Video Tutorial
If you love DIY videos, be sure to subscribe to our YouTube channel!
Large Format Tile Installation – Step-by-Step Guide
Supplies for large format tile installation:
- Tile
- Large format tile mortar
- Tape measure
- Chalk line
- 5 gallon buckets
- Power drill (plug in, not cordless)
- Mixing paddle
- Notched trowel
- Tile spacers – we love these clips & wedges which help with tile leveling too!
- Tile saw – or buy it online here, but more expensive so best to buy in-store to save $
- Grout
- Rubber grout float
- Sponge
- White distilled vinegar
- Grout sealer
- Trim for edges of tile (if needed for transition)
Step 1. Choose tile.
It can be seriously overwhelming to choose tile because there are so many different types of tile. Specifically for an entryway, we recommend ceramic or porcelain tiles because they are popular, which means there are a lot of design options to choose from. They are also both affordable and easy to work with and install.
I don’t know about you but our entry sees a lot of dirt, mud, and stuff getting tracked inside. So one thing that I was looking for when choosing the tile for our entryway was that it would camouflage dirt and dust.
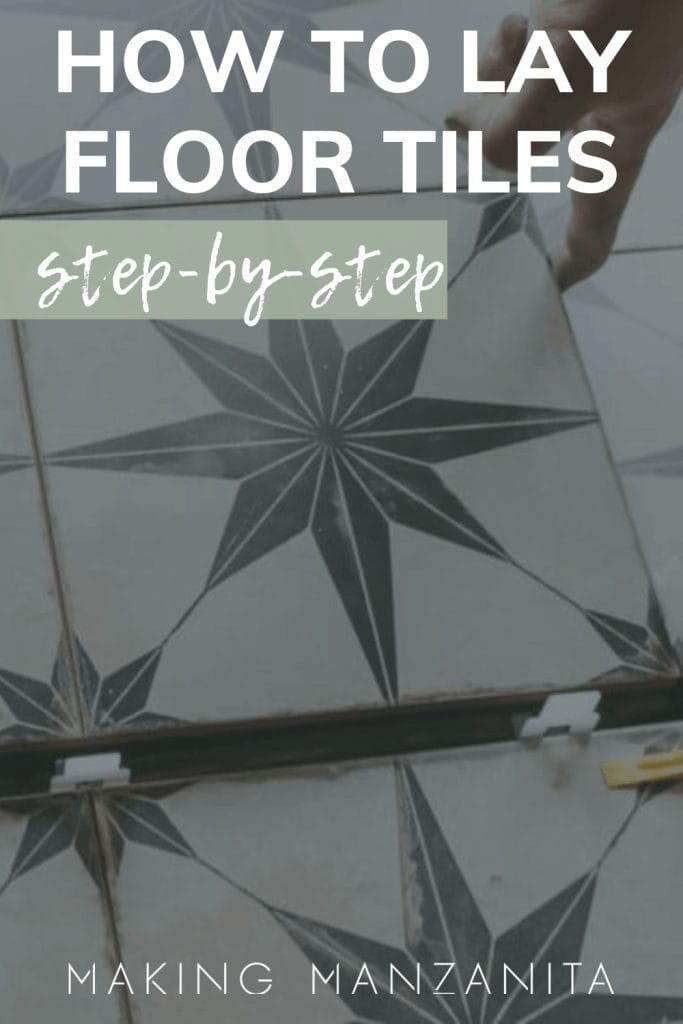
This star pattern has a lot of variation in color and pattern and almost looks a little worn or vintage. This helps a TON to hide dust and dirt at the entryway. I don’t want to have to sweep this area every single day.
Pro tip – Be sure you are choosing a tile that is designed for floors! Floor tile is made thicker harder to withstand foot traffic, hold furniture, appliances, etcetera.
Step 2. Prep floor for tile.
You’ll want to start by removing whatever existing flooring you have in place in your entryway. If you’re removing tile, start with this article on how to remove tile floors.
Since our living room has a concrete subfloor, we didn’t have to worry about installing a concrete backer base. If you discover wood subfloors, you’ll need to add a concrete backer before installing tiles. You can see how to do that in this post about how to tile a bathroom floor.
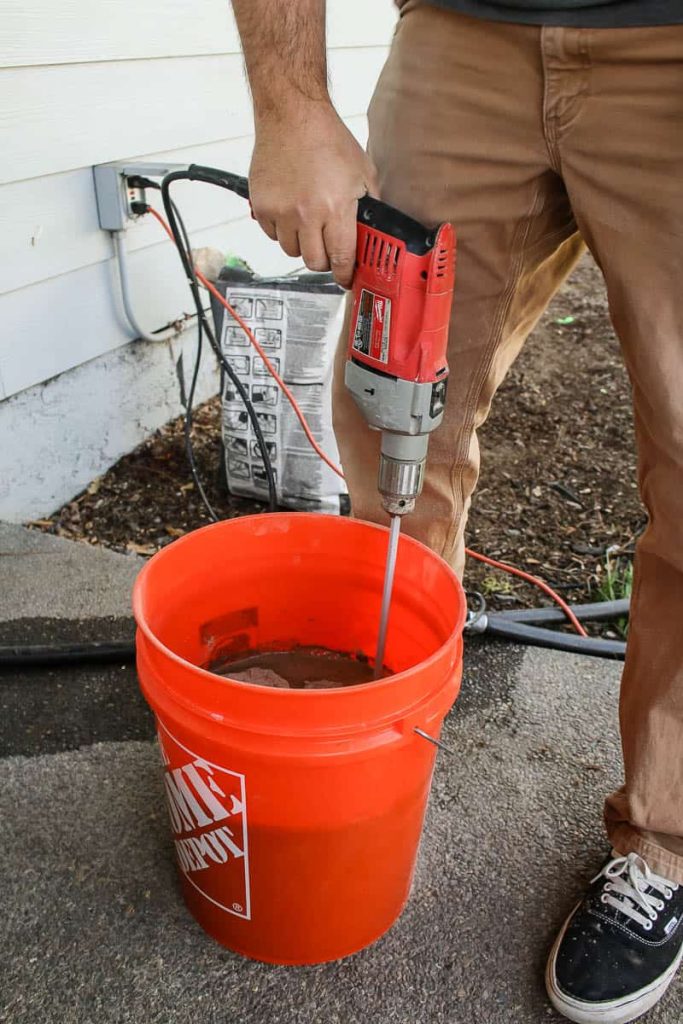
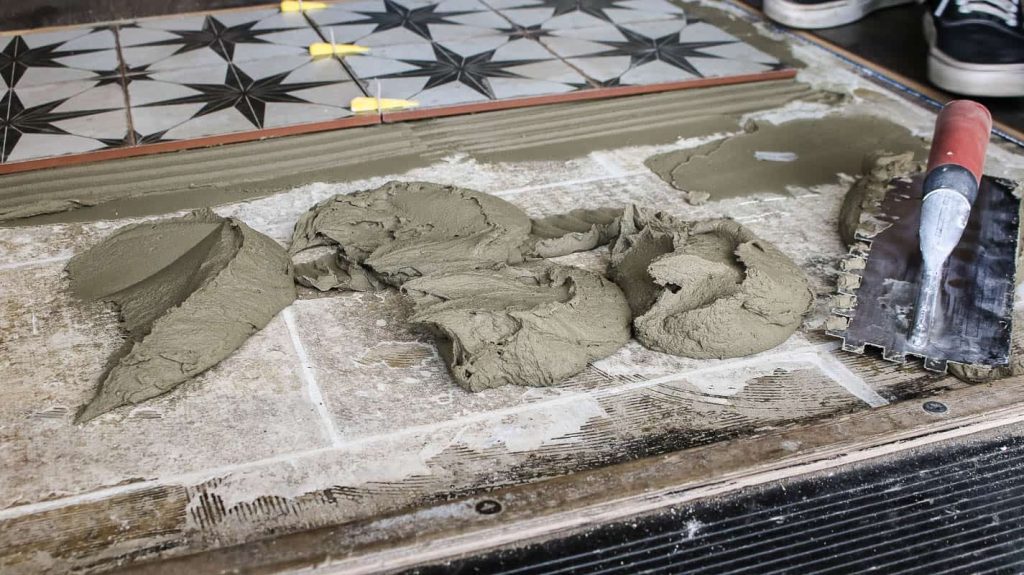
Step 3. Mix tile mortar.
First, you’ll need to mix up some thinset mortar for your tile. There’s a lot that goes into this if you’re doing it for the first time, so I broke it all down in a separate tutorial and video, so hop over here to learn how to mix thinset mortar for tile.
The consistency that you’re going for when mixing up the mortar is that of creamy peanut butter.
But the most important thing to call out in this tutorial about laying large format tiles, specifically, is that you need to use special large format tile mortar – not the regular stuff. The large format tile (“LFT”) mortar is made with slightly bigger materials so it is more coarse, which helps prevent slumping (when the tiles sink into the mortar) and sagging (which is when the tile doesn’t stick to the mortar because it’s too heavy – specifically when you’re installing tiles on a vertical surface like for shower tile installation).
Step 4. Lay large format tiles.
Once the mortar is mixed you can move on to laying the tiles in your entryway.
- Before you start, find the center of your space and mark it. Snapping a chalk line is usually easiest for this. You’ll want to line up your first tile to this line so everything is nice and straight.
- Depending on your space, you may want to also take the time to “dry fit” your tile first. This is just the process of laying out all of the tiles with spacers to make sure there are no super tiny cuts needed at one edge. Dry fitting also allows you to cut all of your tiles beforehand, which can make it easier when you’re installing tiles by yourself. You will not have time to mortar, measure, and cut tiles to fit as you go along, which can get a little stressful when you’re going back and forth to the tile saw a million times as your mortar starts to set up. The thin-set is only workable for usually 20-30 minutes before it starts to harden.
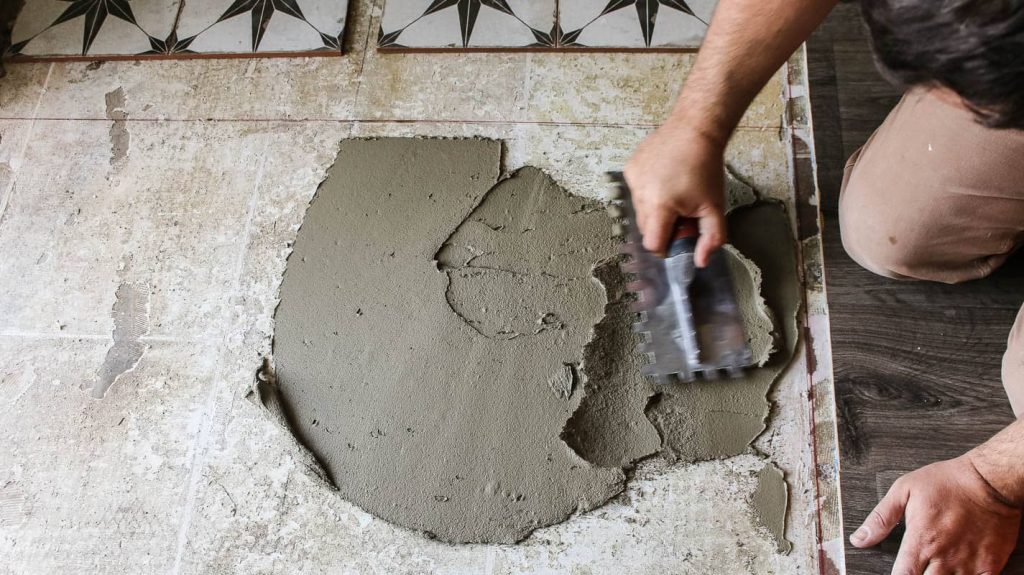
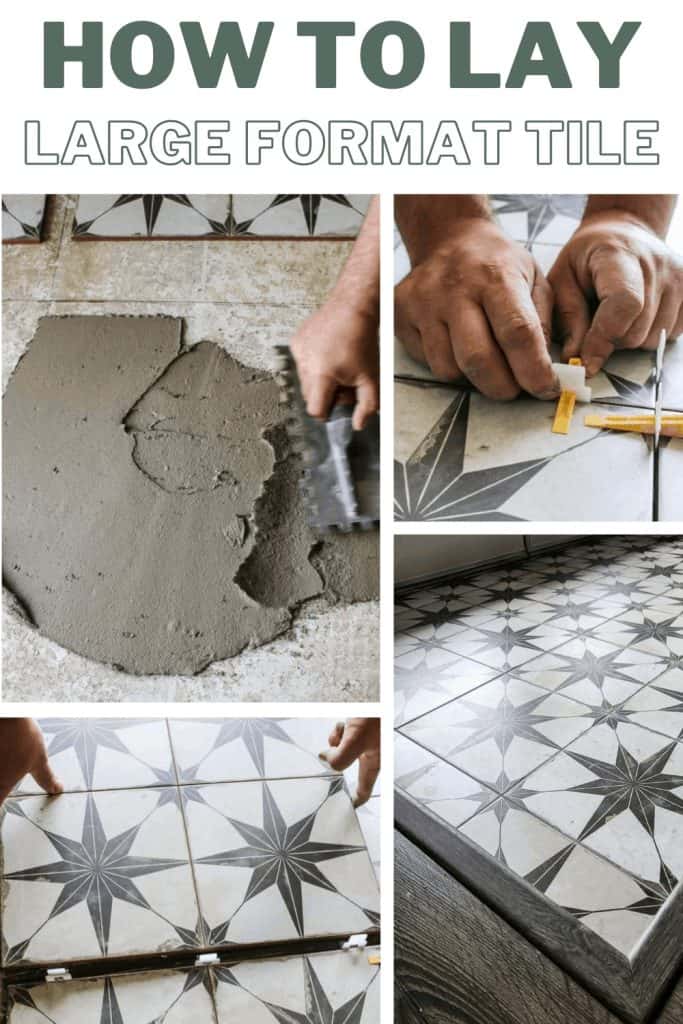
- Plop some thin-set mortar on your surface and spread and level it out as flat as you can with the flat side of your trowel.
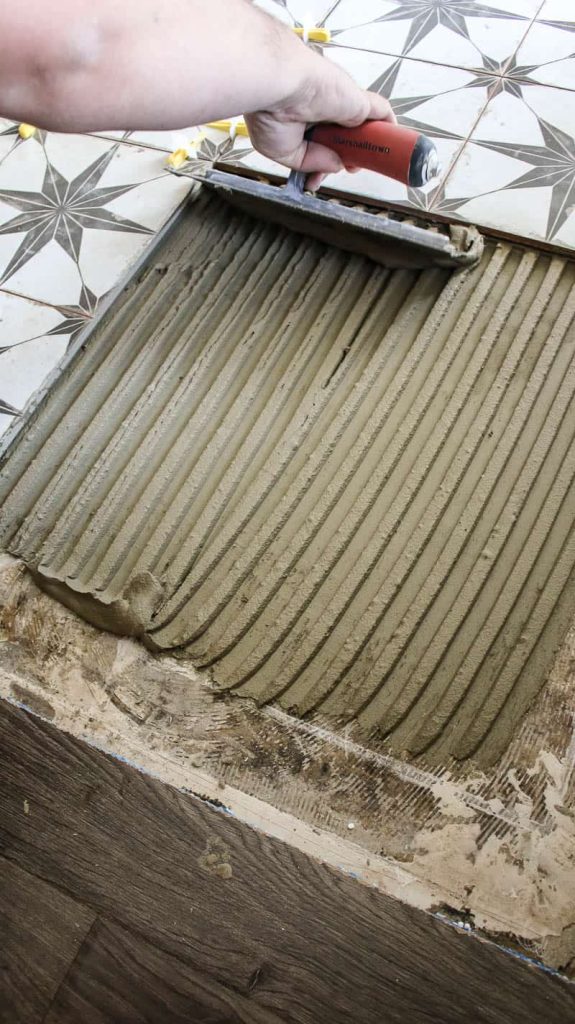
- Change your trowel to the notched side and hold it at 45 degrees to the floor and run the trowel over the thin-set to make ridges in straight lines.
Why you should back butter large format tiles
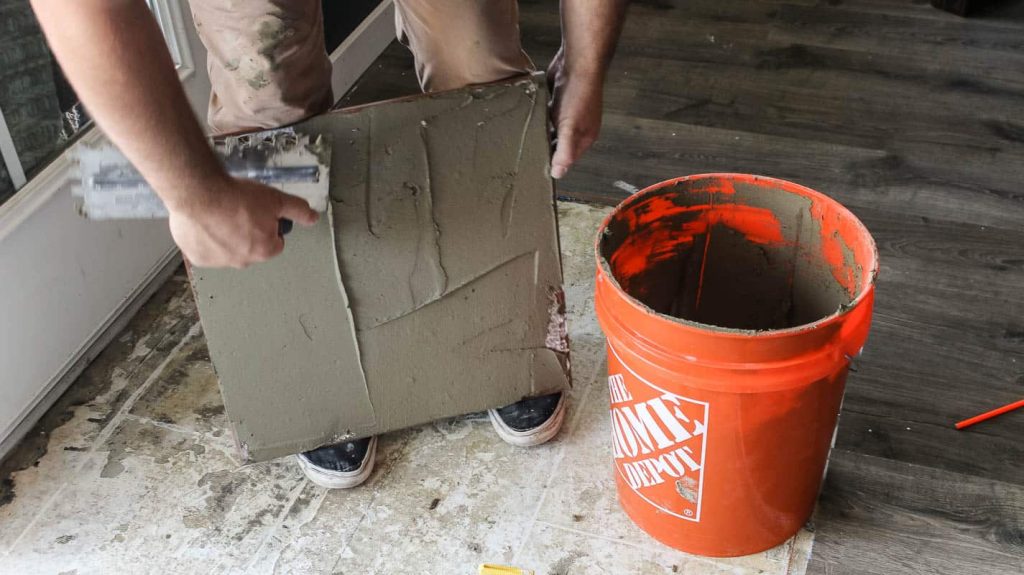
Before you set your tiles into place, it’s recommended that you “back butter” large format tiles.
Back buttering is adding a thin layer of thinset directly to the back of the tile before setting into place. It helps the tiles bond better and improves your mortar coverage, which is important when laying large format tiles. Back buttering also helps fill in all those little ridges, texture and pores on the back of the tile.
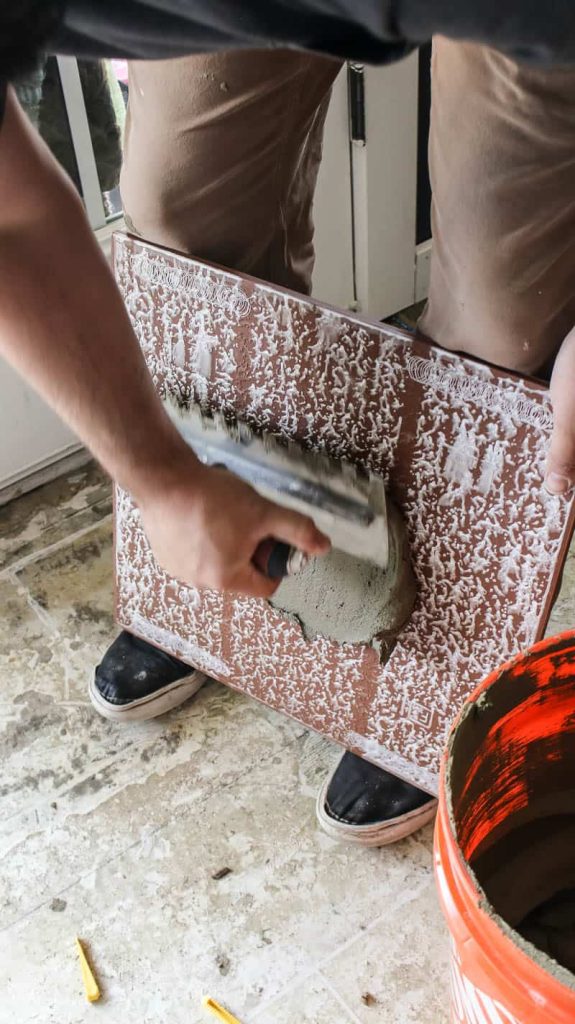
How to back butter large format tiles
Grab a glob of thinset with your trowel and spread it onto the back of your tile with the flat side of your trowel in an even layer. It’s just little you’re putting butter on toast – that’s why they call it back buttering!
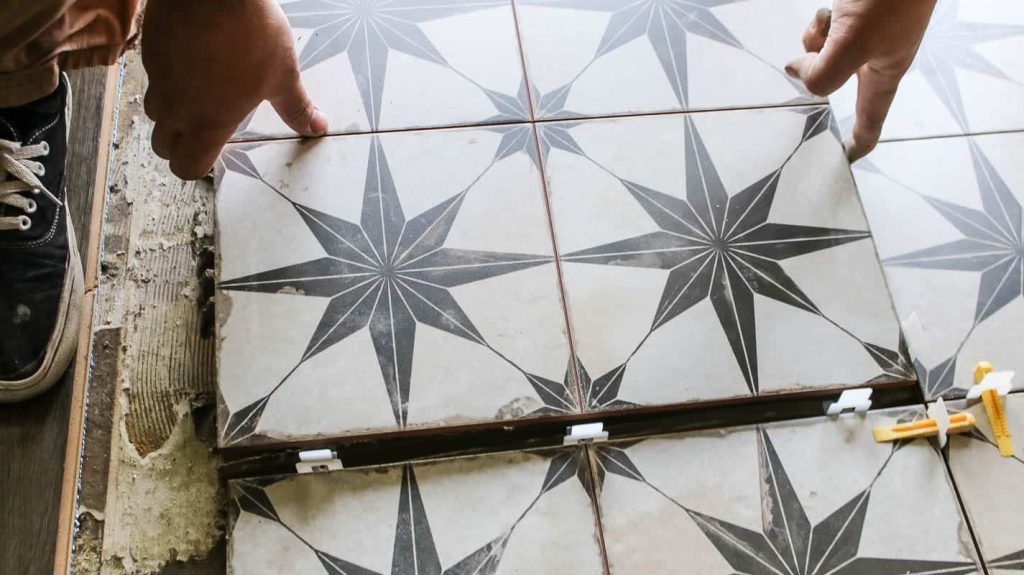
Next, gently set the large format tile straight down on top of the mortar and with even pressure, push down the tile and give it a tiny little shimmy to work out any air bubbles and flatten the mortar underneath.
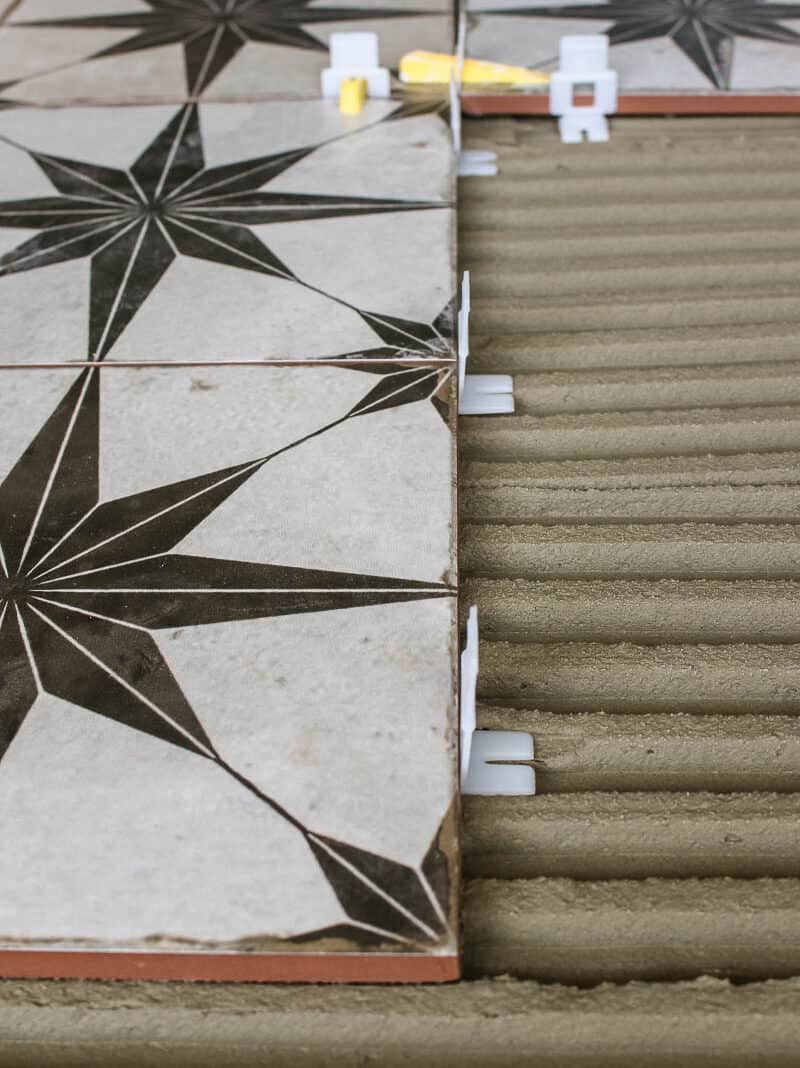
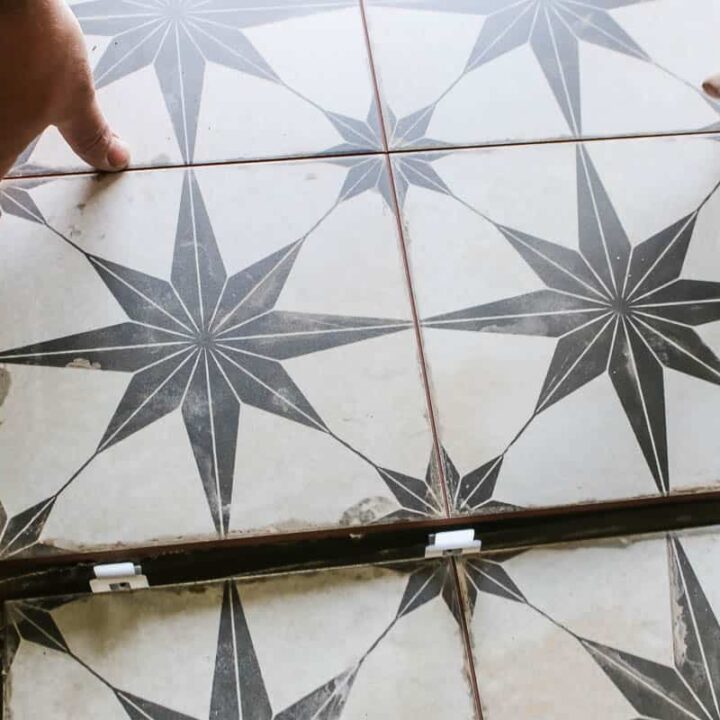
- These clip and wedge spacers not only give you the right spacing between your tiles, which you’ll grout later – but they also help keep the tiles level with each other. Read more about the Lash tile leveling system here.
- Preventing lippage (which is a fancy word for when the tiles aren’t level with each other) is always important when working with tile. But it is even MORE important when you are installing on floors to prevent tripping hazards.
- Getting the tiles even with each other is harder when installing large format tiles because it is harder to make small adjustments due to the size of the tile. That’s why these wedge spacers are SO worth it.
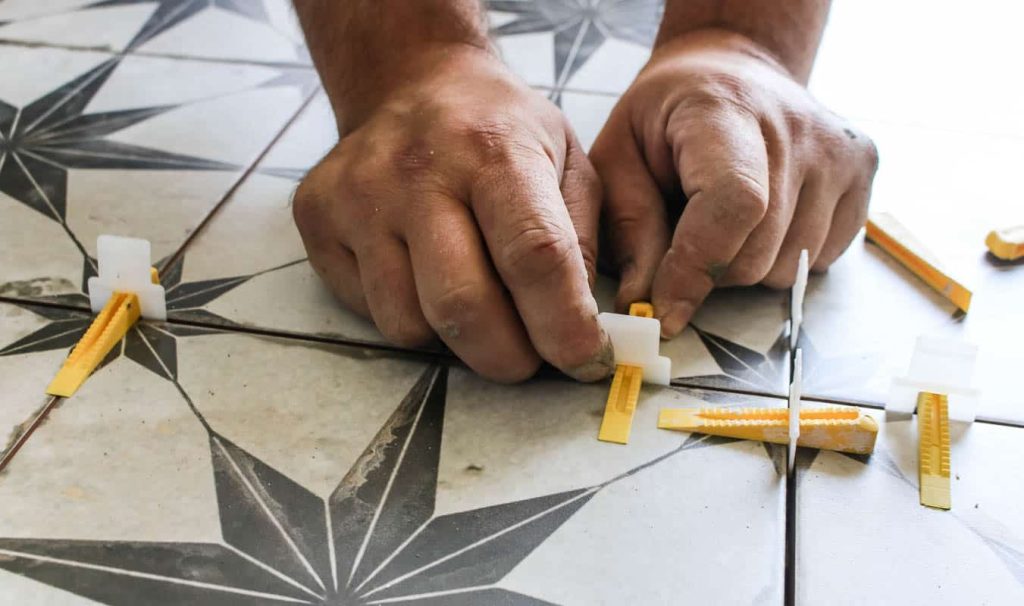
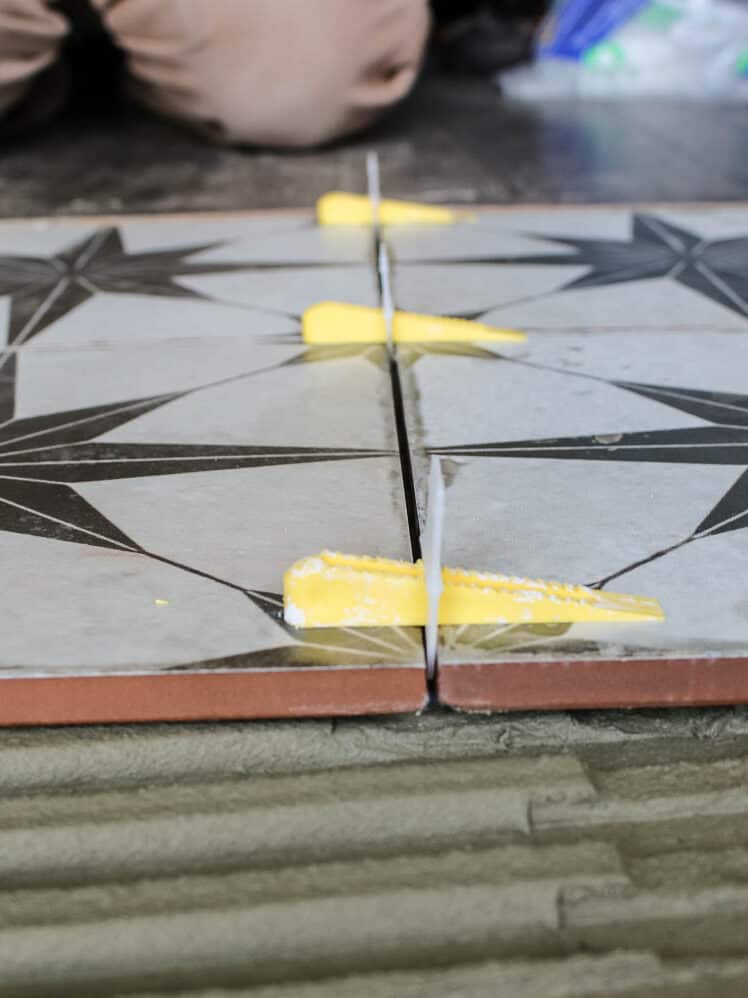
The white part of the spacer goes at the end of the tile and tucks underneath the tile. Then the yellow wedge slides into the hole of the spacer and clicks into place while pushing the tiles down to ensure they are level with each other.
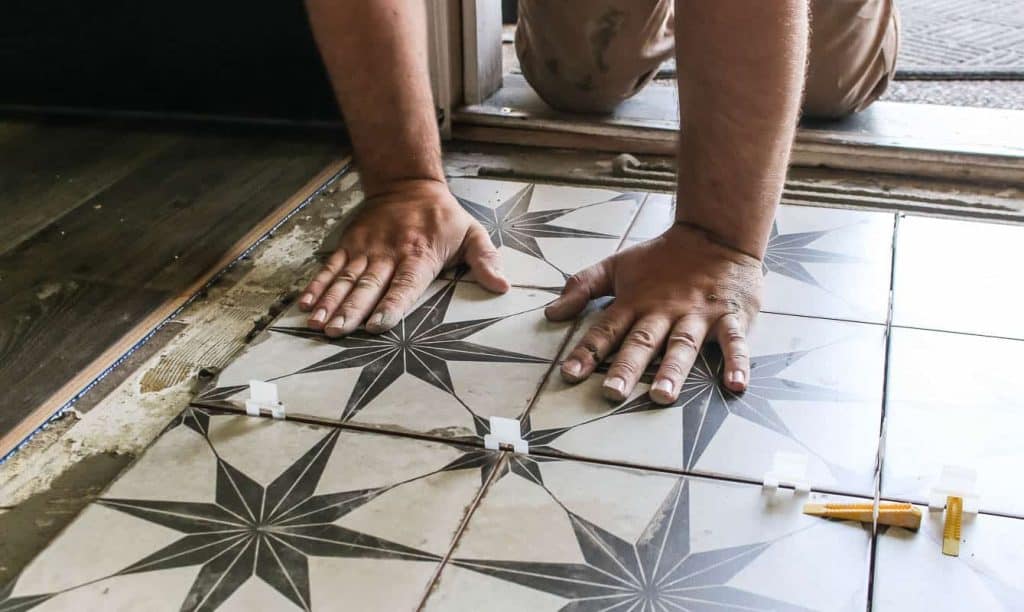
Continue working your way across your entryway surface laying the large format tiles in the same way.

Only put down enough thinset at one time to install one or two tiles max because it starts setting up and hardening quickly.
This tile pattern is so flippin’ gorgeous, don’t you think?
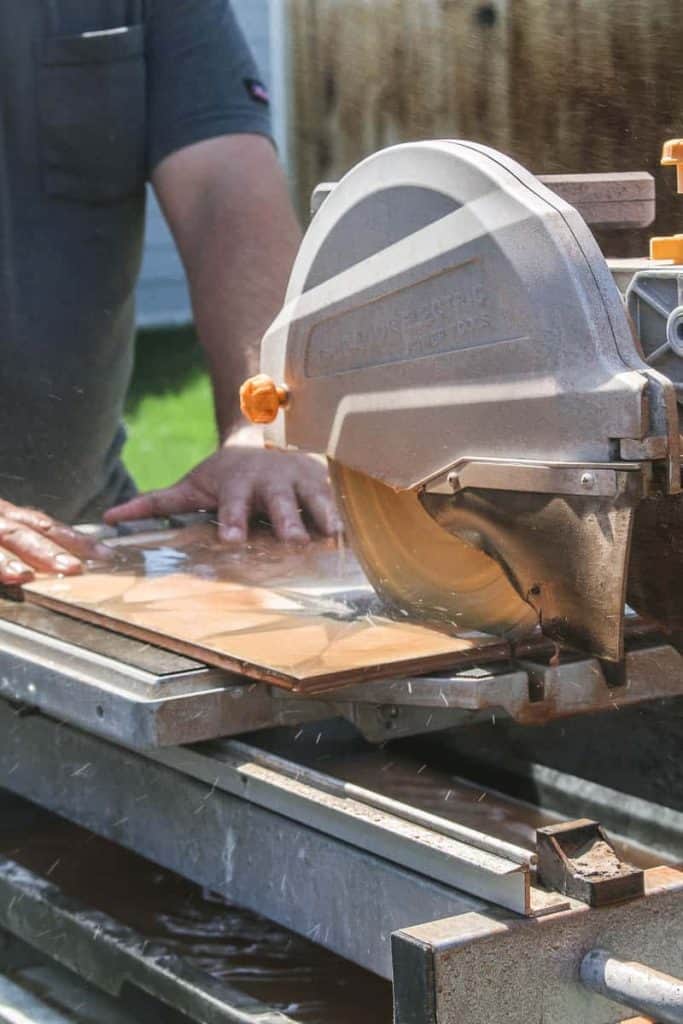
Step 5. Cut edge tiles with a tile saw.
When it comes time to get to the edges, you’ll need to cut down the tiles to fit along the edges of your entryway. Unless, of course, you precut your tiles beforehand if you decided to dry-fit your tile entryway before starting.
Measure the space you need to fill on the edge, subtract the amount for spacers and cut your tiles using a wet tile saw. We have a whole post showing you exactly how to use a wet tile saw, so hop over there to learn more
After all of the tile has been installed, stay off of it for at least 24 hours! This gives the mortar a chance to dry before grouting.
If there is more moisture in your air, you may need to wait up to 48 hours before grouting. However, the instructions on your specific thinset may differ, so be sure to check the bag to confirm.
Step 6. Grout.
After you have waited at least 24 hours for the mortar to dry, you can grout the gaps between the tiles.
Use a rubber grout float held at a 45-degree angle to push the grout into the gaps. Work in small sections and make sure you fill every joint.
Wait about 20-30 minutes (or whatever length of time your grout instructions say) and then use a damp sponge to rinse away any remaining grout left on the tile. Be sure the sponge is well squeezed so you don’t get too much water on the tile. Repeat until the tile is clean.
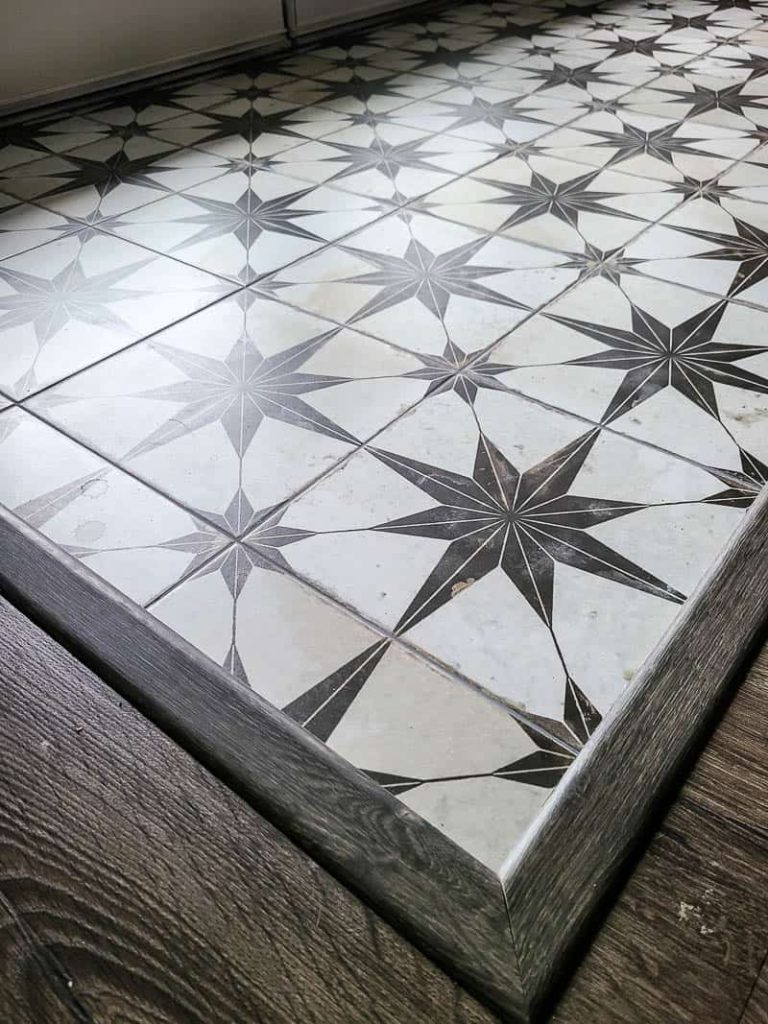
Step 7. Trim out edges of large format tile entryway.
We used this 5-in-1 molding to trim out the edges of the tile to transition from the tile to the laminate flooring. It was fairly simple to install by following the manufacturer’s instructions. I love that it matches our laminate flooring exactly.
Honestly, the hardest part about installing the molding was screwing the track into the concrete subfloors because concrete is pretty hard to drill holes in!
Step 8. Seal grout.
Last, but certainly not least, you want to seal the grout. However, you want to be sure the grout is FULLY DRIED before doing this. We usually wait about 7 days or so and then come back to seal the grout. In the meantime, be sure the grout stays very dry.
The process of sealing grout is pretty simple. You just apply grout sealer with a foam paintbrush or applicator bottle, like this, to the grout lines, wait 3-5 minutes and wipe off the excess.
Check out this article for a full process of how to seal grout.
After Pictures – Tile Entryway
And here’s how the tile entryway turned out!!!
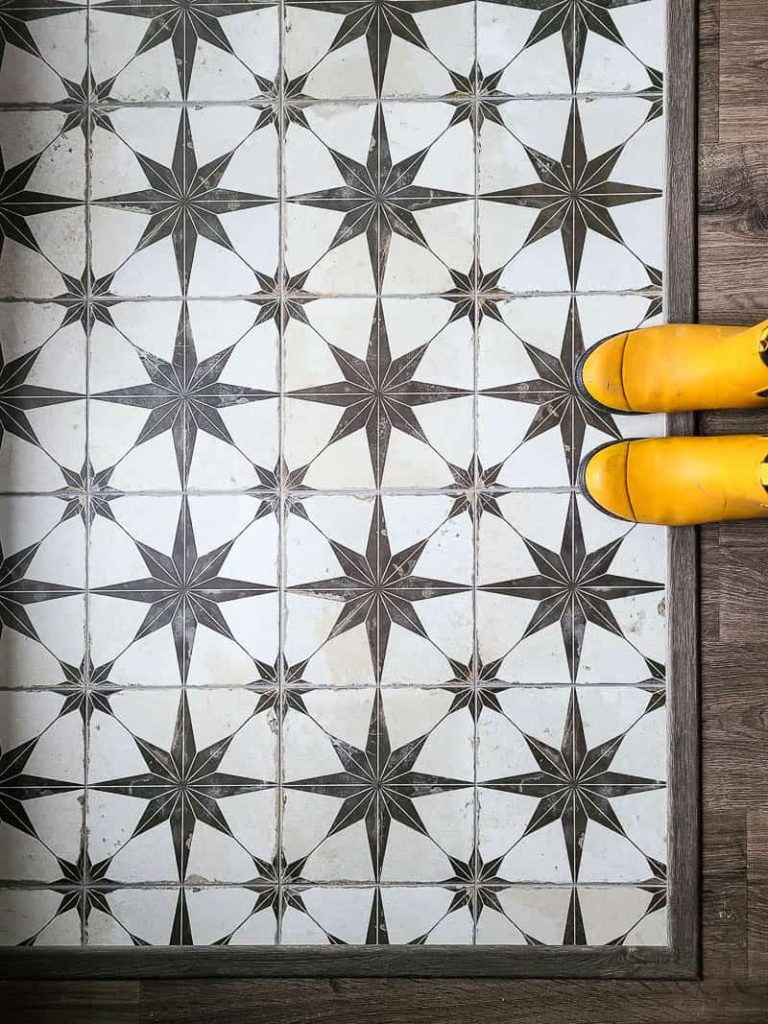
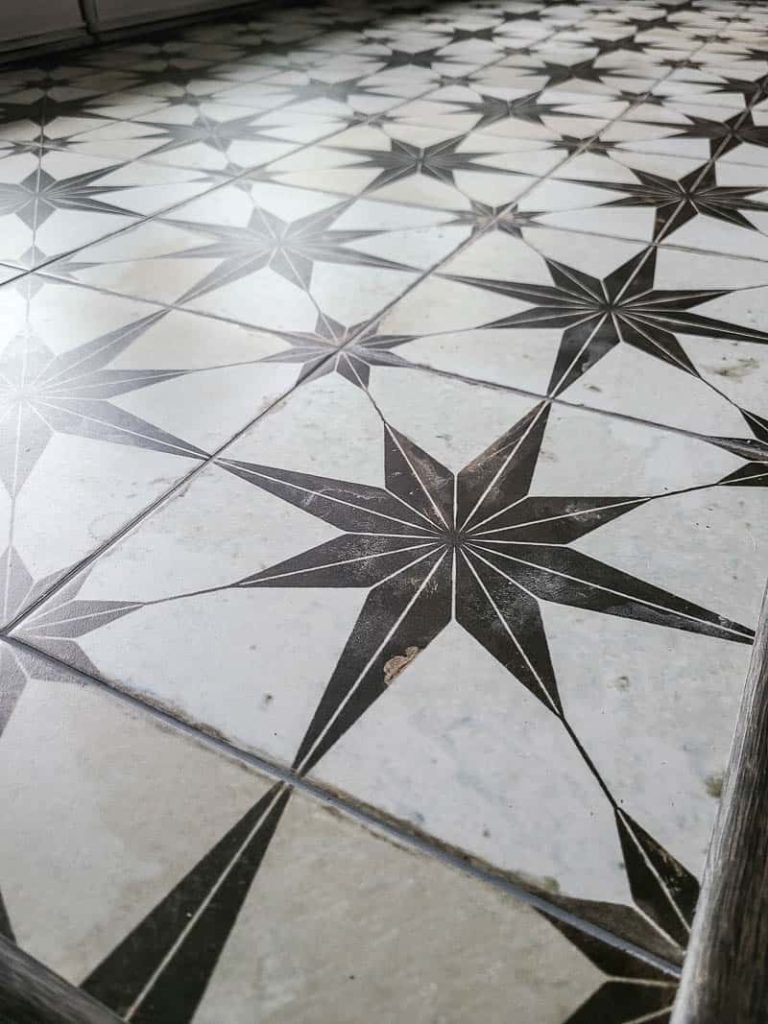
Looks pretty freakin’ amazing, right? I’m OBSESSED with the pattern of this large format tile. It adds so much fun visual interest to the room, don’t you think?
And because of the small grooves in the tile, it doesn’t even look like large format tile. Once you add the grout, you can’t even tell that the tiles are large. Crazy right?
I hope you guys enjoyed this detailed look at the step-by-step process of laying large format tiles.
Check out how the whole finished modern boho living room turned out here!
Do you have any more questions about our tile entryway?
Let us know in the comments below!
How To Lay Large Format Tiles
Do you want to learn all about laying large format tiles? Follow along as we complete our tile entryway. We are sharing tons of beginner tips for large format tile installation.
Materials
- Tile
- Large format tile mortar
- Grout
- White distilled vinegar
- Grout sealer
- Trim for edges of tile (if needed for transition)
Tools
- Tape measure
- Chalk line
- 5 gallon buckets
- Power drill (plug in, not cordless)
- Mixing paddle
- Notched trowel
- Tile spacers - clips
- Tile spacers - wedges
- Tile saw
- Rubber grout float
- Sponge
Instructions
- Choose tile.
- Prep floor for tile.
- Mix tile mortar.
- Lay large format tiles. Start with a chalk line to make sure everything stays straight. Dry fit your tile first with spacers to make all your cuts before you start because the thinset will start hardening up after 20-30 minutes. Plop some thinset on your surface and spread and level it out as flat as you can with the flat side of trowel. Change to notched side of trowel and hold at 45 degree angle and run over the thinset to make ridges in straight lines. Back butter each tile and set down on mortar with even pressure.
- Cut edge tiles with tile saw.
- Grout.
- Trim out edges (if needed).
- Seal grout.
Related – Want to see more articles about tile?
- 5 Different Types of Tile Explained
- How To Tile A Bathroom Floor
- How To Paint Tile Floor (With Stenciling)
- DIY Hamper With Tile Inlay
- Everything You Need To Know About Large Format Tile
- Removing Tile Floor Tips and Tricks
- What To Do With Leftover Tiles | DIY Tray With Leftover Cement Tile
- Why You Shouldn’t Buy A Cheap Tile Saw
- How To Install Subway Tile Backsplash
- Tile Removal: Kitchen Backsplash
- How To Make Marble Coasters With Leftover Tiles
- Shower Tile Installation Tips & Tricks
- 9 Modern Farmhouse Tile Ideas & Inspiration
- Shower Niche Installation Tips (& Why You Need A Prefab Shower Niche)
- Lash Tile Leveling System: Overview and Review
- How To Remove Grout Haze From Tile (The Easy Way)
- How To Grout Tile: Guide for Beginners
- How To Seal Grout: A Beginner’s Guide
- How To Cut Cement Backer Board
- How To Install Durock and HardieBacker Cement Boards: For Beginners
- HardieBacker vs Durock Comparison: What’s The Difference