How To Install Tile In A Shower: Shower Tile Installation Tips

Thank you to DAP for sponsoring this how to install tile in a shower tutorial post! All opinions are entirely my own. This post also contains affiliate links, but nothing that I wouldn’t recommend wholeheartedly. Read my full disclosure here.
Last week we talked all about how to tile a bathroom floor and now we’re back with more lessons from our bathroom renovation. We’re still talking about tile today, but this time it’s all about how to install tile in a shower.
There are three main steps to shower tile installation:
- Waterproofing the shower
- Installing the tile
- Grouting and caulking
We’re going to break this tutorial down into those three parts.
Fair warning: This DIY project is not for the faint of heart!
Although shower tile installation is a rather labor-intensive project, you can definitely save a TON of money by doing this yourself.
Do your research and make sure you understand the in’s and out’s of the entire process.
As with any project, count on several trips to a home improvement store throughout the process.
How To Install Tile in a Shower: Step-by-Step
To get you started, here are the tools we used for this project:
- DAP Kwik Seal Ultra Premium Siliconized Sealant – buy it here
- DAP Silicone Max 100% Premium Kitchen and Bath Silicone Sealant (for shower niche) – buy it here
- Visqueen barrier at least 4 mil (or RedGard)
- Staple gun
- Concrete backer board >> two most popular options are Durock and Hardiebacker, learn the difference here
- Concrete screws
- Utility knife
- Cement board tape
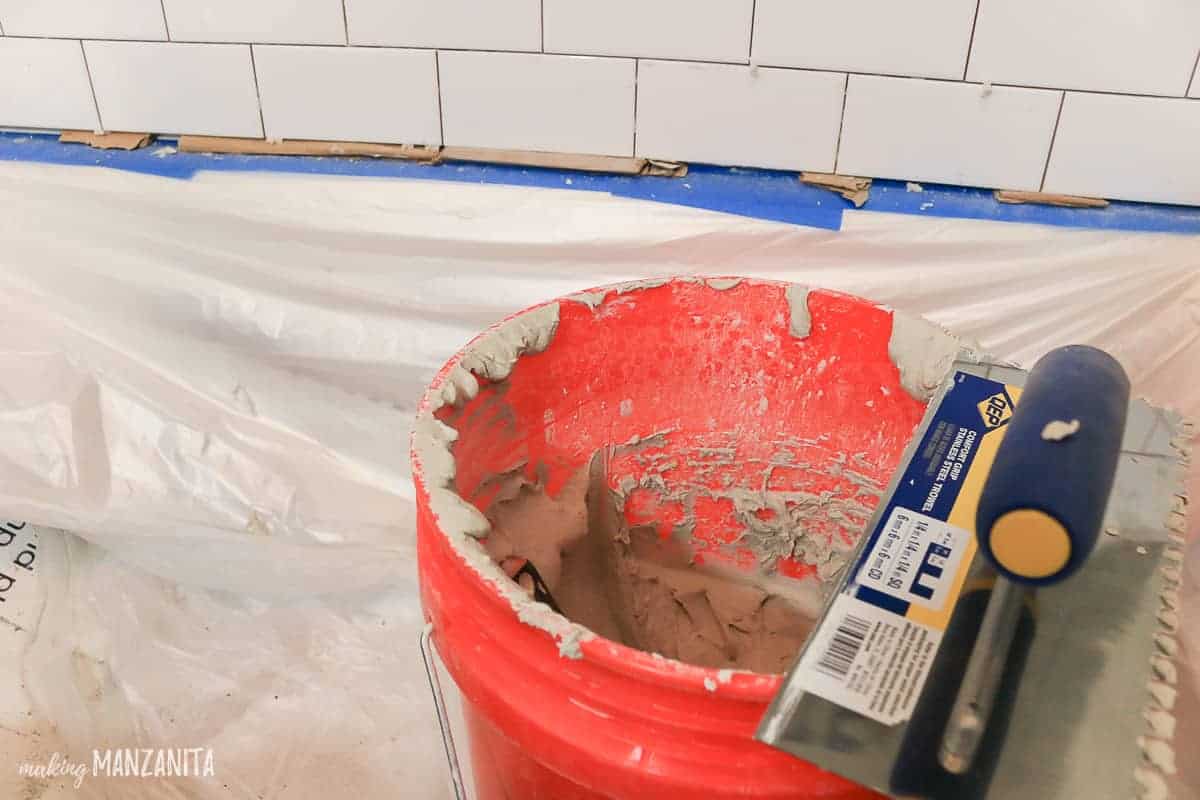
- Thinset mortar >> learn how to mix thinset here
- Trowel
- Buckets
- Sponge
- Shower tile – we used this classic white subway tile (measure the square foot area of the shower walls and then add 20% before purchasing)
- Grout
- Tile saw >> read this post about why you shouldn’t buy a cheap tile saw and learn how to use a wet tile saw here
- Rubber grout float
- Shower niche insert
Now that we have the right tools, let’s get started!
Part 1. Waterproofing the Shower
Before installing tile, you definitely want to be sure your shower is waterproof.
Contrary to popular belief, grout and tile alone is not waterproof. In fact, they are extremely porous surfaces that will absorb moisture and water.
If you do not waterproof your shower, you could end up with a dangerously moldy bathroom with a lot of water damage that needs another renovation!
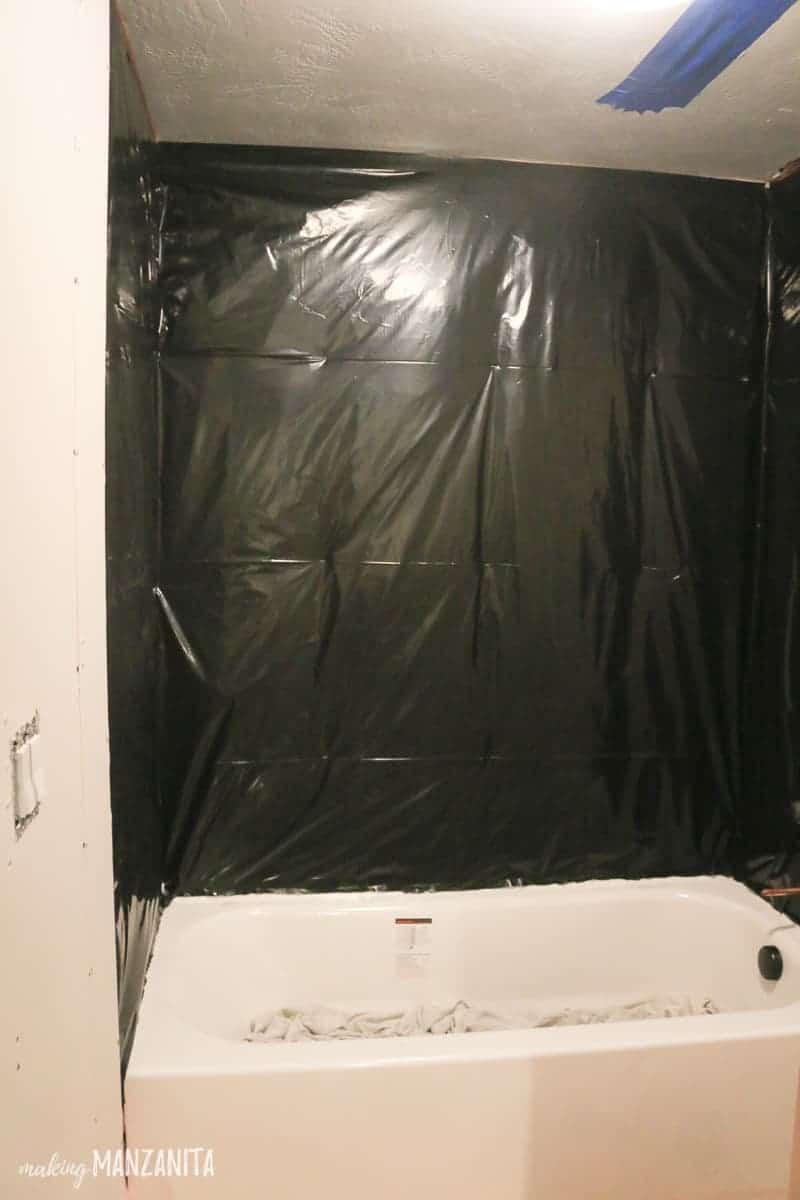
There are two common methods here of waterproofing a shower.
- Put up 4 mil plastic sheeting behind the concrete backer (that overlaps your shower pan liner, if applicable).
- Put up the concrete backer board and paint it with a high-quality waterproof membrane, like RedGard (and overlap that over your shower pan liner, if applicable).
To waterproof our shower, we used method 1. We stapled a Visqueen barrier directly onto the studs underneath the cement backer board.
This protects the interior wall if water were to somehow seep behind the ceramic tile, grout joints, thin-set mortar, and backer board.
We stress here….somehow. Again, if your shower tile is installed correctly, it’s very unlikely that water is going to get all the way back there.
However, it could cause a world of issues if it does, so you want to be sure you create a waterproof barrier…ya know, just in case.
What do you put behind the tile in a shower?
A cement backer board serves as a base layer to go behind the shower tile. It has no organic materials; therefore, it is not prone to mold, rot, shrinkage, or decomposition due to moisture. Tile can be directly applied to the backer board for a durable and stable structure.
When installing tile, you need a backer that is going to accept the thinset mortar, which is how your tile will adhere to the wall.
This great article from Floor Elf mentions that although cement backer board is not “waterproof” per se, it is “dimensionally stable when wet” – aka it won’t swell up. That’s why we still need to waterproof it somehow (see two methods above).
The cement backer board also provides a great surface for the thin-set mortar to grab onto because it has a mesh mat built into it.
Can you use green board in a shower?
You may be wondering if you can just use green board when doing shower tile installation. Spruce.com does an awesome job explaining just what “greenboard” is here.
You’ll find, according to expert advice, that, although green board is technically ok for slightly damp areas (like maybe a kitchen backsplash), it’s NOT a good idea to use it on shower walls on a tub surround (or a shower floor for that matter) that are subjected to a ton of water.
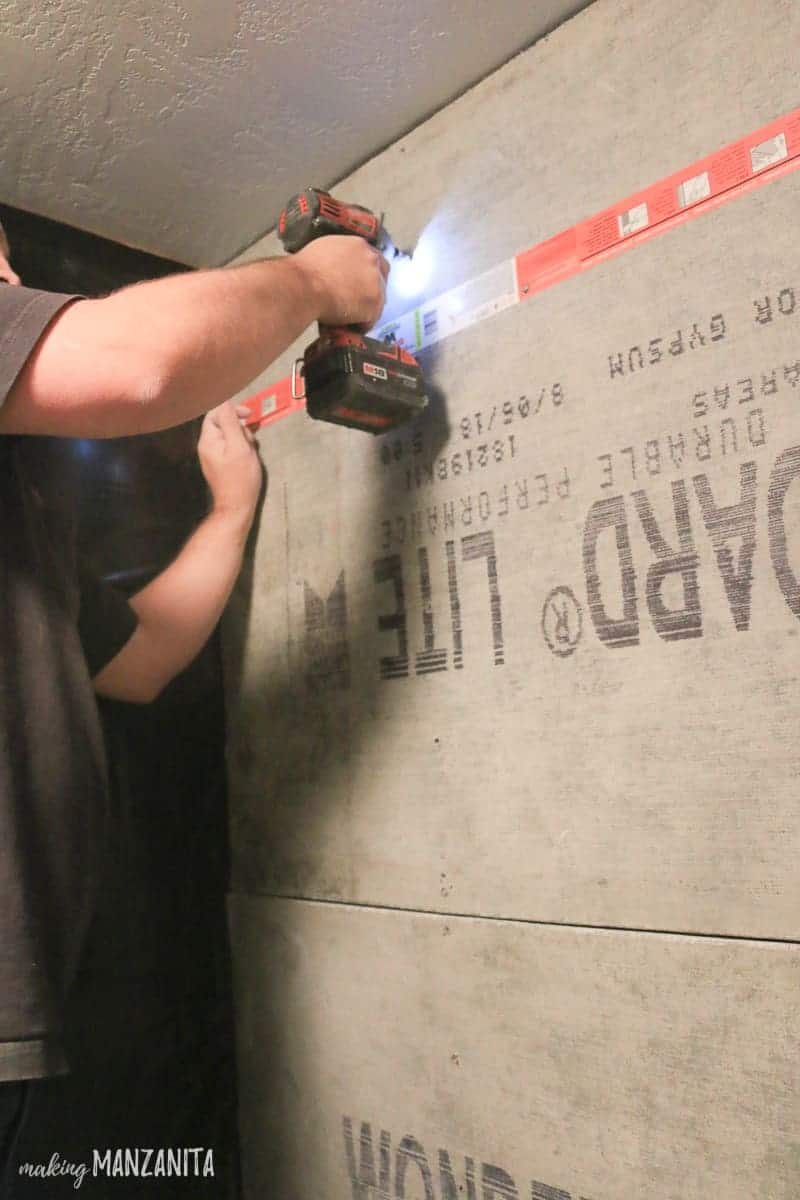
How do you attach the concrete backer board?
After you get your Visqueen barrier stapled to the studs, the next step is to attach the cement board using cement board screws where the studs are located and space the screws out every 6-8 inches.
Start your first cement board screw within 1/2” – 2 1/2” from the edge of the backer board (per manufacturer instructions of the backer board we used).
Learn more about how to install concrete backer board and how to cut cement backer board here.
Like I mentioned earlier, if you want to waterproof a shower with Method 1 (plastic sheeting under backer boards) – you can then go over the areas where you added the cement board screws with a dab of DAP Silicone Max.
If using Method 2 with RedGard over the entire surface, that will cover the screws so no need to add silicone here.
How do you waterproof cement board in a shower?
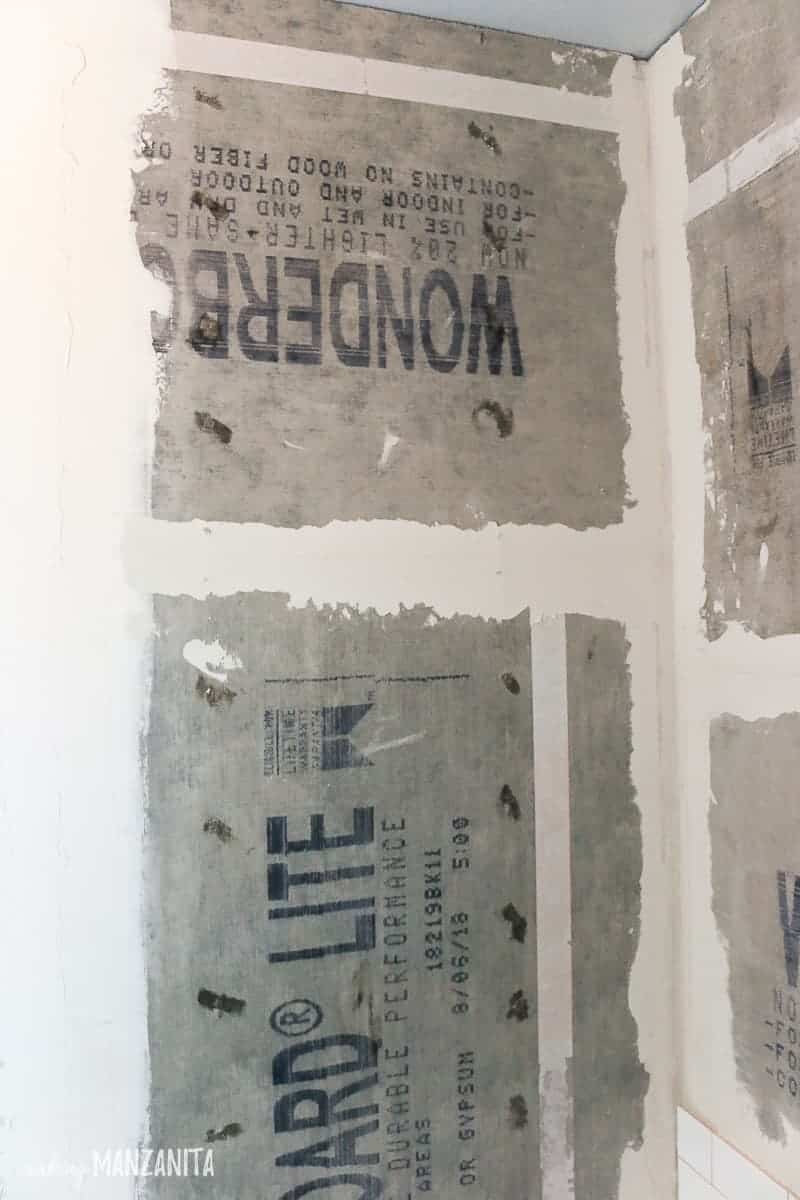
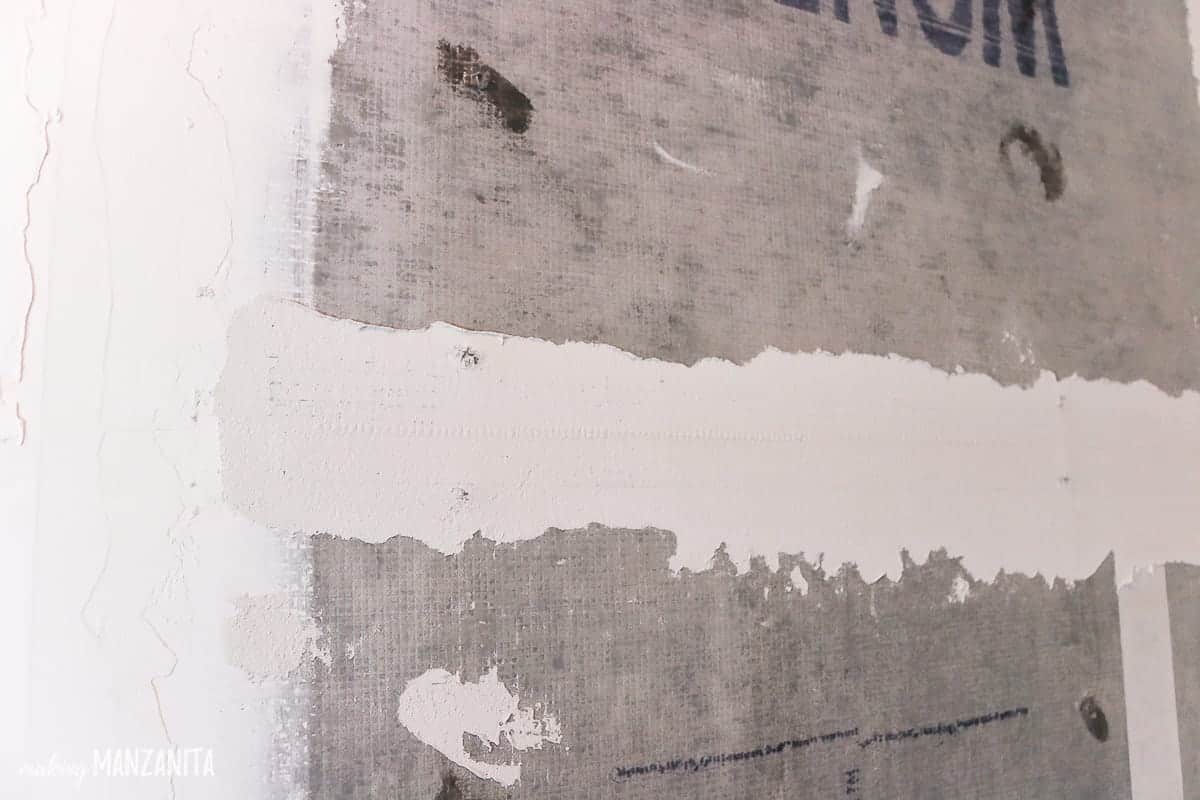
Make sure all of the corners and seams of the cement board in the shower are covered with cement board tape, then cover with thinset mortar using the flat side of your trowel.
Wait for the thinset to fully dry here before moving on with your shower wall tile installation.
This is a good way to bond the two boards together so there is a stable back behind the tile. You don’t want those boards shifting at all once your tile is set, which could lead to cracking on your finished tile work. Which would be not ok, right?
Regardless of which method of waterproofing your shower you choose – Method 1 (plastic sheeting) or Method 2 (RedGard or another type of waterproofing membrane), you still need to cover all joints, corners, and seams on the concrete backer with the tape and thin-set.
Note: If you decide to go with a waterproofing membrane instead of the plastic barrier behind the backer (Method 2), then you’ll apply the RedGard next and wait for it to try before starting to install your first tile.
Part 2. Installing the Shower Tile
When selecting shower tiles (if you need some good modern farmhouse tile ideas, you’ll love this post), keep in mind that the smaller the tile is — the more time-consuming the job. The shower tile size correlates directly with how intense your installation process will be.
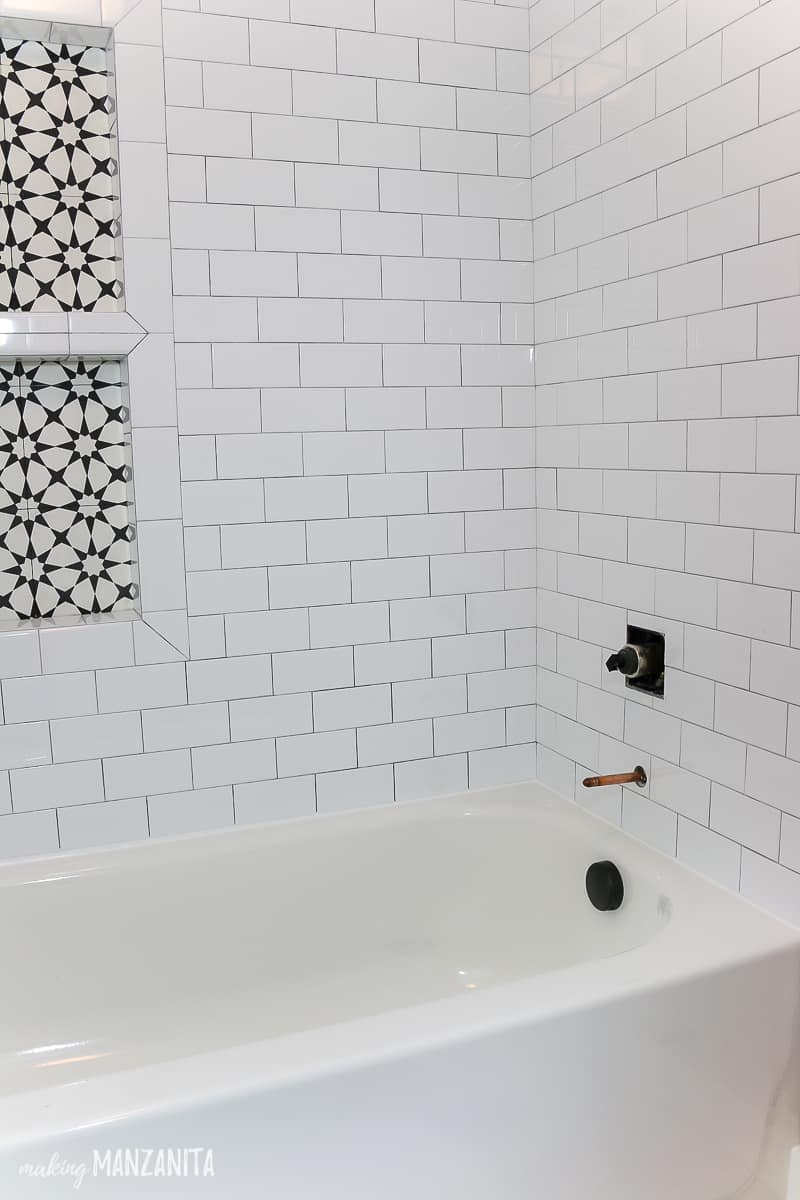
Much to Logan’s dismay – I love the look of classic white 3×6 subway tile. So, we had a big job ahead of us with this small tile.
If you have your heart set on a smaller-sized tile look, consider purchasing the tile in mosaics – which means that they will be grouped together on a mat, which makes it a little faster to install.
You can see that our floor tiles in this post were a mosaic, so we definitely saved some time there.
Tips for Tile Installation:
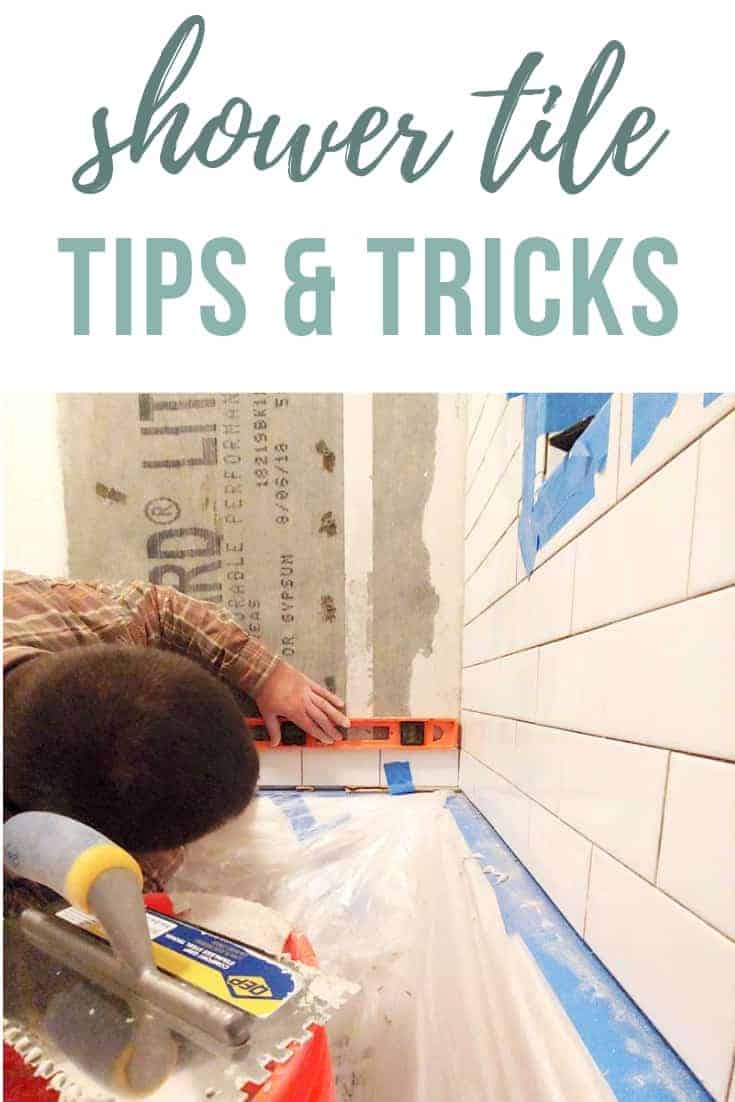
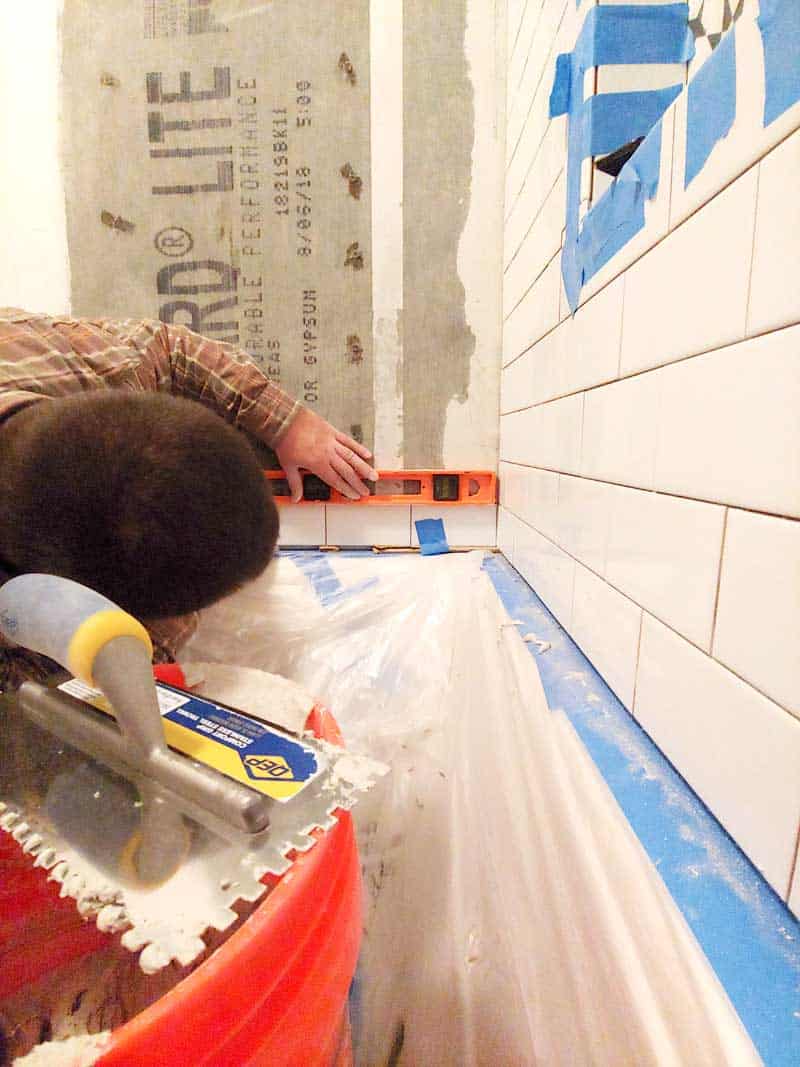
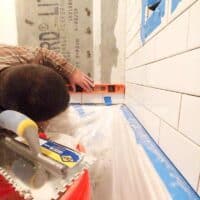
Possibly one of the most important parts of your shower tile installation is making sure things are nice and level.
If you’re installing tile above a bathtub, like we were, you also need to make sure your tub is perfectly level (more on installing a bathtub here). Lastly, be sure that the walls are square.
The first row of tile needs to be perfectly level, take your time on this one. For that first row, create a level line on your backer board and check things as you go with a level. You can also use a laser level here.
Another option for making sure everything is really level is to use a ledger board for the bottom row of tiles. This board would be screwed into place along a level line and the tile pieces would rest upon. Once the thinset as dried later, you remove the ledger board and add in additional tiles in the gap.
If applicable, insert tile spacers in between the tiles. Our small subway tiles have small ridges on the edges that allowed us to skip the tile spacers.
Continue working your way up the shower with the tile. Continue checking to make sure things are level – especially with that second row of tile.
Cut any pieces as needed with a wet tile saw or tile cutter. You can learn how to use a wet saw in this article.
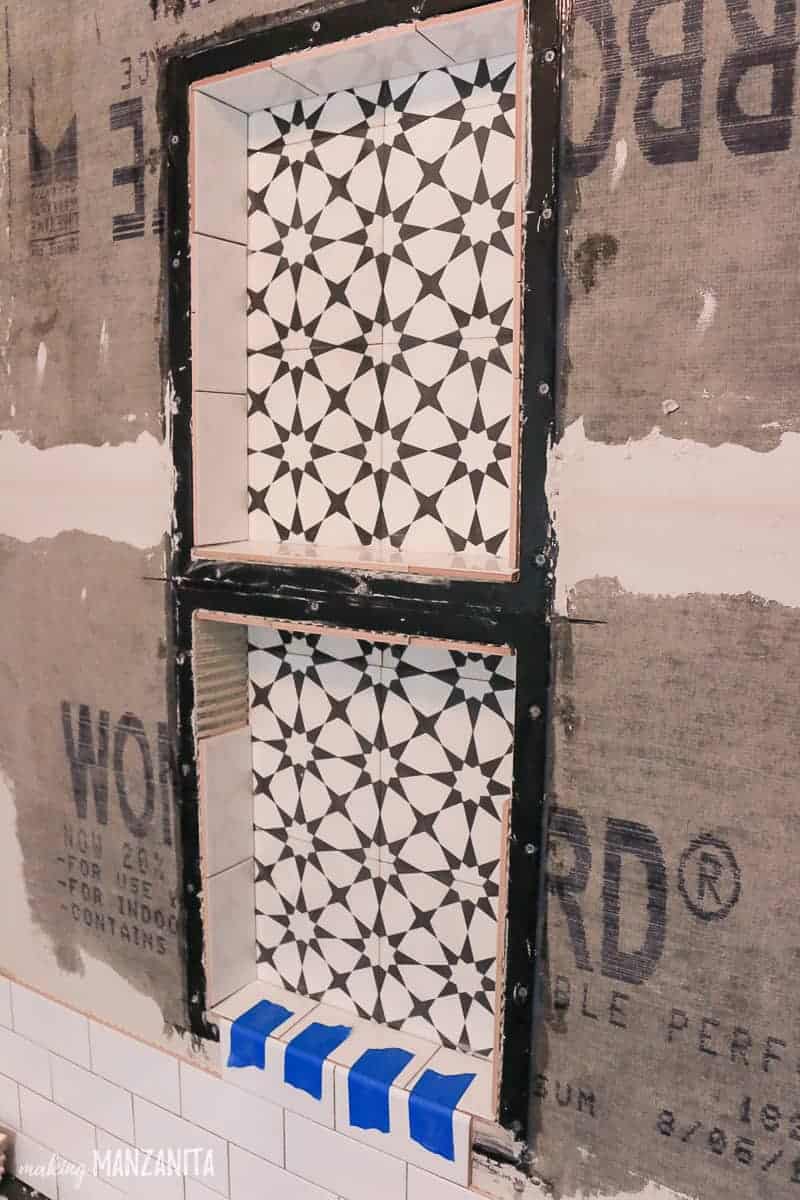
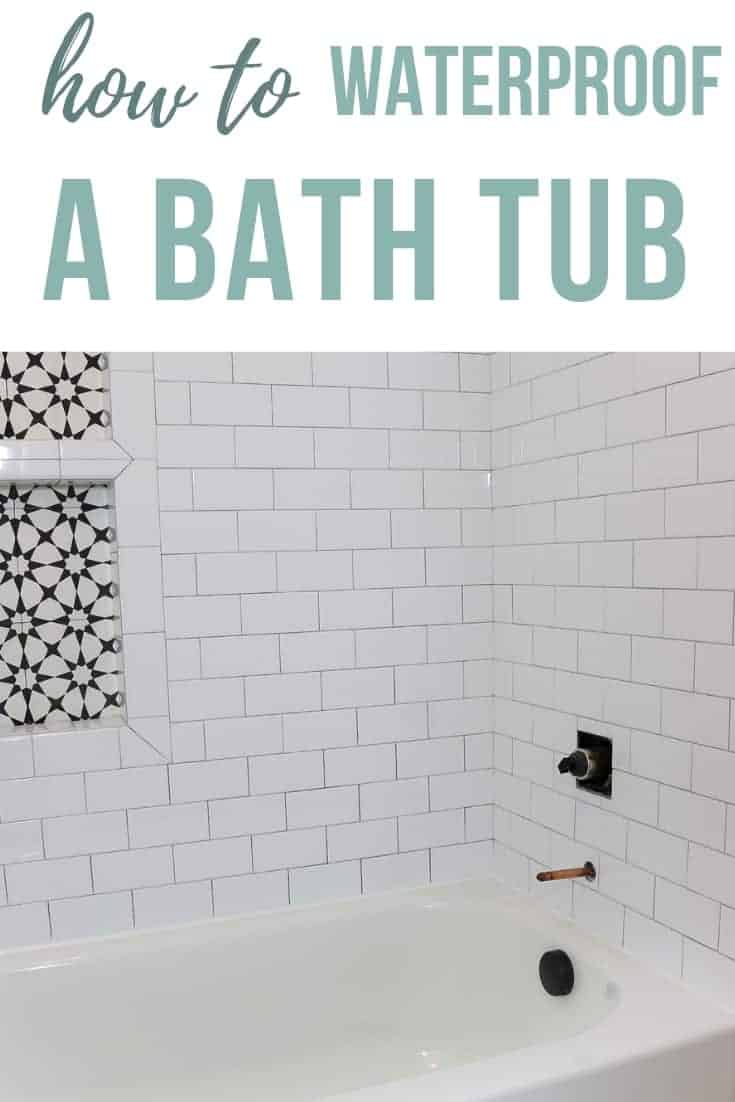
I think my favorite part of the entire bathroom so far is our cute little shower niche. The cement tile on the back of the shower niche adds so much character, don’t you think!?
Learn how to install a shower niche here (and learn about the ideal shower niche height here) and then see how we used the leftover tiles in this fun DIY project.
Part 3. Grouting and caulking
After your shower tile has been installed, wait 24 hours to be sure everything is perfectly dry, and then it’s time to grout.
How to grout tile
Grouting tile is really pretty easy. Just spread it over the tile and push the grout down using a rubber float held at 45 degrees so it gets in all of the gaps in between the tiles. Then, wipe clean with a slightly damp sponge.
Learn more about how to grout tile here.

Pro Tip: Be sure you read the manufacturer’s instructions for how long you should let the grout set before wiping with a wet sponge.
How long do you wait to wipe off grout?
We thought 10-20 minutes would be fine and we could come back and wipe it off (just like we had done on our tile floors last week), but NO CAN DO. This stuff had hardened by the time we got back to wiping it off.
We ended up having to come back and scrape the grout off the tiles later and it was a super tedious process (about 3.5 hours of both of us working on it), so double check the drying times for your grout. We’ve never made this mistake again!
It can be best to work in small sections when grouting.
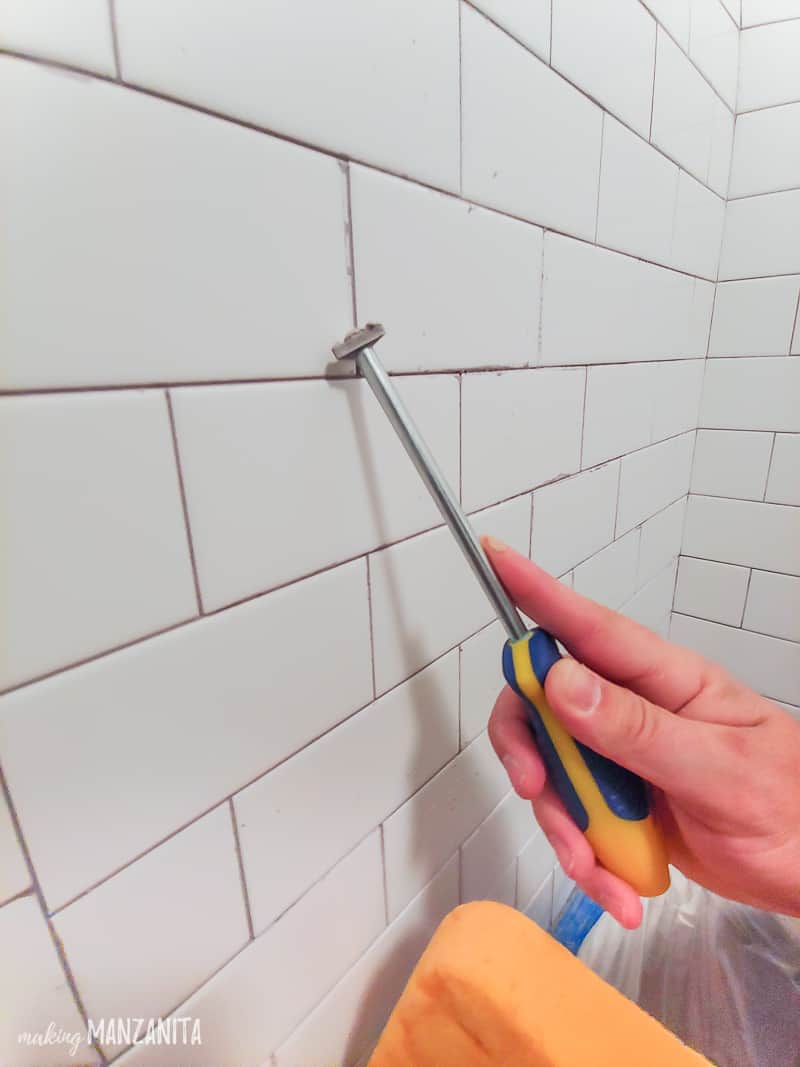
To get rid of the hardened grout, Logan used this handy grout removal tool to scrape the hardened grout off of the tile and clean up the grout lines, while I used a razor blade.
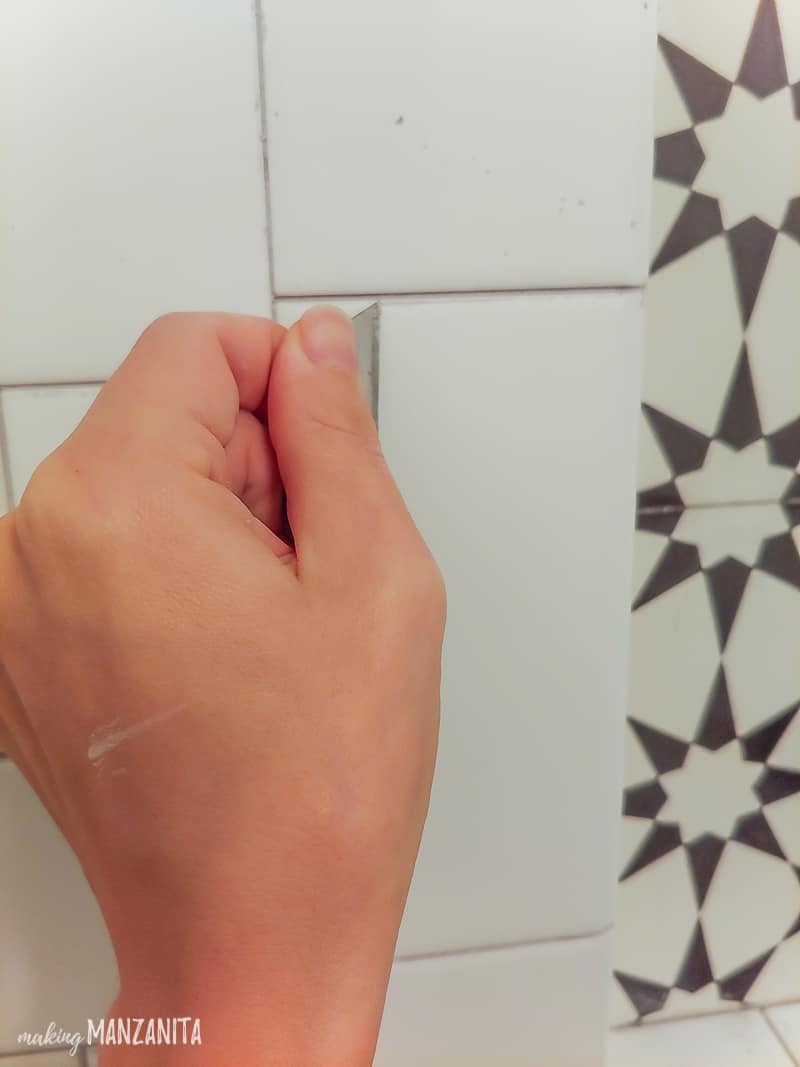
At this point, you want to take a look at your grout lines and make sure they are nice and clean.
Fix anything as necessary, then wait at least 2 hours to wash the grout haze off of the tile with a grout haze cleaner. Distilled white vinegar mixed with water works well, too. Roughly mix 3 parts water with 1 part vinegar.
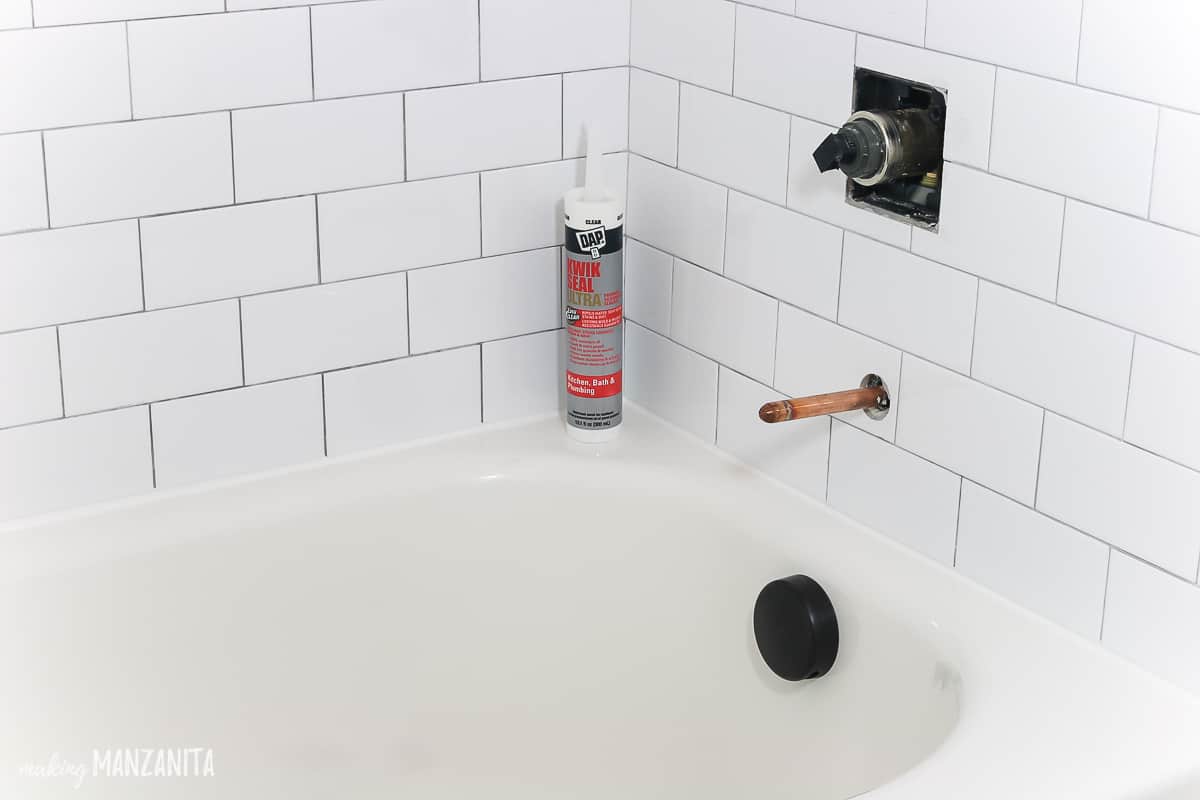
After the grout is complete, it’s time to move on to caulking – the final piece of the project.
How do you caulk around a shower?
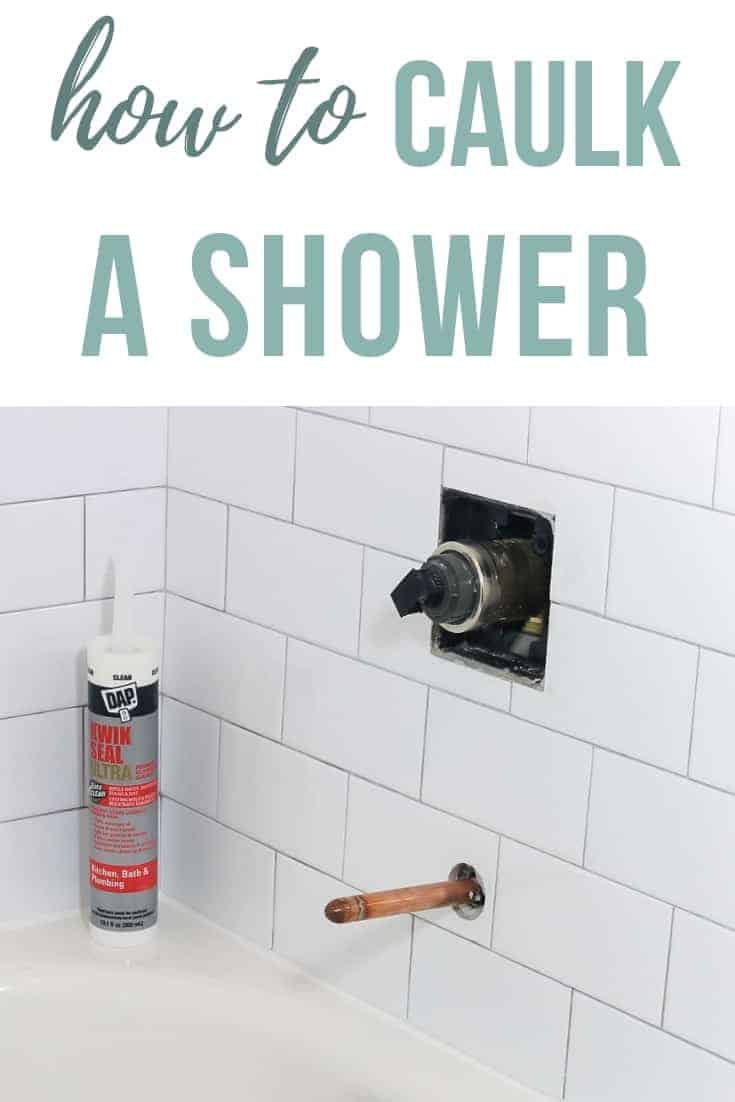
If you’re confused about what type of caulk to use and how to apply it – check out our full article of caulking tips and tricks!
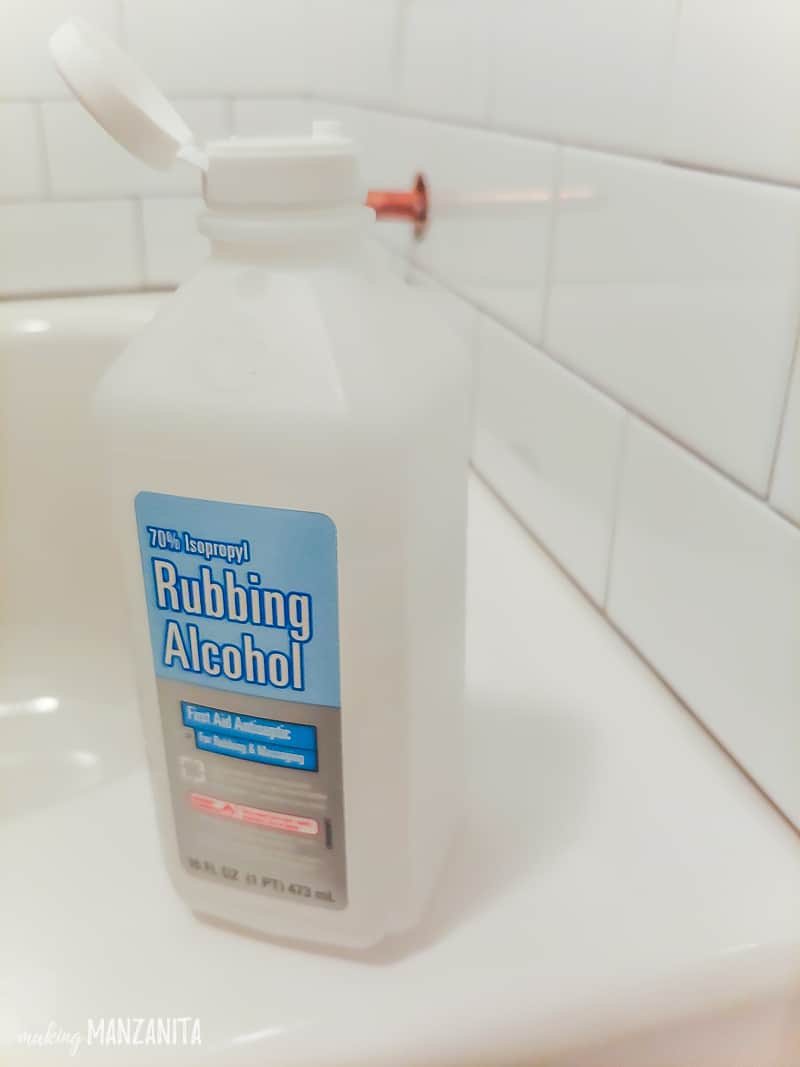
- Make sure the area you’re going to seal is clean and dry. We recommend applying rubbing alcohol to the seam to remove any residue.
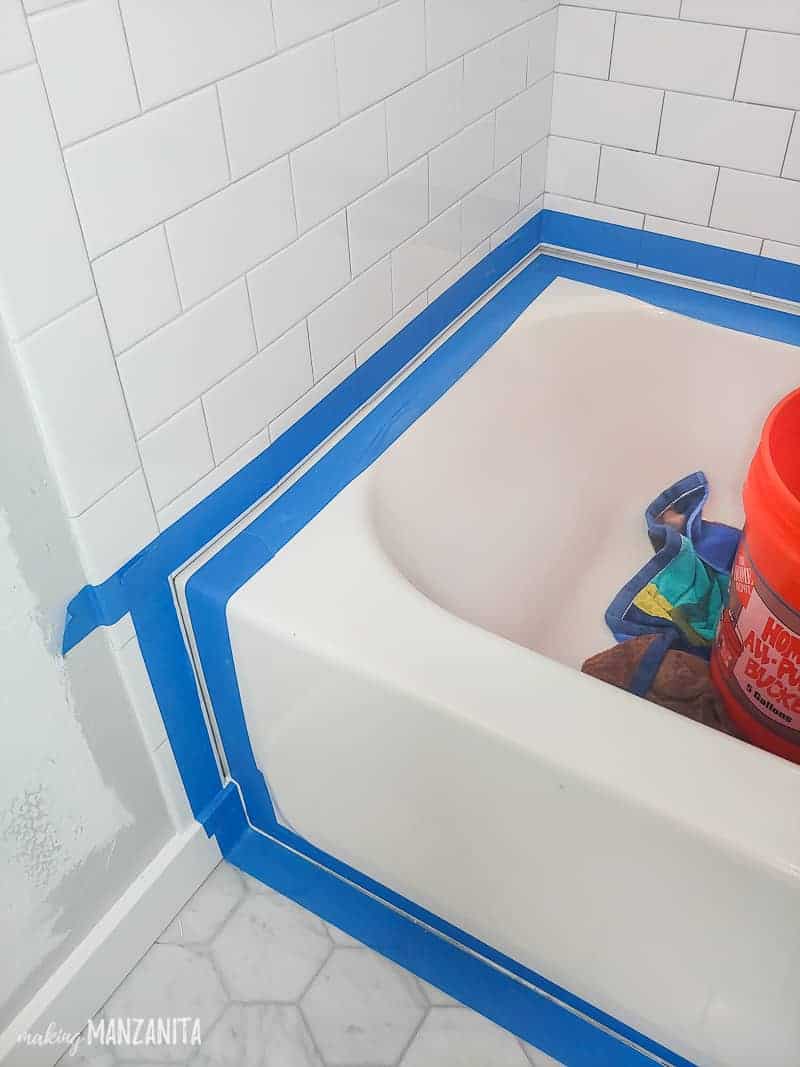
- It’s a good idea to add painter’s tape to both sides of the seam before adding the shower caulk. This will give you nice crisp lines.
- Cut the nozzle of the Kwik Seal Ultra caulk at a 45-degree angle and load into your caulk gun.
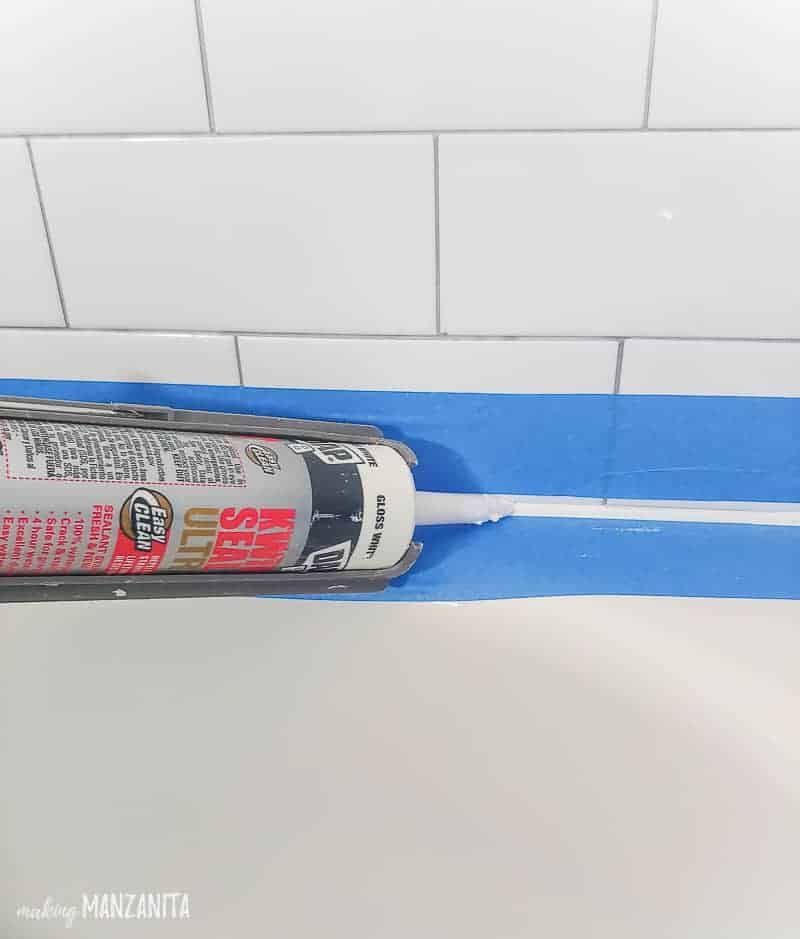
- Hold the caulk gun at a 45-degree angle to the joint and gently squeeze the trigger with steady pressure to apply an even and consistent bead of sealant.
- Move the caulk gun slowly and steadily, filling the joint with sealant.
- Immediately after adding the caulk, smooth the bead of shower caulk with your finger slightly wet or you can grab a caulk finishing tool.
- Be sure to remove the painter’s tape while the shower caulk is still wet. Don’t make the mistake of letting it dry entirely!
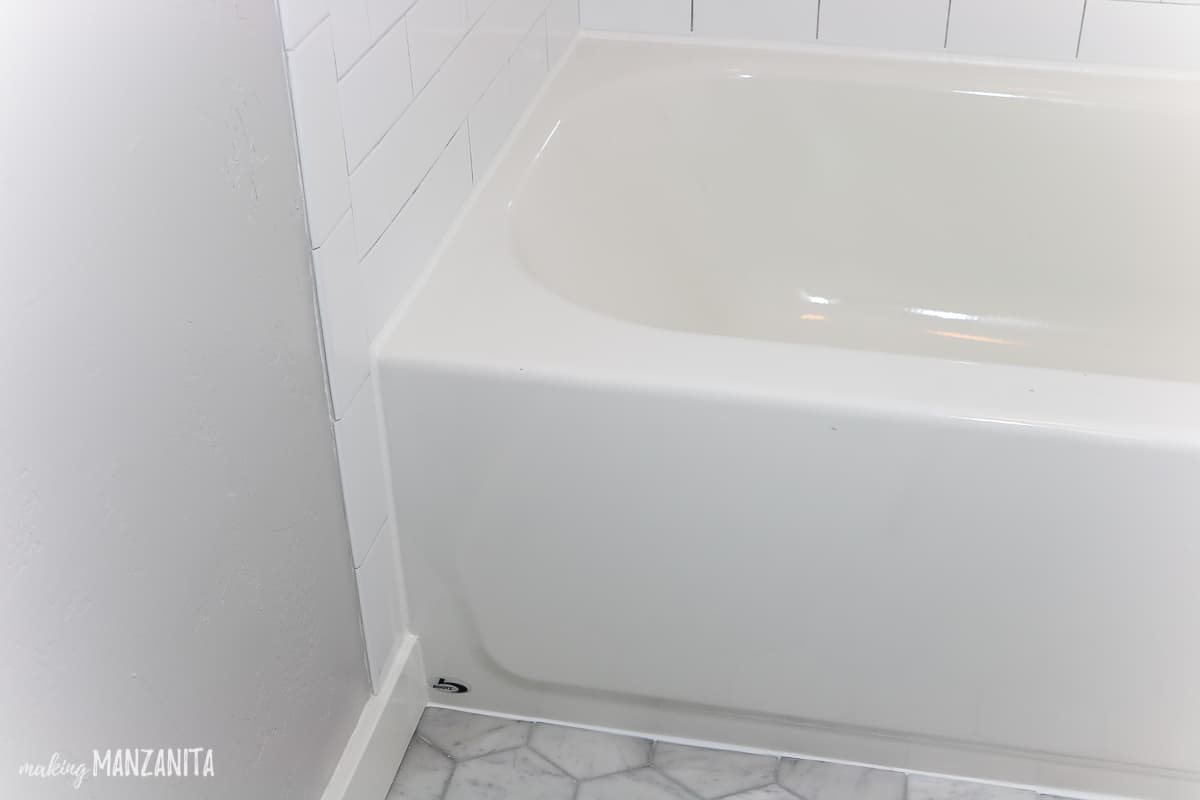
Where do you add shower caulk?
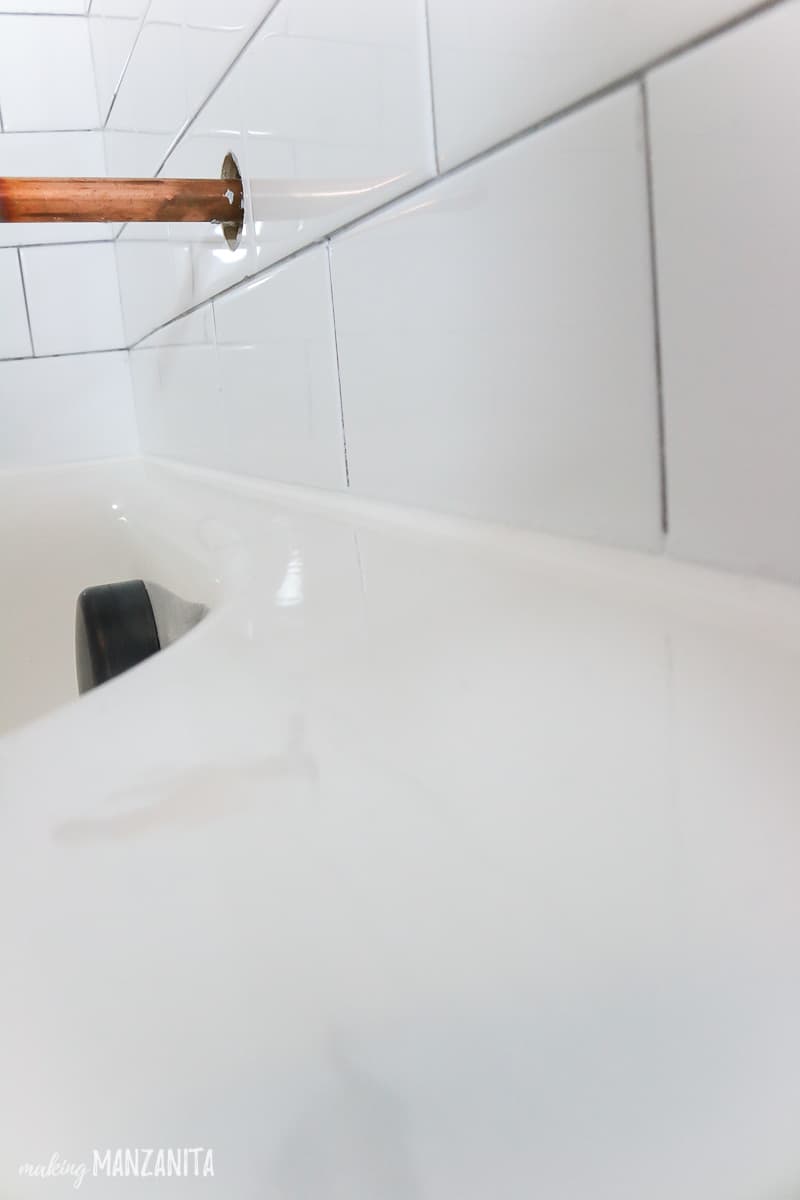
When adding shower caulk, be sure to get any joints or corners. Where the bathtub meets the tile wall, where the bathtub meets the tile flooring, all corners, ceiling, and in all corners of a shower niche.

As you can see, shower tile installation is a pretty labor-intensive home improvement project. Understanding the whole process of how to install tile in a shower will leave you with a beautiful bathroom to be proud of!
Do you have any other questions about how to install tile a shower? Let us know in the comments below if so!
Ready for our modern farmhouse bathroom renovation update of the week??
First of all, let me remind you that we’re sharing the renovation as part of the One Room Challenge, which is a bi-annual event where hundreds of bloggers join together to renovate one room in their home and share about it over 6 weeks. Be sure to check out all of the rooms getting renovated here.

If you’re just joining us, be sure to go catch up on all of our One Room Challenge posts:
- One Room Challenge Week 1: Bathroom Renovation Pictures (Before)
- One Room Challenge Week 2: Modern Farmhouse Bathroom Mood Board
- One Room Challenge Week 3: How To Stay Organized While Renovating (+ Free Project Planning Worksheet)
- One Room Challenge Week 4: 9 Modern Farmhouse Tile Ideas (+ How To Tile A Floor)
- One Room Challenge Week 5: How To Install Tile in a Shower – you are here! (+ Shower Niche Installation Tutorial)
- One Room Challenge Week 6: THE BIG REVEAL!!! << see how the bathroom turned out!
Well, we’re at the finish line of the One Room Challenge! I can’t BELIEVE there is only one more week left. We are down to the wire and every day counts at this point. We have a clear plan on how to wrap everything up in time….now we just have to keep our fingers crossed that all goes as planned.
We’ve had more than a few VERY late nights recently as we have been working on the tile wall above the vanity and the entire shower tile installation.
As I mentioned above, the shower niche really slowed us down a bit. And then there was, of course, the great grout drama of 2018.
The to-do list for the rest of the week is pretty full with the installation of the toilet, all accessories, lights, faucets, mirrors….and then Logan will (ya know as Chip would say…) “pass the baton” to me to decorate and style the bathroom.
I’ve got high hopes that I’m going to miraculously have time to create some DIY frames and wall art as well…I’ve got the plan in my noggin’, now I just gotta get the supplies and find some time!
Here’s the full to-do list for our modern farmhouse bathroom renovation:
Build wallsLearn how to build a wall here!Install electricalRough in plumbingInstall exhaust fan/light in water closetInstall insulationBuild divider wall for water closetInstall pocket door on divider wallLearn how to frame a door in a wall here!Install bathtub & drainLearn how to install a bathtub here!Hang drywallHang wonderboard on walls & lay on floorsLearn how to install backerboard here!Texture dry wallLearn how to texture drywall here!Lay tile floorsLearn how to tile a floor here!Seal tile floorsGrout tile floorsLearn how to grout tiles here!Install vanityInstall toilet flangeInstall countertopTile surround in showerTile wall behind vanityInstall trim & baseboardsPaint ceilingLearn how to paint ceilings here!Paint wallsLearn how to paint a room here!- Install vanity faucets – Learn how to install a bathroom faucet here!
- Install toilet
Add vanity lights- Install bathroom accessories
- Make DIY wall art (….maybe? If I have time, ha) – See how the DIY poster frames turned out here!
- Hang shelves above toilet
- Decorate!
Huge thanks to our official sponsors of this renovation!

Dap | Avanity | The Builder Depot
Want more behind the scenes looks at our modern farmhouse renovation?
If you want tons of behind-the-scenes update on our modern farmhouse bathroom One Room Challenge renovation, the best place for you is our Instagram Stories!! If you want to catch up from the beginning, head over to our Instagram profile and watch here. Be sure to follow our account to see you can see the day to day updates and help us out with decisions like these below…Our IG followers helped us already by giving us feedback on dividing walls for water closets and the floor tile options!
How To Install Tile In A Shower
Shower tile installation can be broken down into three key steps: waterproofing, tile application, and expert grouting and caulking. Here's the process.
Materials
Instructions
- Waterproof shower - There are two methods to choose from: (a) Put up 4 mil plastic sheeting behind the concrete backer (that overlaps your shower pan liner, if applicable) or (b) Put up the concrete backer board and paint it with a high-quality waterproof membrane, like RedGard (and overlap that over your shower pan liner, if applicable).
- Add concrete backer board, attach with cement board screws every 6-8 inches
- If using plastic sheeting under backer, go over screws with DAP Silicone. If using RedGard, no need to do that
- Cover all corners and seams with cement board tape and cover with thinset mortar using flat side of trowel
- If using RedGard, do that now
- Make sure your bottom row of tiles is very nice and level. Install tile in the shower from the bottom up. Cut any pieces with tile.
- Add shower niche insert if applicable.
- Wait 24 hours for the mortar to dry.
- Grout spaces between tiles with rubber float held at 45 degrees pushing the grout into all the spaces. Wipe clean with a slightly damp sponge.
- Wash off grout haze with vinegar and water (3:1 water to vinegar ratio)
- Caulk all corners and seams around the shower and bath.


wow that’s a great tile tutorial!! I have never tried tiling myself before but now that’s an inspiration! love a crisp white bathroom. can’t wait to see the finished room next week!
Thanks….Fingers crossed that we can finish in time!
Hey Chelsea! Great post! You guys are really rockin the DIY right out of that shower. I’m so impressed. I’m remodeling a bathroom, too…..but I had to hire guys. Boo! Me!! I’m also trying to catch up with your posts that I’ve missed ….and looking so forward to seeing the reveal. Hang in there…. it’s almost Reveal Wednesday!! ~~ Susie from The Chelsea Project
Thanks Susie! It was a huge project to tackle, but I’m so glad all that tile is done.
Wow those tiles look amazing, so fresh and crisp! Looking forward to your reveal!
Thanks Linda !
It was a very educational project! I never thought I could do a bathroom, but it turned out better than I expected.
Thanks so much for your words of encouragement.
Thanks for sharing all these great details! The shower looks amazing! We’re in the middle of a remodel that includes both subway tile (kitchen backsplash) and that cement tile (powder room floor) which is how I’ve stumbled upon your post. I wanted to see if you would share what color grout you used between the subway tile and the cement tile? Any issue with the darker grout staining the cement tile?
And what size spaces did you use in each case?
Thanks!
Hi there! We have always used a gray grout for all tile installations (both bathrooms and our kitchen backsplash). I like that there’s a bit of contrast with the gray and that it doesn’t get as dirty as white over time – but also that it’s not super dark, like black, which has a tendency to show any imperfections in the tile or installation. They always stick out like a sore thumb when there is black grout.
Cement tile can be tricky like you mentioned with sealing/staining. To help, cement tile can be pre-sealed before installing or grouting. Here’s some info about pre sealing: https://www.aventetile.com/pages/benefits-of-pre-sealing-cement-tile
In our most recent bathroom renovation (seen here: https://www.makingmanzanita.com/modern-bathroom-reveal/) we incorporated a tile that had the exact same pattern as the cement tile in the bathroom shown here but it was actually a porcelain tile not cement so it was a great option.
For spacers, every type of subway tile that we’ve used in the past had ridges on the edges which prevented the need for spacers and gave us about a 1/16 space just by butting the tiles up against each other. For the cement tile, we used 1/16 spacers I believe.
Good luck 🙂
Did you use any type of tile “edging” or did you just grout the outside edge around the bullnose? My husband is getting ready to tile a small shower stall and is asking me which I’d prefer. We’re doing 3×6 subway tile with gray grout so it will be very similar. I’d prefer to just have grout I think but is that a pain in the butt to get a nice even line around it?
Oops, I just noticed you didn’t use a bullnose but just ended with the tile?
Hi there! We did, in fact, incorporate a bullnose subway tile on the front edge of the tile. I like this option because the bullnose edge is worked into a piece of subway tile instead of needing to add a narrow “trim” piece of tile. Here’s the bullnose subway that we used: https://www.thebuilderdepot.com/bridgeww3x6nose.html
I love your post, thank you so much. Can you please post how you guys did the shower niche? I would like to include it in my diy shower project as well!
We have a whole article about that: https://www.makingmanzanita.com/shower-niche-installation/
Hi!! I’m obsessed with the shower niche tile you used, do you have a link to where it is from ?!
Yes, here is the link to the black and white tile in the back of the shower niche: https://www.thebuilderdepot.com/cemtatlasblack.html Keep in mind that it is a real cement tile, so it requires sealing before installing.