How To Build A Rolling Tool Cart with Pegboard

Thank you to Kreg for sponsoring this rolling tool cart project! All opinions are entirely my own. This post also contains affiliate links, but nothing that I wouldn’t recommend wholeheartedly. Read my full disclosure here.
We’re always looking for more creative tool storage in our workshop! A while back we built some tool storage shelves to go under our Kreg clamp stand. And those are still working out great for us, but we’re starting to outgrow them as we add to our collection.
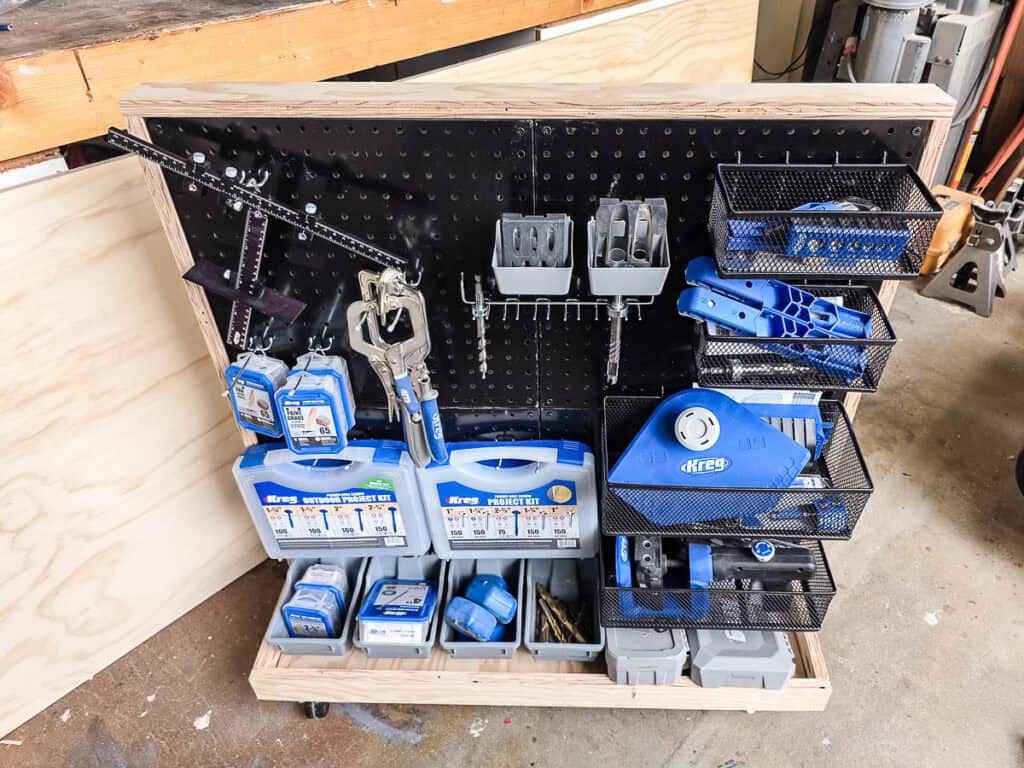
Logan came up with this rolling tool cart idea because he wanted something mobile that he could easily wheel around the shop as he was working. It is large enough to hold big tools that can be tough to store and also has spots to store small tools and accessories with the pegboard.
Kreg 720PRO Pocket Hole Jig
If you’ve been following Making Manzanita for a bit, you know that we are big fans of the Kreg pocket hole system.
Pocket hole joinery is definitely one of the easiest ways to join wood in woodworking projects. It’s our favorite hidden weapon for beginning woodworkers!
Want to learn more? I wrote a super detailed guide & created a video all about how to set up your Kreg 720PRO Pocket Hole Jig and use it, so be sure to check that out too!
We teamed up with our friends Kreg again for these tool cart plans and are sharing them online for free, now available on KregTool.com!
Kreg’s website is chocked full of so many easy-to-follow FREE woodworking plans! I promise that you are going to find so much inspiration while you’re there! It is a goldmine!
DIY Tool Cart: Step-by-Step Instructions
Tools & materials you’ll need
I love that you only need one sheet of plywood to complete this woodworking project!
Step 1: Cut wood
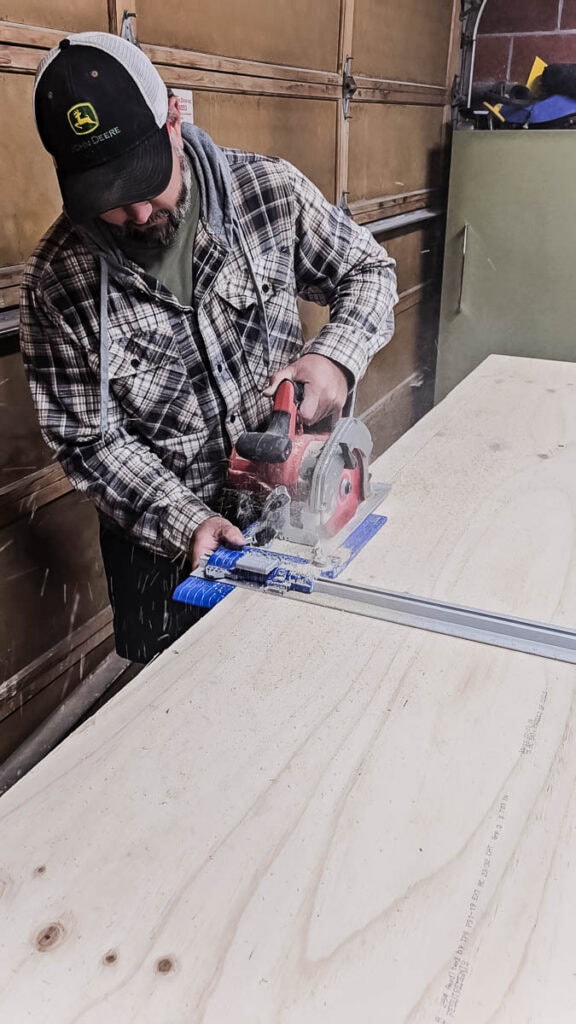
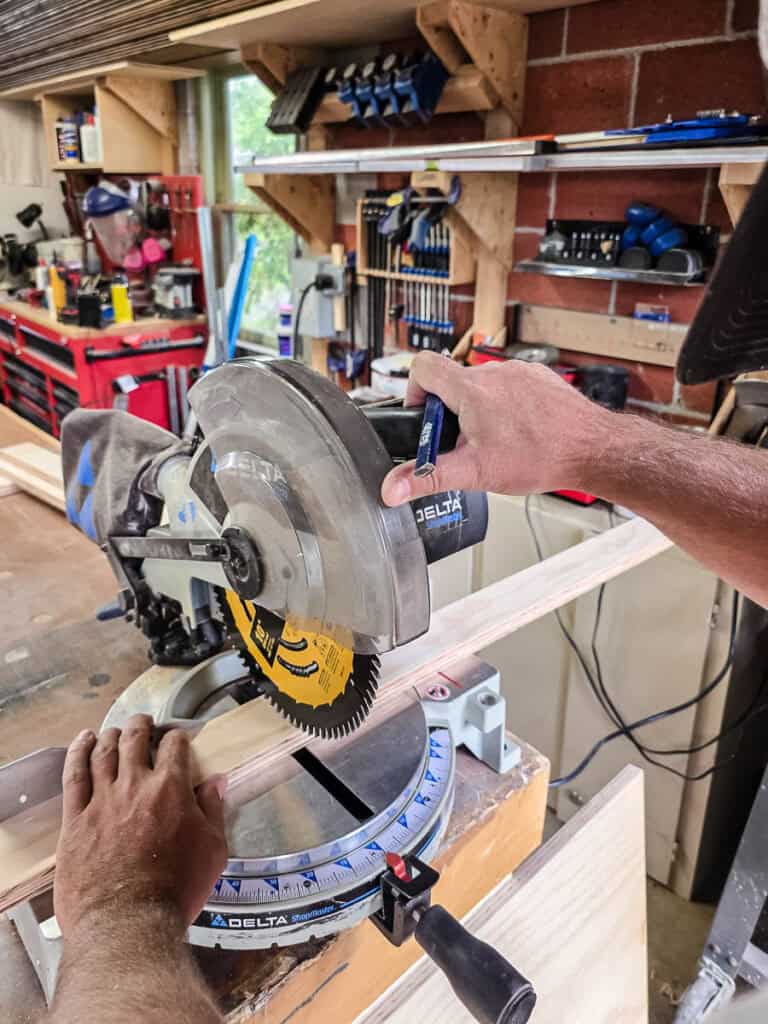
- Cut your plywood down to size according the cut list in the free plans, which you can download here.
- Use a miter saw for the lengths.
- Use a RipCut, AccuCut, or table saw for the rip cuts.
Step 2: Drill pocket holes
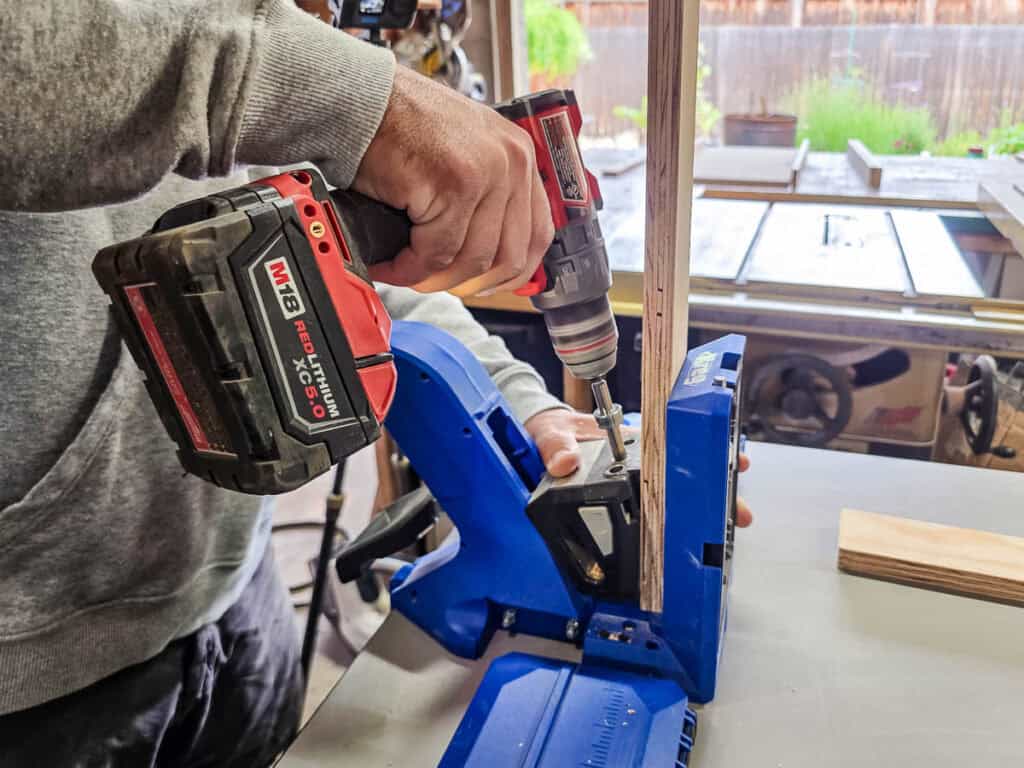
- Drill pocket holes where shown in the plans. We used the 720Pro jig for this.
Step 3: Assemble the base
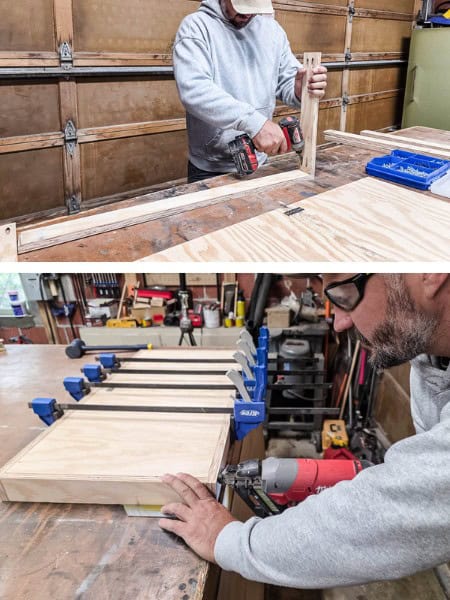
- Attach the four outer pieces of the base frame using 1 ¼” pocket hole screws.
- Slide the interior base piece into the frame so it’s flush on one edge.
- Clamp it in place and secure it with 1 ½” finish nails.
Step 4: Assemble and attach the top frame
- Connect the three pieces of the top frame with pocket hole screws.
- Center this frame on the base, standing upright, and attach it.
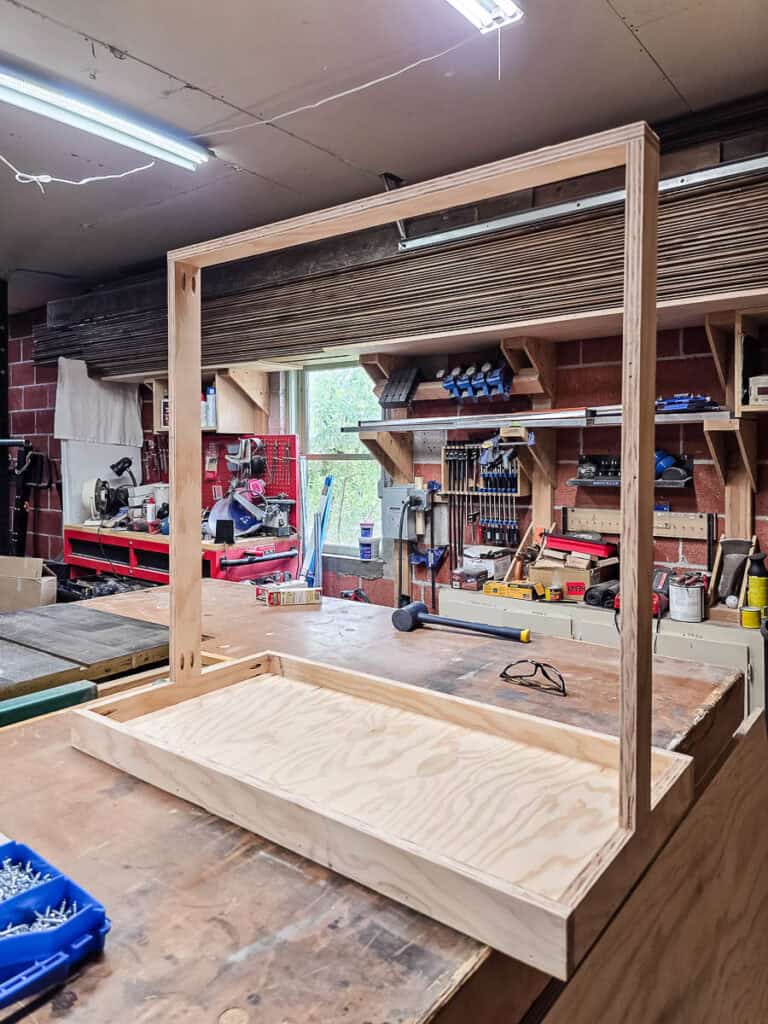
Step 5: Add interior piece for the top
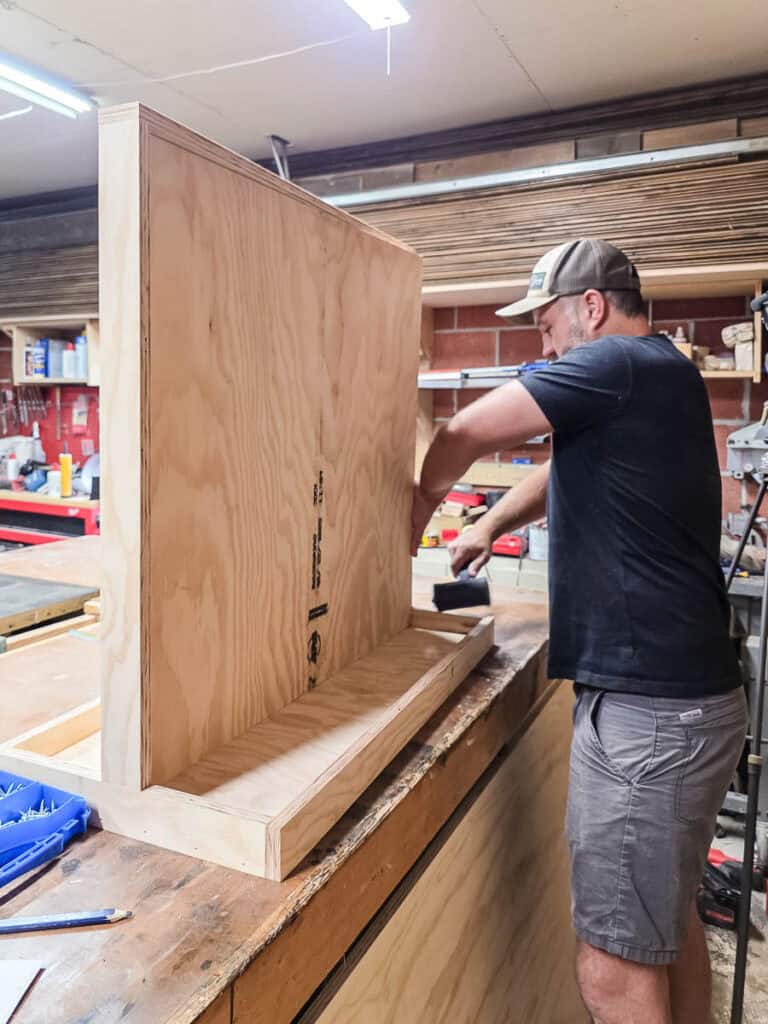
- Slide the top’s interior piece into the frame (a rubber mallet helps if it’s snug).
- Make sure it’s flush on one side.
- Clamp and secure it with 1 ½” finish nails from the outside.
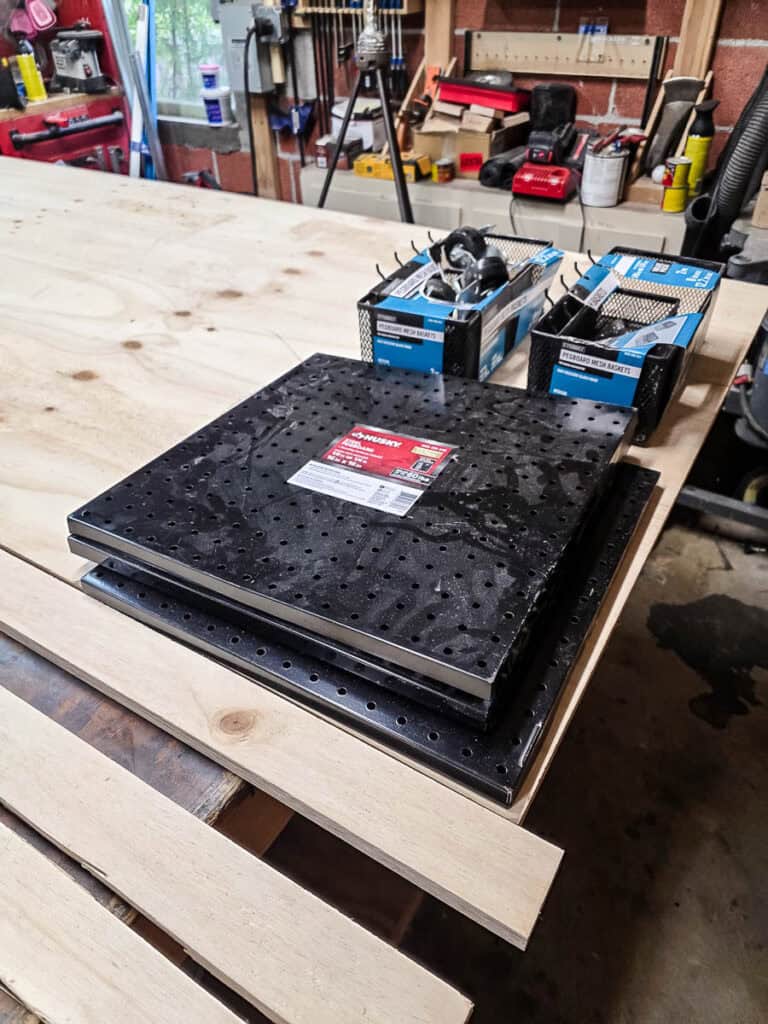
Step 6: Add pegboards and casters
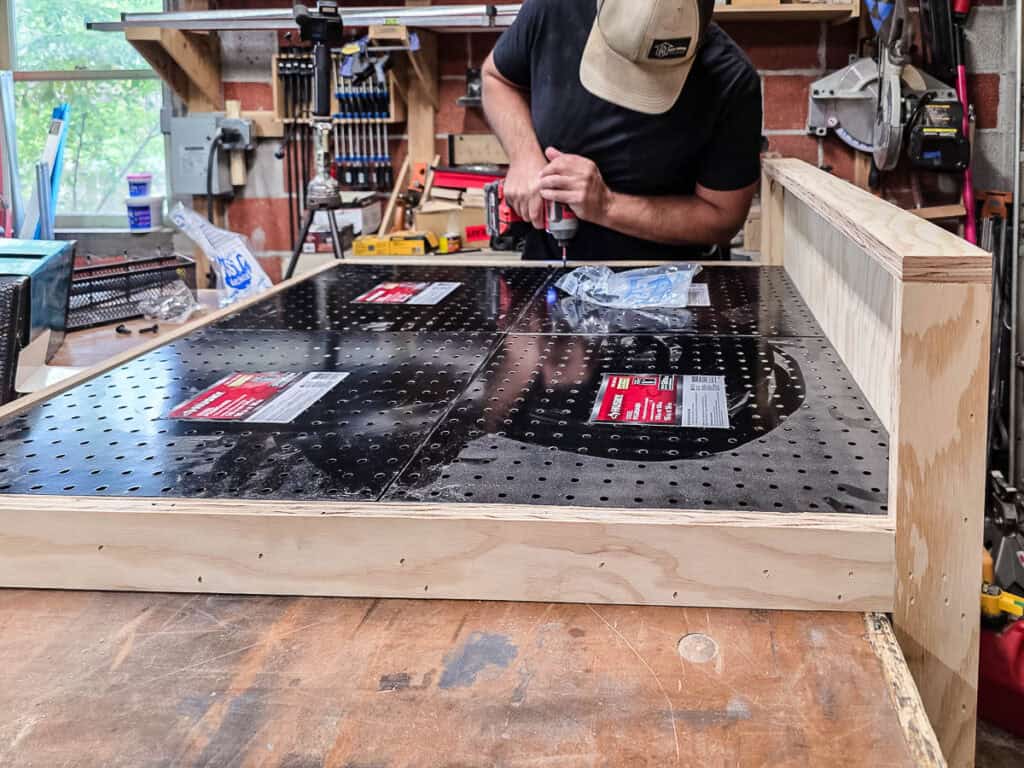
- Attach the metal pegboards using the screws that came with them.
- Install casters at each corner of the base.
Step 7: Add baskets and tools
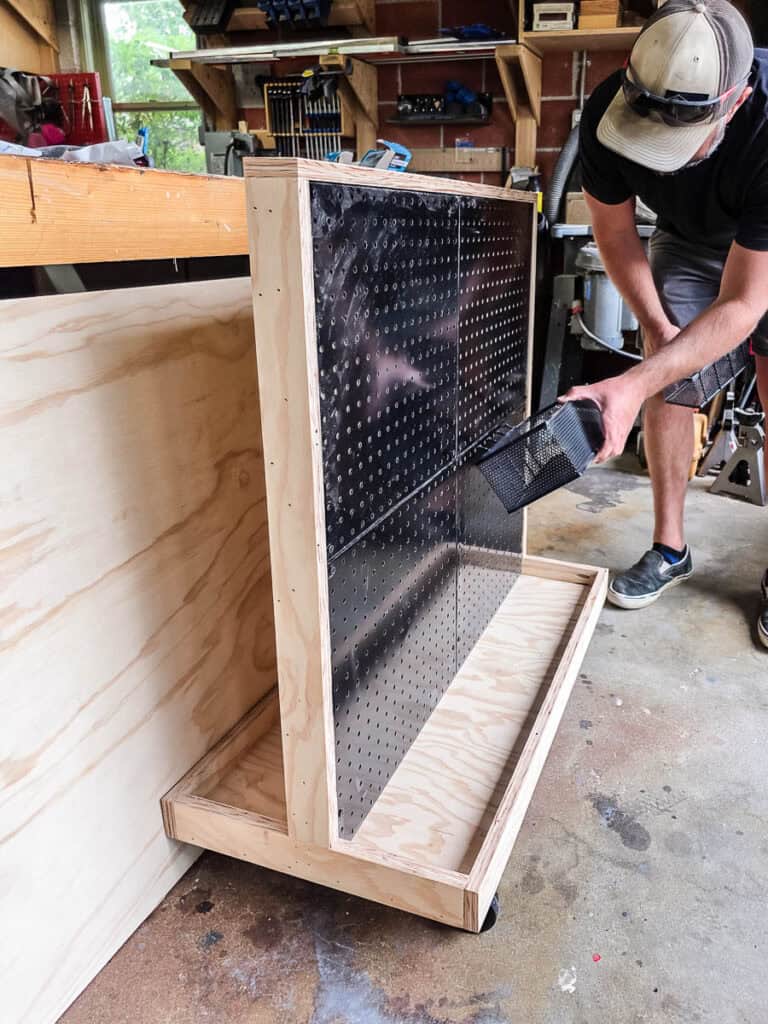
- Now the fun part—organize!
- Hang your baskets, accessories, and tools on the pegboards.
- The back side is perfect for larger tools (like your RipCut or bar clamps).
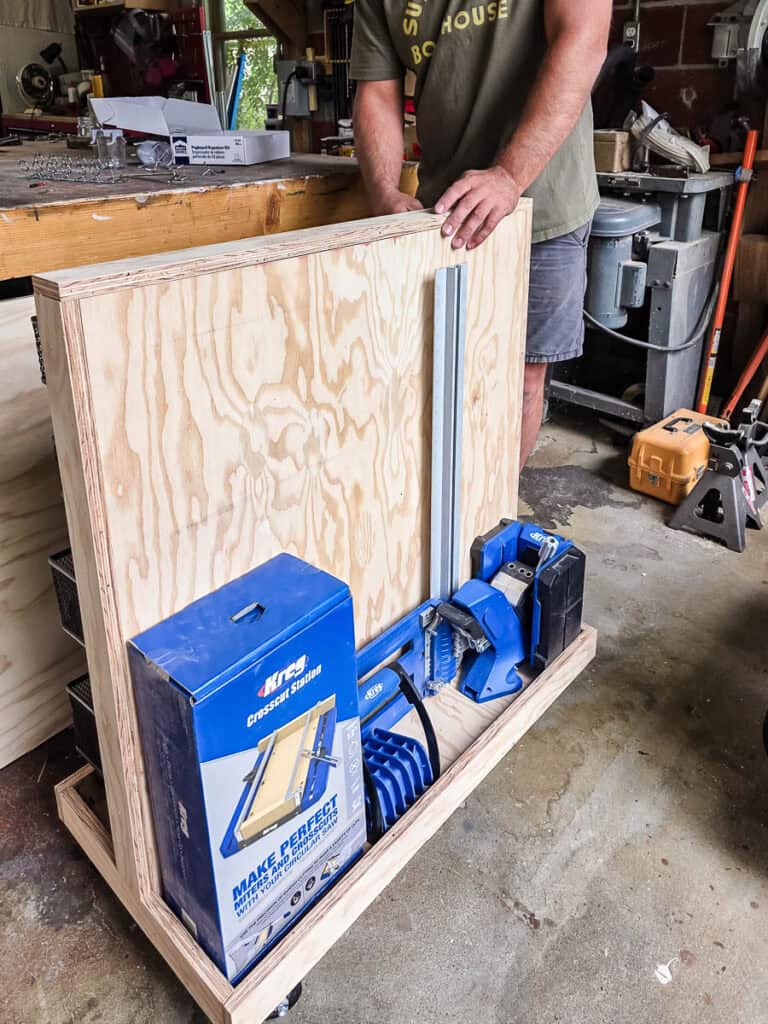
This rolling tool cart was really the perfect solution to our problem. We now have convenient places for some of our bigger tools, like the RipCut and small spots for things, like pocket hole screws and plugs.
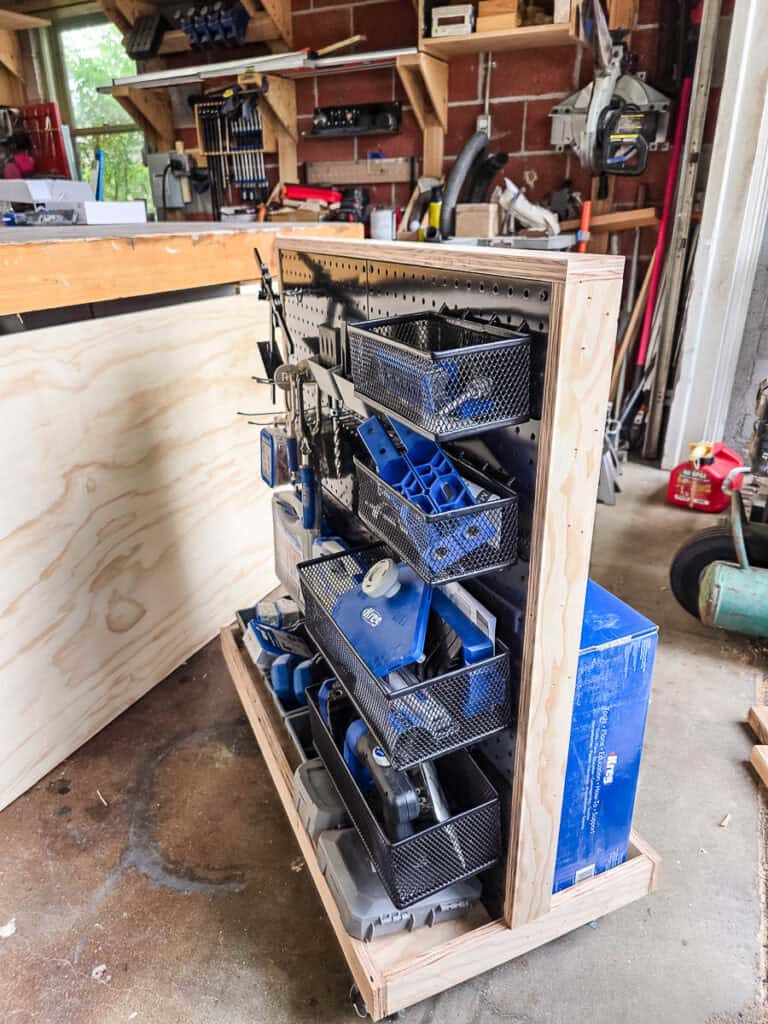
The best part is that it wheels around the garage easily so we can move it with us as we build!
If you want to build your own rolling tool cart with a pegboard? We’ve done all the hard work for you! All you need to do is hop over to Kreg’s website and check out the full tutorial.
At the bottom of the tutorial on Kreg’s website, you’ll also see a link to download the free plan to get all of the detailed measurements and a cut list!
Related – Projects that use a pocket hole jig
- Kid’s Cabin Bed
- Table Top
- Planter Box for Front Porch
- Outdoor Plant Wall
- Farmhouse Sink Cabinet
- Mudroom Lockers
- DIY Desk Calendar & Wooden Pencil Holder
- DIY Dress Up Storage for Kids
- Picture Ledge DIY
- DIY Firewood Rack with Roof
- DIY Cane Headboard
- Boho Nightstand with Cane
- DIY Behind the Couch Table with Outlet
- DIY Headphone Stand
- DIY Cookbook Stand
- Easy DIY Grill Utensil Holder
- DIY Deck Box for Outdoor Toys
- DIY Towel Rack Made With One Board
- DIY Tool Organizer for Kreg Tool Stand
- DIY Mail and Key Holder
- DIY Step Stool for Toddler
- DIY Trash Can
- DIY Spice Rack
- DIY Book Holder
- Easy DIY Magazine Shelf
- DIY Clamp Rack
- DIY Chicknic Table
- DIY Bike Rack
- Small Bookshelf
- DIY Laptop Tray